
In today’s fast-paced world, our smartphones have become an indispensable part of our lives. Whether it’s staying connected with loved ones or accessing important information, our mobile phones keep us connected. However, there are times when we unknowingly trigger certain features that can be both frustrating and disruptive. One such feature is the SOS (Emergency) mode on the iPhone.
If you’ve ever found yourself in a panic after accidentally triggering the SOS feature on your iPhone, worry not! In this article, we will walk you through the steps to stop SOS on your iPhone and prevent any accidental emergency calls. Whether you’re an iPhone newbie or have been using it for years, understanding how to disable SOS can save you from unnecessary distress and unwanted emergency calls.
Inside This Article
- Overview
- Method 1: Disable SOS on iPhone
- Method 2: Customize SOS settings on iPhone
- Method 3: Add emergency contacts to your Health app
- Method 4: Use the Emergency SOS feature on iPhone
- Conclusion
- FAQs
Overview
Are you struggling with accidentally triggering the SOS (Emergency) feature on your iPhone? Don’t worry, as we have got you covered! In this article, we will provide you with step-by-step methods to stop SOS on your iPhone, ensuring that accidental activations are a thing of the past.
The SOS feature on iPhones is designed to be a helpful tool in emergency situations, allowing you to quickly call for help or alert your emergency contacts. However, it can sometimes be triggered inadvertently, causing unnecessary panic and disruptions.
Fortunately, there are multiple ways to disable or customize the SOS settings on your iPhone to prevent accidental activations. Whether you want to completely turn off the SOS feature or fine-tune its settings, we have the solutions for you.
Additionally, we will guide you on how to add emergency contacts to your Health app, as well as how to utilize the Emergency SOS feature effectively on your iPhone. So, without further ado, let’s dive into the methods to stop SOS on your iPhone and regain peace of mind.
Method 1: Disable SOS on iPhone
SOS is a valuable feature on iPhones that allows users to quickly call for emergency assistance. However, if you find that the SOS feature is getting accidentally triggered or if you simply do not want to make use of it, you can easily disable it on your iPhone. Here’s how you can do it:
1. Open the Settings app on your iPhone.
2. Scroll down and tap on “Emergency SOS”.
3. In the Emergency SOS settings, toggle off the “Call with Side Button” option. This will prevent the SOS feature from activating when you press and hold the side or power button.
4. Additionally, you can also disable the “Auto Call” feature, which automatically calls emergency services after a certain countdown. To do this, simply toggle off the “Auto Call” option in the Emergency SOS settings.
5. Once you have made these changes, the SOS feature will be disabled on your iPhone. You can now use your device without the worry of accidental emergency calls.
It’s important to note that even with the SOS feature disabled, you can still manually make emergency calls by dialing the local emergency number directly, such as 911 in the United States.
If you ever change your mind and want to enable the SOS feature again, simply follow the same steps and toggle the relevant options back on.
Method 2: Customize SOS settings on iPhone
Customizing your SOS settings on your iPhone allows you to have more control over your emergency contacts, as well as the ability to enable or disable certain features. Here’s how you can customize your SOS settings:
1. Open the “Settings” app on your iPhone.
2. Scroll down and tap on “Emergency SOS”.
3. Here, you will see options to customize your SOS settings. One of the key settings is “Auto Call”. When this feature is enabled, your iPhone will automatically call emergency services when you press the side button five times quickly.
4. You can also add emergency contacts by tapping on “Set up SOS Contacts”. This will allow you to add specific contacts that will be notified when you use the emergency SOS feature.
5. Another important setting is “Call with Side Button”. This determines whether your iPhone will automatically call emergency services when you press and hold the side button along with either of the volume buttons.
6. Additionally, you can enable “Countdown Sound” and “Flash LED for Alerts”. The countdown sound gives you an audible alert before the emergency call is made, while the flash LED option provides a visual alert by flashing the LED light on the back of your iPhone.
7. Once you have customized your SOS settings, you can test them out by pressing the side button five times quickly. Your iPhone will initiate the emergency SOS sequence, and you can see if the settings you’ve chosen work as intended.
By customizing your SOS settings, you can ensure that your iPhone’s emergency features are tailored to your specific needs and preferences. It’s important to review and update these settings periodically to make sure they align with your current emergency contact information and desired functionality.
Method 3: Add emergency contacts to your Health app
If you want to be prepared for any emergency situation while using your iPhone, adding emergency contacts to your Health app is a crucial step. By doing so, you ensure that important information about your emergency contacts is readily accessible on your device, even when it’s locked.
The Health app on your iPhone allows you to store important medical information, including emergency contacts, in the Medical ID section. This feature not only provides peace of mind but also enables first responders and medical professionals to quickly access your emergency contacts in case of an emergency.
To add emergency contacts to your Health app, follow these simple steps:
- Open the Health app on your iPhone. It can usually be found on your home screen.
- Tap on the “Medical ID” tab at the bottom-right corner of the screen.
- Select “Edit” at the top-right corner of the screen.
- Scroll down to the “Emergency Contacts” section and tap on the green “+” button.
- You can now add contacts from your existing contacts list by selecting them. Alternatively, you can choose to create a new contact by tapping on “Create New Contact.”
- Once you have added your emergency contacts, you can designate their relationship to you, such as “Spouse,” “Parent,” or “Friend.”
- Tap “Done” when you have finished adding and organizing your emergency contacts.
Once you have successfully added your emergency contacts to the Health app, they can be accessed by anyone who needs to help you in an emergency situation. When your iPhone is locked, first responders and medical professionals can view your emergency contacts by following these steps:
- Press the “Home” button or the “Side” button, depending on your iPhone model, to wake up the device.
- On the lock screen, locate and tap on the “Emergency” button. This button is usually located in the bottom-left corner of the screen.
- Next, tap on the “Medical ID” option.
- Your emergency contacts will now be displayed, along with any other vital medical information you have added to the Health app.
Remember, it’s important to keep your emergency contact information up to date in the Health app. Regularly review and update the contacts and their relationship to ensure that the right people can be contacted in case of an emergency.
By taking a few minutes to add emergency contacts to your Health app, you can be well-prepared and ensure that you and your loved ones have the necessary support in any emergency situation.
Method 4: Use the Emergency SOS feature on iPhone
The Emergency SOS feature on iPhone is a powerful tool that allows you to quickly call for help in emergency situations. Whether you find yourself in a dangerous situation or witness an accident, knowing how to use the Emergency SOS feature can potentially save lives. Here’s how you can use it:
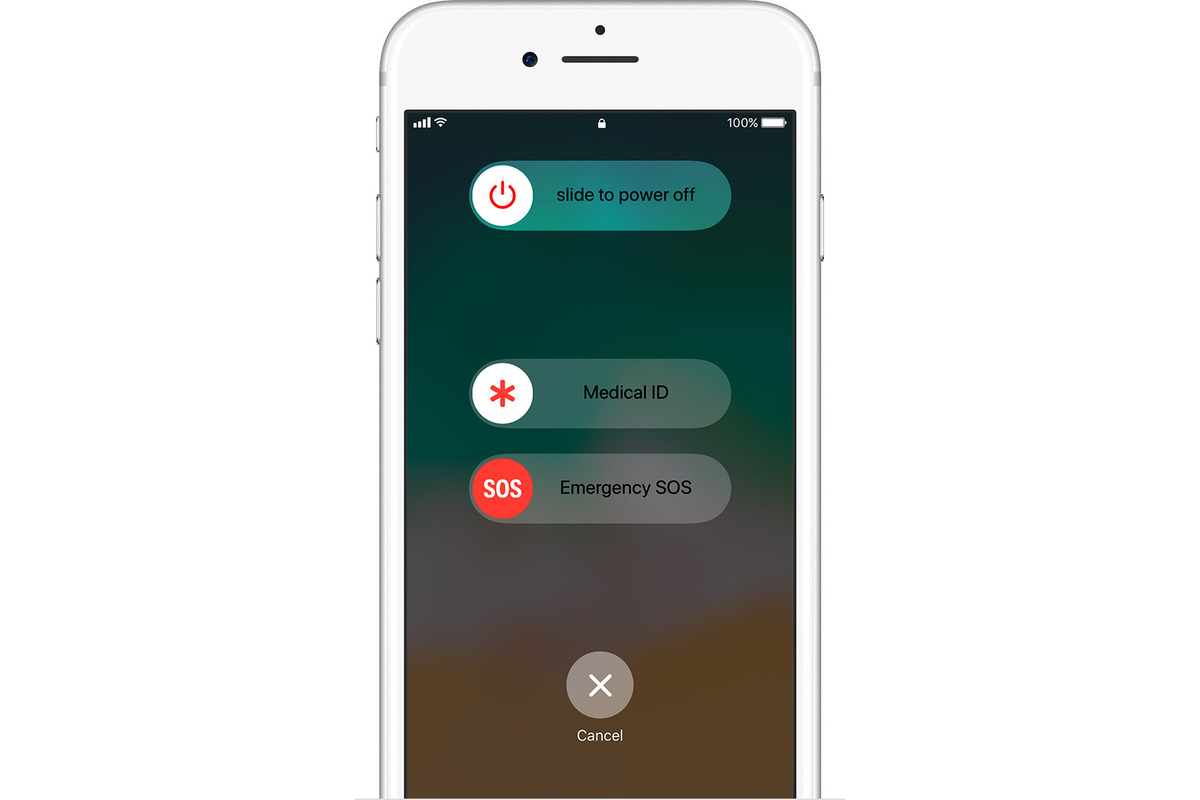
1. To activate the Emergency SOS feature, press and hold the side button and either volume button on the iPhone.
2. When the Emergency SOS slider appears, slide it to the right to call emergency services immediately. Your iPhone will also automatically send a message to your emergency contacts, if you have set them up.
3. Alternatively, if you’re in a situation where you can’t reach your iPhone, you can activate Emergency SOS by pressing the side button five times in quick succession. This will automatically initiate the emergency call and send a message to your emergency contacts.
4. To add emergency contacts, open the Health app on your iPhone. Go to your profile picture in the top right corner, then select ‘Medical ID.’ From there, tap on ‘Edit’ in the top right corner and scroll down to the ‘Emergency Contacts’ section. Tap the ‘+’ button to add contacts.
5. It’s important to note that the Emergency SOS feature may vary slightly depending on your iPhone model and iOS version. Make sure to familiarize yourself with the specific steps for your device to ensure you can access help quickly when needed.
Using the Emergency SOS feature on your iPhone can provide peace of mind knowing that help is just a few taps away. It’s a simple yet powerful tool that can make a difference in emergency situations. Remember to test this feature beforehand, so you are familiar with the process and can use it confidently when the need arises.
Conclusion
In conclusion, knowing how to stop SOS on your iPhone is crucial for preventing accidental emergency calls and unnecessary stress. By following the steps mentioned in this article, you can easily disable the SOS feature or make changes to its settings according to your preferences.
Remember, it’s important to familiarize yourself with the SOS functionality on your iPhone to ensure you can use it effectively in case of a genuine emergency. However, if you find yourself frequently triggering SOS unintentionally, it’s best to disable the feature or adjust the settings to prevent any unnecessary disruptions.
With these simple steps and precautions, you can have peace of mind while using your iPhone, knowing that accidental emergency calls will be a thing of the past. Stay connected, stay safe, and enjoy your iPhone experience!
FAQs
1. What is SOS on iPhone and how does it work?
The SOS feature on iPhone is designed to provide quick access to emergency services in case of an emergency. When activated, it allows users to quickly call for help by pressing the power button five times rapidly. It also automatically shares the user’s location with the emergency contacts they have set up on their device.
2. How do I stop SOS on my iPhone?
To stop the SOS feature on your iPhone, you can simply press the power button again or swipe the “Emergency SOS” slider that appears on the screen after initiating the SOS call. This will cancel the call to emergency services and prevent any accidental triggering of the SOS feature.
3. Can I disable the SOS feature on my iPhone completely?
While you cannot completely disable the SOS feature on your iPhone, you can prevent accidental triggering of the feature by turning off the “Auto Call” option. To do this, go to Settings, then Emergency SOS, and toggle off the “Auto Call” switch. This way, you will still be able to use the SOS feature manually, but it will not automatically call emergency services when the power button is pressed rapidly.
4. What happens when I activate SOS on my iPhone accidentally?
If you accidentally activate the SOS feature on your iPhone, you can cancel the call by pressing the power button again or swiping the “Emergency SOS” slider on the screen. Once the call is canceled, you can rest assured that emergency services will not be notified. However, it’s always a good idea to inform the relevant emergency contacts about the accidental activation, just to be safe.
5. Can I customize the emergency contacts that show up on the SOS feature?
Yes, you can customize the emergency contacts that appear on the SOS feature of your iPhone. To do this, go to the Health app, tap your profile picture in the top-right corner, then tap on Medical ID. From there, choose Edit, scroll down to the Emergency Contacts section, and add or remove contacts as needed. Remember to save the changes when you’re done.