
In today’s digital age, more and more people are exploring their creative side using various software and tools. One of the popular art apps is Procreate, known for its powerful features and user-friendly interface. Among its many functionalities, Procreate offers the ability to apply blurring effects to images, giving artists and designers the flexibility to create stunning visual effects. Whether you’re a beginner or a seasoned Procreate user, learning how to blur in Procreate opens up a whole new world of creative possibilities. In this article, we will dive into the techniques and steps to achieve beautiful blurring effects in Procreate. So, if you’re ready to take your digital artwork to the next level, grab your iPad, open Procreate, and let’s get started!
Inside This Article
- What is Procreate?
- Understanding the Blur Tool in Procreate
- Steps to Blur in Procreate
- Adjusting the Blur Strength
- Applying Blur to Specific Areas
- Using the Gaussian Blur Technique
- Creating Depth of Field Effect
- Conclusion
- FAQs
What is Procreate?
Procreate is a powerful digital art and illustration app for iPads. It is known for its versatility, user-friendly interface, and extensive range of artistic tools. With Procreate, artists, designers, and hobbyists can create stunning digital artworks using a wide range of brushes, colors, layers, and effects.
Procreate offers a seamless and intuitive drawing experience, allowing users to draw directly on the iPad’s screen with their fingers or a stylus. It supports various pressure-sensitive styluses, making it feel like you’re working with traditional art materials.
One of the standout features of Procreate is its vast library of brushes. It offers an extensive collection of customizable brushes, including pencils, inks, markers, and more. Users can adjust the brush settings to achieve their desired textures, effects, and strokes.
In addition to brushes, Procreate provides a comprehensive set of editing tools like layers, masks, blend modes, and transformation tools. These tools give users complete control over their artwork, allowing them to experiment, refine, and enhance their creations.
Procreate also supports exporting artwork in various formats like JPEG, PNG, Photoshop, and even video. This enables artists to easily share or print their digital masterpieces on different platforms or mediums.
Furthermore, Procreate has a vibrant and active online community where artists can seek inspiration, share their work, and participate in challenges and competitions. This community aspect adds a collaborative and motivating element to the Procreate experience.
Understanding the Blur Tool in Procreate
Procreate is a powerful digital art and design app that is widely used by artists, designers, and illustrators. One of its many useful features is the Blur Tool, which allows users to create a soft, out-of-focus effect on their artwork. Understanding how to use the Blur Tool effectively can greatly enhance your digital art and give it a professional look.
The Blur Tool in Procreate works by simulating the effect of blurring or softening specific areas of an image. This can be done to create depth, add dimension, or to focus attention on a particular subject. By selectively applying blur, you can create stunning visual effects and manipulate the viewer’s perception of the image.
When using the Blur Tool in Procreate, it’s important to understand the different options available to you. Procreate offers various types of blurs, including Gaussian Blur, Motion Blur, and Radial Blur. Each type of blur creates a distinct effect and can be adjusted to suit your specific needs.
The strength of the blur can be adjusted using the slider provided. This allows you to control the intensity of the blur effect, from subtle to more pronounced. Experimenting with different levels of blur can help you achieve the desired result and bring your artwork to life.
In addition to adjusting the blur strength, Procreate also provides the option to apply blur to specific areas or layers. This allows for precise control over which parts of the image are blurred, giving you greater flexibility and creative freedom.
One technique that is commonly used in digital art is the Gaussian Blur. This technique creates a smooth, soft-focus effect by blurring the entire image or a selected portion of it. The Gaussian Blur is especially effective for creating depth of field, where objects in the foreground are sharp and in focus, while the background is blurred.
Creating a depth of field effect in Procreate can greatly enhance the realism of your artwork. By selectively blurring the background and keeping the foreground sharp, you can create a sense of depth and draw the viewer’s attention to the main subject of your image.
Steps to Blur in Procreate
Procreate is a powerful digital art and design app that offers a variety of tools to enhance your creative process. One of the essential tools in Procreate is the Blur Tool, which lets you add depth and atmosphere to your artwork by softening or blurring specific areas. If you’re looking to add a blurred effect to your artwork in Procreate, follow these simple steps:
Step 1: Open your artwork
Launch Procreate and open the artwork you want to blur. You can either create a new canvas or import an existing image or drawing.
Step 2: Select the Blur Tool
In the toolbar on the left side of the screen, locate and select the Blur Tool. It looks like a drop of water. Once selected, a new panel will appear with various blur options.
Step 3: Adjust the blur strength
Use the slider in the blur panel to adjust the strength of the blur effect. Moving it to the left will create a subtle blur, while moving it to the right will increase the intensity of the blur.
Step 4: Apply the blur effect
With the desired blur strength selected, start applying the blur effect to the areas you want to soften. Simply brush over the specific areas using your Apple Pencil or your finger if you’re using Procreate on an iPad with touch capability.
Step 5: Refine the blur effect
To further refine the blur effect, you can use the Smudge Tool or the Eraser Tool. The Smudge Tool allows you to blend the blurred areas seamlessly with the rest of your artwork, while the Eraser Tool lets you remove the blur effect from specific areas if needed.
Step 6: Save and export your artwork
Once you’re satisfied with the blur effect, make sure to save your artwork. Procreate automatically saves your progress, but it’s always good to manually save your work as well. You can export your artwork in various formats, such as PNG or JPEG, depending on your needs.
By following these simple steps, you can easily add a blurred effect to your artwork in Procreate and enhance the overall look and feel of your digital creations.
Remember, practice makes perfect, so don’t be afraid to experiment with different blur settings and techniques to achieve the desired effect!
Adjusting the Blur Strength
One of the great features of the Procreate app is the ability to adjust the strength of the blur effect. This allows you to have control over the amount of blurring applied to your artwork, giving you the flexibility to achieve the desired level of softness or focus.
To adjust the blur strength in Procreate, follow these simple steps:
Step 1: Open your artwork or image in Procreate.
Step 2: Select the layer or area that you want to apply the blur effect to. If you want to apply the blur effect to the entire image, make sure you have the correct layer selected.
Step 3: Tap on the ‘Adjustments’ icon located at the top of the Procreate interface. It looks like a magic wand.
Step 4: Scroll down and tap on the ‘Blur’ option.
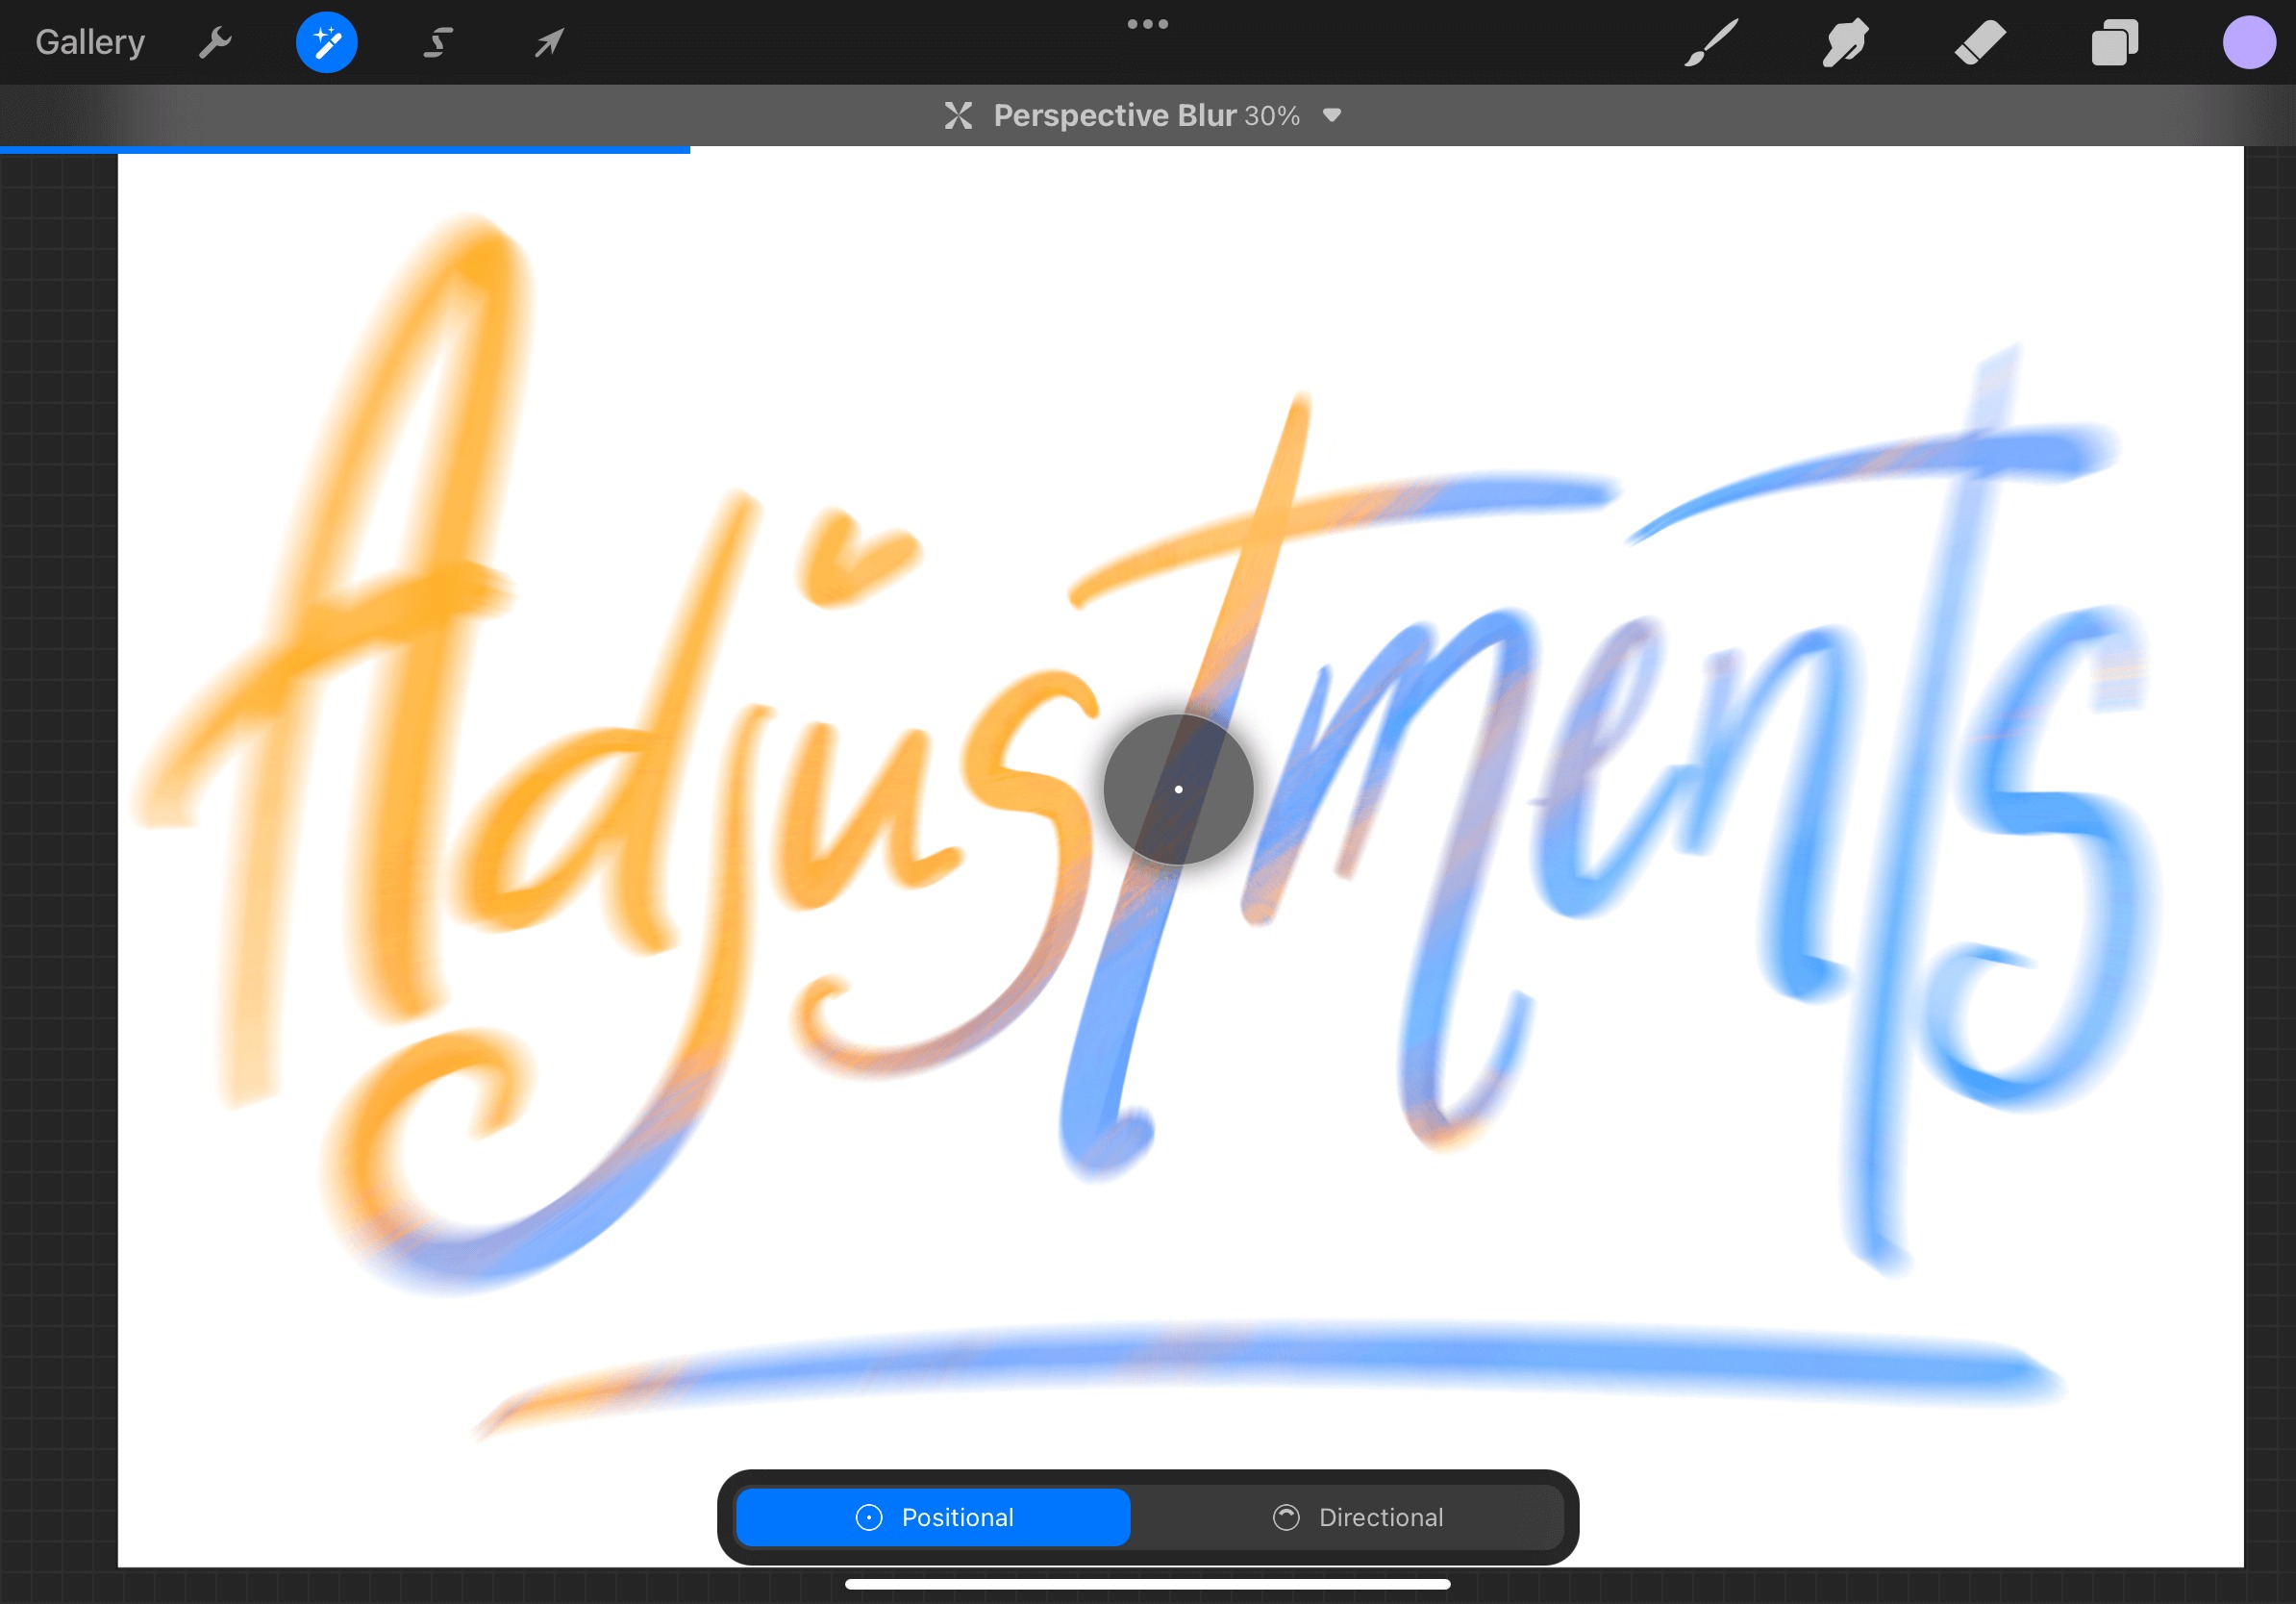
Step 5: Now, you’ll see a slider labeled ‘Blur Strength’. Drag the slider left or right to decrease or increase the blur strength, respectively.
Step 6: As you adjust the blur strength, you’ll immediately see the changes reflected in your artwork. This real-time preview allows you to fine-tune the blur effect to your liking.
Step 7: Continue adjusting the blur strength until you achieve the desired level of blurriness.
With the ability to adjust the blur strength in Procreate, you can create stunning effects such as a shallow depth of field or a dreamy atmosphere. Experiment with different blur strengths and see how it enhances your artwork.
Remember, the blur effect in Procreate is non-destructive, so you can always go back and readjust the blur strength or even remove the effect altogether if needed.
Now that you know how to adjust the blur strength in Procreate, let your creativity flow and take your artwork to the next level!
Applying Blur to Specific Areas
If you want to selectively blur specific areas in your Procreate artwork, you’re in luck! Procreate offers an easy and precise way to apply blur effects to specific areas of your canvas. This allows you to create focal points or emphasize certain elements in your composition.
To apply blur to specific areas in Procreate, follow these steps:
- Select the layer that contains the area you want to blur. You can do this by tapping on the layer in the Layers panel on the right side of the screen.
- Tap on the “Adjustments” icon located at the top of the screen. It looks like a magic wand.
- In the Adjustments panel that appears, tap on the “Gaussian Blur” option.
- Adjust the blur strength by sliding your finger across the screen or using the slider at the bottom of the Adjustments panel. This will determine the intensity of the blur effect.
- With your finger or stylus, paint over the specific areas you want to blur on the canvas. You can use a larger brush size for broader areas or a smaller brush size for more precise details.
- As you paint, you’ll notice that the selected areas become blurred in real-time. If you make a mistake or want to erase part of the blur effect, switch the brush mode to Erase and paint over the areas you want to remove the blur from.
- Once you’re satisfied with the blur effect, tap on the “Done” button in the Adjustments panel to apply the changes to the selected layer.
It’s important to note that applying blur to specific areas in Procreate is non-destructive, meaning you can always adjust or remove the blur effect later. Simply select the layer containing the blur effect and access the Adjustments panel to make any necessary changes.
With the ability to apply blur to specific areas, you have the power to enhance the depth and focus of your artwork in Procreate. Whether you want to create a shallow depth of field or draw attention to a particular subject, the blur tool in Procreate allows you to achieve stunning and professional-looking results.
Using the Gaussian Blur Technique
The Gaussian Blur technique is a powerful tool in Procreate that allows you to create a soft and dreamy effect in your artwork. Whether you want to add a subtle blur to create a sense of depth, or you want to create a dreamy, out-of-focus background, the Gaussian Blur technique can help you achieve that desired effect.
To use the Gaussian Blur technique in Procreate, follow these simple steps:
- Select the layer or area that you want to apply the blur to. You can do this by tapping on the layer to make it active or using the selection tool to draw around the specific area.
- Once you have selected the desired layer or area, go to the ‘Adjustments’ panel and tap on the ‘Blur’ option.
- In the blur options, you will see a slider that allows you to adjust the strength of the blur. Move the slider to the right to increase the blur and to the left to decrease it.
- Take a moment to preview the effect by zooming in or out on your artwork. This will give you a better understanding of how the blur is affecting the selected area.
- If you are not satisfied with the results, you can always adjust the blur strength by going back to the ‘Blur’ options and fine-tuning the slider until you achieve the desired effect.
One of the great things about the Gaussian Blur technique is that it allows you to create realistic depth of field effects. With this technique, you can make certain areas of your artwork appear sharp and in focus while blurring out the surrounding background. This is particularly useful when you want to draw attention to a specific subject or give a three-dimensional feel to your artwork.
Experimenting with different blur strengths and applying the Gaussian Blur technique to specific areas can open up a whole new creative world in Procreate. Whether you are working on digital illustrations, concept art, or photo editing, the Gaussian Blur technique can help you add a sense of depth and realism to your artwork.
So, don’t be afraid to play around with the blur tool in Procreate and explore the creative possibilities it offers. Try using the Gaussian Blur technique to add a touch of softness and dreaminess to your artwork, and watch your creations come to life in a whole new way.
Creating Depth of Field Effect
One of the most effective ways to add depth and visual interest to your artwork in Procreate is by creating a depth of field effect. This technique is commonly used in photography and cinematography to highlight a specific subject by blurring the background or foreground. With Procreate’s advanced tools and features, you can easily achieve this effect and make your artwork stand out.
To start creating a depth of field effect in Procreate, follow these simple steps:
- Choose a brush that has a soft edge and low opacity. This will help create a gradual and natural-looking blur.
- Select the layer that you want to apply the depth of field effect to. It can be the background, foreground, or any other element you want to emphasize.
- Begin by lightly brushing over the areas you want to blur. Start with a small brush size and increase it gradually as you move away from the main subject.
- Use light strokes and build up the intensity gradually to create a smooth transition between the sharp and blurred areas.
- Experiment with different brush sizes, opacities, and blending modes to achieve the desired depth of field effect.
Remember that the depth of field effect is not limited to blurring the background. You can also apply it to the foreground or even specific objects within your artwork. This technique adds realism and draws the viewer’s attention to the main subject, giving your artwork a professional and polished look.
Additionally, combining the depth of field effect with other techniques in Procreate, such as layer blending modes and adjustment layers, can further enhance the overall impact of your artwork.
So, don’t be afraid to experiment and play around with different settings and brushes in Procreate to create stunning depth of field effects that will make your artwork truly remarkable.
Conclusion
The ability to blur in Procreate is a powerful tool that can enhance your digital artwork and give it a professional finish. Whether you’re looking to create depth, soften edges, or add visual interest, the blurring feature in Procreate offers a variety of options to achieve the desired effect.
By mastering the different types of blurs and experimenting with their settings, you can elevate your artwork to the next level. Whether you’re a beginner or an experienced artist, Procreate’s intuitive interface and extensive range of tools make it a valuable asset in your digital art toolkit.
Remember to consider your artistic vision and the specific requirements of your artwork when choosing which blur option to use. Take the time to assess the impact each blur has on your composition and make adjustments accordingly.
So dive into Procreate, unleash your creativity, and make use of the powerful blur tools to take your artwork to new heights.
FAQs
1. Can I blur images in Procreate?
Yes, absolutely! Procreate is a powerful digital art app that includes a variety of tools, including a blur tool. With Procreate, you can easily apply a blur effect to your images to create depth, emphasize certain elements, or add a dreamy atmosphere. The blur tool in Procreate allows you to adjust the strength and size of the blur, giving you full control over the desired look.
2. How do I blur in Procreate?
To blur an image in Procreate, follow these simple steps:
- Open your image in Procreate
- Select the brush tool from the toolbar
- Choose the blur brush from the brush library
- Adjust the brush size and opacity according to your preference
- Start brushing over the areas you want to blur
- Use the undo button if you need to make any changes
- Continue refining the blur effect until you achieve the desired result
- Save your artwork
3. Can I control the intensity of the blur in Procreate?
Yes, you have full control over the intensity of the blur in Procreate. After selecting the blur tool, you can adjust its strength and size using the sliders that appear at the bottom of the screen. By increasing the strength, you’ll create a more pronounced blur, while decreasing it will result in a softer effect. You can experiment with different settings to find the perfect balance for your image.
4. Can I selectively blur certain parts of an image in Procreate?
Absolutely! Procreate allows you to selectively apply the blur effect to specific parts of an image. To do so, simply use the blur brush to paint over the areas you want to blur. This gives you the flexibility to focus on certain elements, such as the background, while keeping other parts sharp. You can also use different brush sizes and opacity levels to achieve more intricate and precise results.
5. Can I animate the blur effect in Procreate?
No, Procreate does not have built-in animation capabilities. While you can apply the blur effect to individual frames, Procreate itself does not provide the functionality to create motion or animated effects. However, you can export your artwork from Procreate and import it into other animation software to add animated effects, including a blur effect, to your artwork.