
Welcome to our comprehensive guide on how to fill color in Procreate! If you’re an artist or digital creator, you’ve likely heard of Procreate – a powerful and widely-used software for creating digital artwork on iPads. One of the fundamental skills every digital artist should possess is the ability to effectively fill color in their artwork. Whether you’re a beginner looking to learn the basics or an experienced artist wanting to refine your coloring technique, this article will walk you through the process step-by-step. We’ll explore various tools, techniques, and tips to help you achieve vibrant and visually appealing colors in your Procreate artwork. So, let’s dive in and discover the wonderful world of coloring in Procreate!
Inside This Article
- Getting Started with Procreate
- Understanding the Color Tools in Procreate
- Applying Color to Your Artwork in Procreate
- Advanced Color Techniques in Procreate
- Conclusion
- FAQs
Getting Started with Procreate
Procreate is a powerful digital art application that has gained immense popularity among artists and designers. Whether you are an aspiring artist or a seasoned professional, Procreate offers a wide range of tools and features to bring your creative visions to life. Here, we will guide you through the essential steps to get started with Procreate and unleash your artistic potential.
The first step to getting started with Procreate is to download and install the application on your device. Currently, Procreate is only available for iOS devices, so make sure you have an iPhone or iPad running the latest iOS version. Simply visit the App Store and search for Procreate. Once you find it, tap on the “Get” or “Install” button to download and install the application.
Once Procreate is installed, you can launch the app and start exploring its features. The user interface of Procreate is intuitive and user-friendly, making it easy to navigate. You will find various tools and settings on the screen, such as brushes, layers, and color palettes.
To start a new artwork, tap on the “+” icon located at the top right corner of the screen. This will create a new canvas where you can begin your artistic journey. Procreate offers a wide range of canvas sizes and resolutions to suit your needs, whether you are creating a small sketch or a large-scale illustration.
Now that you have created a canvas, it’s time to familiarize yourself with Procreate’s brushes. Procreate offers a vast library of pre-installed brushes, each with its unique characteristics and effects. To access the brush menu, tap on the brush icon located on the top toolbar. From there, you can select a brush and adjust its size, opacity, and other settings to customize your strokes.
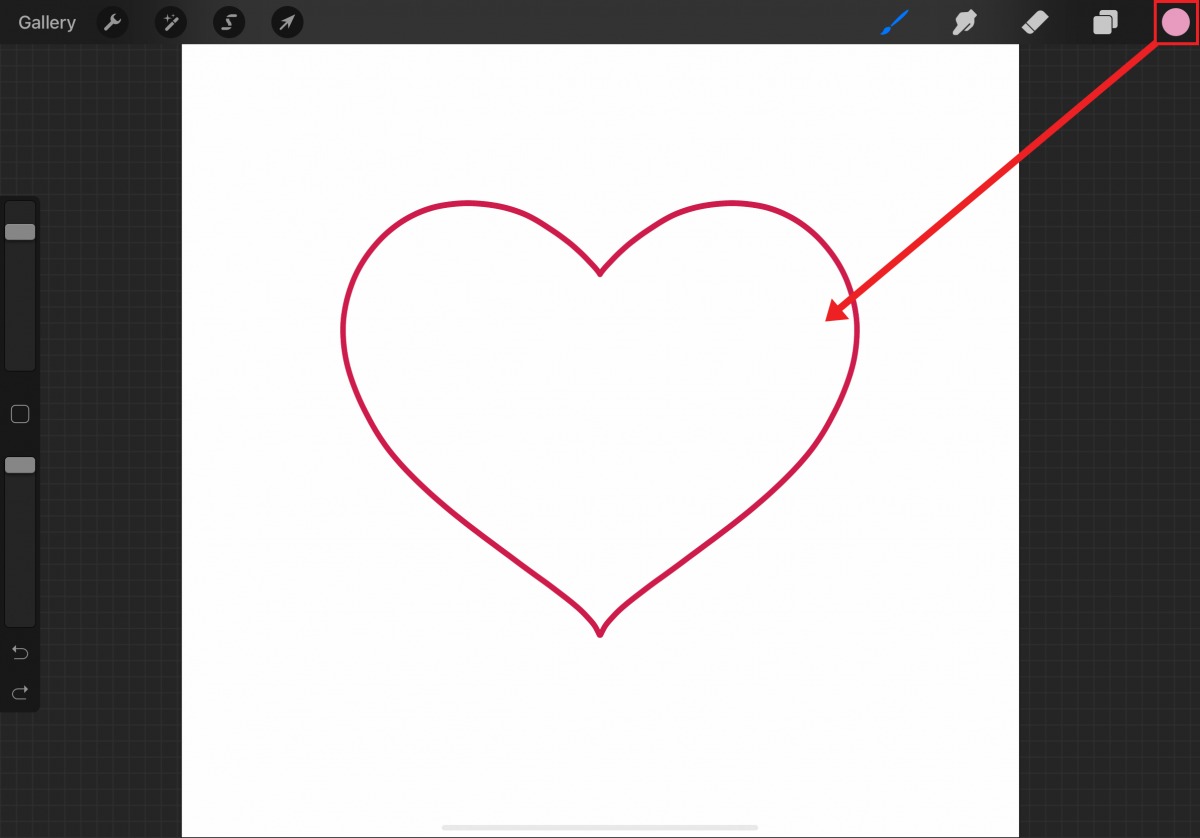
One of the standout features of Procreate is its powerful color tools. To access the color palette, tap on the color circle icon located on the top toolbar. Here, you can choose from a wide range of colors, create custom color palettes, and apply gradients to your artwork. Experimenting with different color combinations can add depth and vibrancy to your creations.
As you work on your artwork, Procreate allows you to work with multiple layers. Layers act as transparent sheets that you can stack on top of each other, allowing you to make changes without affecting the rest of your artwork. To access the layer menu, tap on the layer icon located on the top toolbar. From there, you can add, delete, and rearrange layers as needed.
Procreate also offers a range of advanced features, such as blending modes, transform tools, and selection tools. These features allow you to refine your artwork and add intricate details. Exploring these advanced features can take your artwork to the next level and showcase your artistic abilities.
With these basic steps, you are now ready to dive into the world of Procreate and create stunning digital artwork. Remember, practice makes perfect, so don’t be afraid to experiment, try new techniques, and let your creativity flow. The possibilities with Procreate are endless, and the only limit is your imagination.
Understanding the Color Tools in Procreate
Procreate is a powerful digital art app that offers a wide range of tools and features to help artists bring their creations to life. One of the fundamental aspects of creating stunning artwork is understanding how to use color effectively. In Procreate, there are several color tools that allow you to explore and experiment with different hues, shades, and tones. Let’s delve into some of these color tools and understand how they can enhance your digital artwork.
1. Color Picker:
The Color Picker tool is a fundamental tool in Procreate that allows you to select colors from your artwork or the color wheel. By tapping on the Color Picker icon, you can sample colors by tapping anywhere on your canvas. This tool is particularly useful when you want to match colors or create harmonious color palettes.
2. Color Swatches:
Procreate provides a variety of pre-selected color swatches that serve as a starting point for your artwork. These swatches can be accessed by tapping on the color wheel icon, and they offer a wide range of colors in different tones and intensities. Additionally, you can create your own custom color swatches to save and reuse for future projects.
3. Color Harmony:
The Color Harmony feature in Procreate allows you to create color palettes based on specific color harmonies, such as complementary, triadic, or analogous. By selecting a base color, Procreate automatically generates a harmonious palette for you to work with. This tool is fantastic for creating cohesive and visually appealing artwork.
4. Gradient Tool:
The Gradient tool in Procreate enables you to apply smooth color transitions to your artwork. You can choose from various types of gradients, such as linear, radial, or elliptical, and customize the colors and direction of the gradient. This tool adds depth and dimension to your artwork by seamlessly blending different colors.
5. Blend Modes:
Procreate offers a range of blend modes that allow you to experiment with how colors interact with each other. By changing the blend mode of a layer, you can create unique visual effects and enhance the overall look and feel of your artwork. Some popular blend modes include Overlay, Multiply, Screen, and Soft Light.
6. Color Dynamics:
The Color Dynamics feature in Procreate lets you add variation and movement to your colors. You can adjust settings like hue, saturation, brightness, and opacity to create dynamic and vibrant color effects. This tool is excellent for creating eye-catching illustrations and adding depth to your artwork.
Understanding the color tools in Procreate is essential for unleashing your creativity and creating visually stunning artwork. Whether you’re a beginner or an experienced artist, exploring and mastering these color tools will undoubtedly elevate your digital artwork to new heights. So, dive in, experiment, and let your imagination run wild!
Applying Color to Your Artwork in Procreate
Once you’ve created a stunning outline for your artwork in Procreate, it’s time to bring it to life by applying color. Whether you’re a beginner or a seasoned artist, Procreate offers a variety of tools and features to make the color application process both intuitive and enjoyable. In this guide, we will explore the different methods you can use to add color to your artwork in Procreate.
1. Using the Color Picker:
One of the simplest ways to apply color in Procreate is by using the color picker tool. With this tool, you can choose any color from the color wheel or select a specific hue from an existing artwork. Simply tap on the color picker icon, located at the top right of the screen, and then tap on your desired color. Once selected, you can start painting or filling areas with the chosen color by using the brush or fill tool.
2. Creating Custom Color Palettes:
Procreate allows you to create custom color palettes, making it easier to access and use your favorite colors. To create a custom palette, tap on the color swatch icon located at the top right of the screen. From there, you can either select from a range of pre-made palettes or create your own by tapping the “+” button. Once you’ve created your custom palette, you can easily switch between colors by tapping on the desired swatch. This feature is particularly useful if you’re working on multiple projects or want to maintain a consistent color scheme within your artwork.
3. Using the Gradient Tool:
If you’re looking to add depth and dimension to your artwork, the gradient tool in Procreate is your go-to option. This tool allows you to create smooth color transitions by blending multiple colors together. To access the gradient tool, tap on the icon located on the toolbar. From there, you can select a pre-made gradient or create your own by selecting the colors and adjusting the gradient settings. Once you’ve chosen your gradient, simply drag your finger or stylus across the canvas to apply it. You can customize the length, angle, and opacity of the gradient to achieve the desired effect.
4. Using Layer Modes:
Layer modes are a powerful feature in Procreate that allow you to blend colors and create unique effects. By adjusting the layer mode of a specific layer, you can change how it interacts with the layers beneath it. For example, you can use the Multiply mode to create shadows or the Overlay mode to add highlights. To access layer modes, tap on the layer you want to modify and then tap on the “N” icon located on the top right of the screen. Experimenting with different layer modes can lead to exciting and unexpected color combinations.
5. Using Alpha Lock and Clipping Masks:
If you want to selectively add color to specific areas of your artwork, Procreate offers two powerful techniques: alpha lock and clipping masks. Alpha lock allows you to paint within the boundaries of a specific layer without affecting the areas outside of it. To enable alpha lock, simply swipe right on the layer and tap “Alpha Lock.” On the other hand, clipping masks allow you to apply color to specific layers based on the shape of another layer. To create a clipping mask, tap on the layer you want to clip and select “Create Clipping Mask.” This technique is particularly useful for adding intricate details or highlights to your artwork.
With these various methods at your disposal, you can bring your artwork to life with vibrant and captivating colors in Procreate. Play around with different techniques, experiment with color combinations, and let your creativity soar. Remember, the possibilities are endless, and the more you practice, the better you’ll become at applying color to your artwork in Procreate.
Advanced Color Techniques in Procreate
Procreate is a powerful digital art app that allows artists to create stunning illustrations and paintings on their iPads. In addition to its wide range of brush tools and creative features, Procreate also offers advanced color techniques that can elevate your artwork to the next level. In this guide, we will explore some of these techniques and how you can use them to add depth, atmosphere, and life to your digital masterpieces.
1. Custom Color Palettes: One of the great things about Procreate is the ability to create and save custom color palettes. Instead of relying solely on the default color options, you can experiment with different combinations and save your favorite colors for future use. This allows you to develop a unique color scheme that reflects your artistic style and enhances the overall mood of your artwork.
2. Color Harmony: Achieving color harmony in your artwork is essential for creating a visually appealing piece. Procreate offers several tools to help you achieve this. The Color Harmony feature allows you to explore different color combinations and create harmonious palettes based on complementary, analogous, or triadic color schemes. This feature enables you to easily experiment with colors and find the perfect balance for your artwork.
3. Gradient Maps: Adding gradient maps to your artwork can create stunning visual effects and enhance the overall mood. Procreate allows you to easily apply gradient maps to your layers, giving you complete control over the color transitions in your artwork. Experimenting with different gradients can add depth, dimension, and a touch of magic to your illustrations.
4. Blend Modes: Procreate offers a variety of blend modes that allow you to blend colors and textures seamlessly. By combining different blend modes with various brush techniques, you can create unique and eye-catching color effects. Whether you want to create a soft and dreamy look or add vibrant colors to your artwork, the blend modes in Procreate give you the flexibility to achieve your desired results.
5. Color Adjustments: Procreate features powerful color adjustment tools that allow you to fine-tune the colors in your artwork. From adjusting brightness and contrast to tweaking hue and saturation, these tools give you the ability to make precise color changes and corrections. This can be particularly useful when you want to add vibrancy, balance, or make subtle color enhancements to your artwork.
6. Layer Opacity and Blending: Another advanced color technique in Procreate involves utilizing layer opacity and blending modes. By adjusting the opacity of individual layers and experimenting with different blending modes, you can create interesting color overlays and effects. This technique allows you to play with transparency, light, and shadow, giving your artwork depth and visual interest.
7. Color Dynamics: Procreate’s Color Dynamics feature enables you to add dynamic and textured brush strokes to your artwork. By adjusting the color dynamics settings, you can create brushes that automatically vary in color as you paint, resulting in more organic and natural-looking strokes. This technique is ideal for adding depth and texture to your illustrations, and it allows you to experiment with different color variations in a single brush stroke.
By mastering these advanced color techniques in Procreate, you can take your digital artwork to new heights. Whether you want to create realistic paintings, vibrant illustrations, or atmospheric designs, Procreate provides the tools and features to bring your creative vision to life. So, don’t be afraid to experiment, push your artistic boundaries, and explore the realm of color in Procreate.
Conclusion
Filling color in Procreate can be a rewarding experience that allows artists and hobbyists to bring their digital creations to life. Whether you’re working on illustrations, sketches, or paintings, Procreate offers powerful and intuitive tools to help you achieve the desired results.
By following the steps outlined in this guide, you can confidently navigate through the color selection process and apply color to your artwork with ease. Experimenting with different brushes, blending modes, and layering techniques can further enhance your creations and add depth and dimension.
Remember, practice makes perfect, so don’t be afraid to experiment, make mistakes, and learn from them. The more you use Procreate to fill color, the better you’ll become at understanding color theory, shading, and highlighting, resulting in stunning and impactful artwork.
So go ahead, unleash your creativity, and let Procreate be your digital canvas for vibrant and captivating color-filled masterpieces!
FAQs
1. Can you fill color in Procreate?
Yes, Procreate is a powerful digital art and illustration app that allows you to easily fill color in your artwork. With a variety of painting tools and brushes, you can easily select colors and apply them to your drawings.
2. How do I fill color in Procreate?
To fill color in Procreate, follow these steps:
- Select the layer you want to color.
- Choose a color from the color picker.
- Select the paintbrush tool or any other suitable painting tool.
- Tap on the area you want to fill with color and it will automatically fill it with the selected color.
3. Is there a fill tool in Procreate?
Yes, Procreate offers a fill tool that allows you to quickly fill areas with solid colors. The fill tool can be accessed through the toolbar and is represented by a paint bucket icon. Simply select the fill tool, choose a color, and tap on the area you want to fill.
4. Can I adjust the opacity of the filled color in Procreate?
Yes, you can adjust the opacity of the filled color in Procreate. After filling an area with color, you can go to the layers panel, select the layer with the filled color, and adjust the opacity slider to your desired level. This allows you to create subtle shading or transparent effects within your artwork.
5. Are there any advanced features for filling color in Procreate?
Absolutely! Procreate provides advanced features for filling color such as blending modes, layer masks, and selection tools. These tools allow you to create complex color effects, gradients, and precise color selections within your artwork. With Procreate, you have complete control over the color filling process.