
When it comes to managing your inbox, efficiency is key. Whether you’re dealing with a flood of emails or simply trying to organize your messages, being able to move, delete, or mark multiple emails at once can save you a significant amount of time and effort. Fortunately, if you’re an iPhone user, mastering this task is easy. In this article, we will guide you through the process of moving, deleting, and marking multiple emails at a time on your iPhone, empowering you to take control of your inbox and streamline your email management. Whether you’re a busy professional or an avid email user, these tips and tricks will allow you to efficiently manage your emails with just a few taps on your iPhone.
Inside This Article
- Moving Multiple Emails at a Time on the iPhone
- Deleting Multiple Emails at a Time on the iPhone
- Marking Multiple Emails as Read/Unread on the iPhone
- Tips for Managing Multiple Emails on the iPhone
- Conclusion
- FAQs
Moving Multiple Emails at a Time on the iPhone
Managing emails on your iPhone can be a time-consuming task, especially when you have a cluttered inbox. Luckily, Apple has made it easy to move multiple emails at once, allowing you to quickly organize your messages with just a few taps.
To move multiple emails on your iPhone, follow these simple steps:
- Open the Mail app on your iPhone.
- Navigate to your inbox or the folder where the emails you want to move are located.
- Tap on the “Edit” button located at the top right corner of the screen.
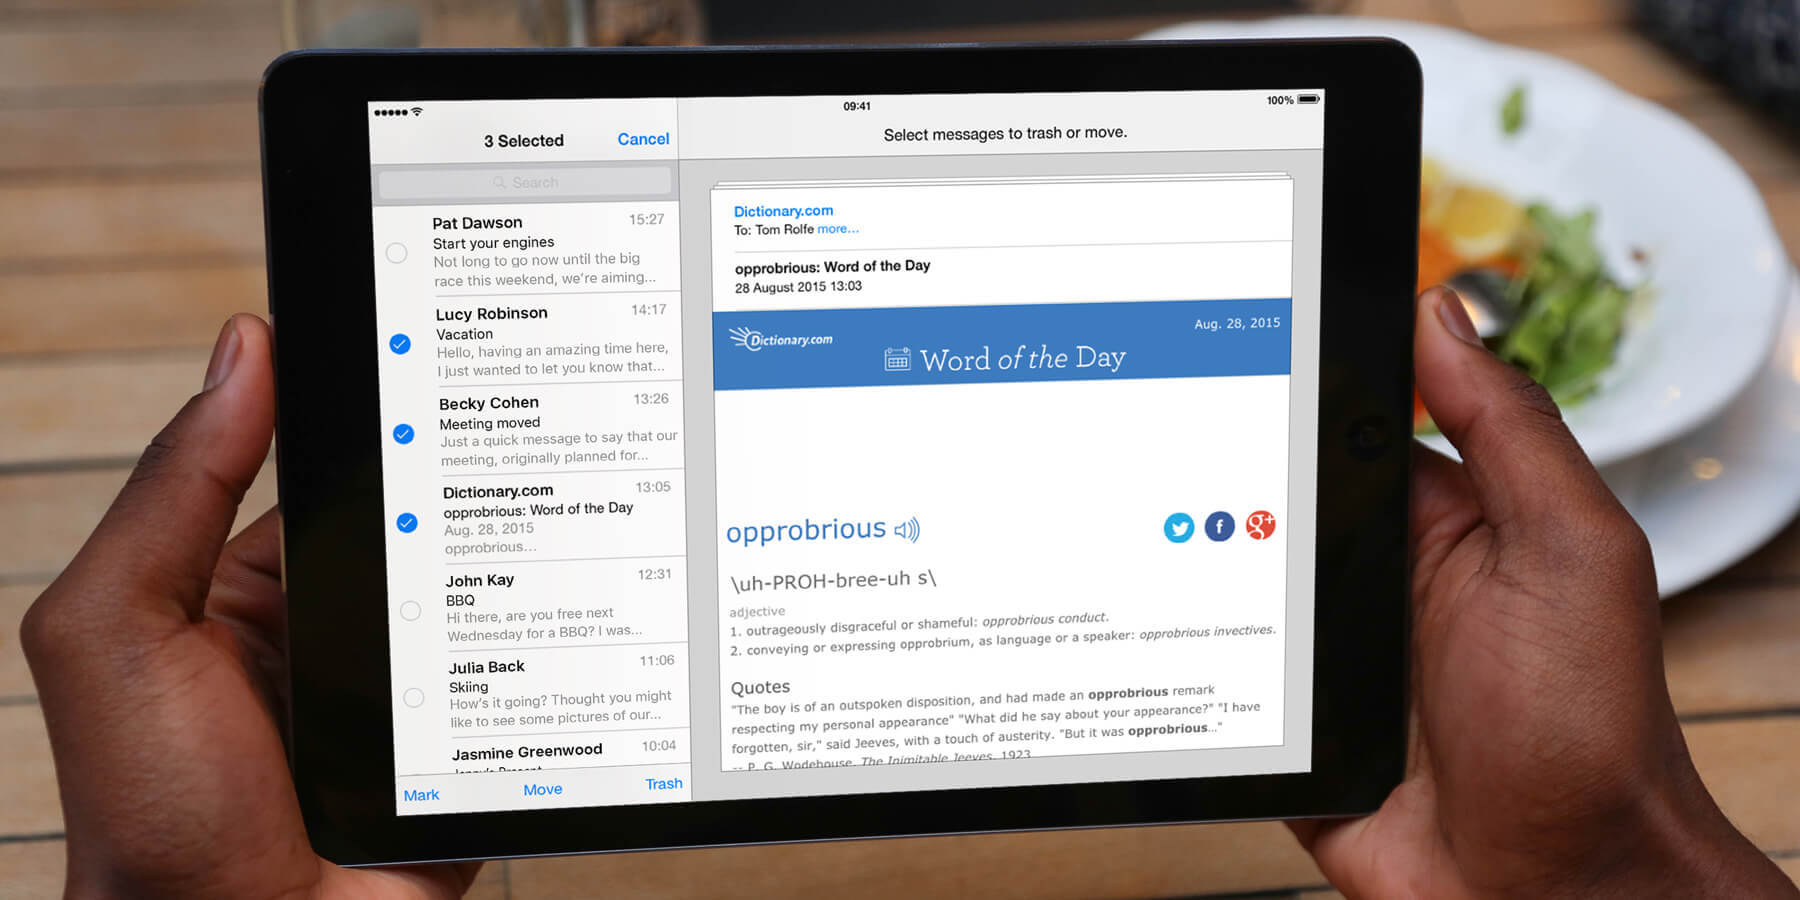
- Select the emails you want to move by tapping on the circle icon next to each email. You can also tap on the “Select All” option to choose all emails in the folder.
- Once you have selected the emails, tap on the “Move” button at the bottom of the screen.
- Choose the destination folder where you want to move the selected emails. You can select an existing folder or create a new one.
- Tap on the “Move” button again to confirm the action. The selected emails will then be moved to the chosen folder.
It’s as simple as that! By following these steps, you can easily move multiple emails at once, saving you time and effort in organizing your inbox.
Deleting Multiple Emails at a Time on the iPhone
Do you have a cluttered inbox on your iPhone and need to quickly delete multiple emails? Don’t worry, with just a few simple steps, you can easily delete multiple emails at once and organize your inbox more efficiently. Here’s how you can do it:
1. Open the Mail app on your iPhone.
2. Tap on the Mailboxes button located at the top left corner of the screen.
3. Select the mailbox or account where the emails you want to delete are located.
4. Once you are in the mailbox, tap on the Edit button located at the top right corner of the screen.
5. Now, you will see a small circle next to each email. Tap on the circle next to the emails you want to delete. As you tap on each email, a blue checkmark will appear.
6. After selecting all the emails you want to delete, tap on the Trash icon or the Delete button at the bottom right corner of the screen.
7. A confirmation message will appear asking if you want to move the selected emails to the Trash folder. Tap on the Delete button to confirm.
8. Once you have deleted the emails, they will be moved to the Trash folder. You can access the Trash folder by tapping on the Mailboxes button, selecting the account where the Trash folder is located, and then tapping on the Trash folder.
9. If you want to permanently delete the emails from the Trash folder, open the Trash folder, tap on the Edit button, select the emails you want to delete permanently, and then tap on the Delete button.
With these simple steps, you can quickly delete multiple emails at once on your iPhone and keep your inbox organized. Remember to regularly clean up your inbox to free up storage space on your device and ensure that important emails stand out more prominently.
So, go ahead and give it a try. Your clutter-free inbox awaits!
Marking Multiple Emails as Read/Unread on the iPhone
If you have a cluttered email inbox on your iPhone, it can be time-consuming to manually mark each email as read or unread. Luckily, there is a simple way to mark multiple emails at once. Here’s how:
1. Open the Mail app on your iPhone and navigate to the inbox or folder where the emails you want to mark are located.
2. Tap on the “Edit” button at the top-right corner of the screen. You will see checkboxes appearing next to each email.
3. Tap on the checkboxes next to the emails you want to mark as read or unread.
4. Once you have selected the emails, tap on the “Mark” button at the bottom-left corner of the screen.
5. A menu will appear with options to mark the selected emails as “Read” or “Unread”. Select your desired option.
6. The selected emails will now be marked as read or unread, depending on your choice. You can see the changes reflected in your inbox or folder.
Marking multiple emails as read or unread on your iPhone can save you a significant amount of time and help you stay organized. Whether you want to quickly catch up on important emails or keep track of unread messages, this feature makes it easy to manage your inbox effectively.
Tips for Managing Multiple Emails on the iPhone
Handling multiple emails on your iPhone can sometimes be overwhelming, especially if your inbox is flooded with messages. Fortunately, there are several useful tips and tricks that can help you effectively manage and organize your emails. Whether you need to sort, search, or prioritize your messages, these tips will ensure that you stay on top of your email game.
1. Use email filters and folders: One of the best ways to manage multiple emails is by utilizing email filters and creating folders. Set up filters to automatically categorize incoming messages based on criteria such as sender, subject, or keywords. Create specific folders for different topics or projects, allowing you to easily find and access relevant emails in the future.
2. Enable push notifications: By enabling push notifications for your email app, you will receive real-time alerts whenever you receive a new email. This allows you to stay updated on important messages without constantly checking your inbox, saving you time and ensuring timely responses.
3. Archive or delete unnecessary emails: If your inbox is cluttered with unnecessary emails, take the time to either archive or delete them. Archiving allows you to remove emails from your main inbox while keeping them easily accessible in the archived folder. Deleting unnecessary emails frees up space and keeps your inbox more organized.
4. Utilize the search function: When dealing with a large number of emails, finding specific messages can be a challenge. The search function on your iPhone allows you to quickly locate emails based on keywords, sender, or subject. Take advantage of this feature to locate important emails without having to manually sift through your entire inbox.
5. Use swipe gestures: Customize the swipe gestures on your iPhone’s email app to perform actions such as marking emails as read, archiving, or deleting them. This can help you quickly triage your inbox and prioritize important emails.
6. Create email templates: If you find yourself frequently composing similar emails, create email templates to save time. Your iPhone’s email app may have a feature that allows you to create and save templates for common responses or inquiries.
7. Set email priorities: Most email apps have a feature that allows you to set priorities for your messages. By assigning different levels of importance to your emails, you can easily identify and respond to urgent messages, ensuring that you stay on top of any time-sensitive communications.
8. Schedule dedicated email time: Instead of constantly checking your email throughout the day, which can be distracting, designate specific time slots for processing your inbox. This helps you maintain focus on other tasks and prevents email from taking over your entire day.
9. Use email aliases: If you receive emails from different sources or roles, consider setting up email aliases. This allows you to categorize and manage emails more easily, ensuring that messages related to specific roles or projects can be accessed separately.
10. Regularly update your email app: Keep your email app up to date to ensure you have access to the latest features and security patches. New updates often include improvements to the user interface, performance enhancements, and bug fixes, all of which can improve your overall email management experience.
By implementing these tips, you can efficiently manage and organize your emails on your iPhone. Take advantage of the built-in features and functionalities of your email app to streamline your workflow and stay on top of your email correspondence.
In conclusion, managing your emails efficiently on the iPhone has never been easier. With the ability to move, delete, and mark multiple emails at once, you can quickly declutter your inbox and stay organized on the go. Whether you want to group emails by topic, clear out a large number of unread messages, or mark important emails for follow-up, these features provide the flexibility and convenience you need.
The iPhone’s software allows for seamless email management, empowering you to stay productive and focused on what matters most. By utilizing these tips and tricks, you can save time, streamline your workflow, and ensure that your email correspondence is tidy and well-organized.
So, next time you find yourself drowning in a sea of emails, remember that you have the power to take control. With just a few taps, you can move, delete, and mark multiple emails on your iPhone, making your email management a breeze.
FAQs
1. Can I move, delete, and mark multiple emails at a time on the iPhone?
Yes, you can! The iPhone provides a convenient way to manage your email inbox by allowing you to perform actions on multiple emails simultaneously.
2. How do I select multiple emails on the iPhone?
To select multiple emails on the iPhone, simply open your Mail app and navigate to the mailbox where the emails are located. Tap on the “Edit” button at the top right corner of the screen, and then tap on each email you want to select. Selected emails will be highlighted with a blue checkmark.
3. Can I move multiple emails to a different mailbox at once?
Absolutely! After selecting the desired emails using the steps mentioned above, tap on the “Move” option at the bottom left corner of the screen. A list of mailboxes will appear, allowing you to choose the destination mailbox. Tap on the desired mailbox, and the selected emails will be moved there.
4. How can I delete multiple emails on the iPhone?
Similar to moving emails, select the desired emails by following the steps mentioned in question 2. Once the emails are selected, tap on the “Trash” icon located at the bottom center of the screen. A confirmation prompt will appear, asking if you want to delete the selected emails. Tap “Delete” to confirm, and the emails will be permanently deleted.
5. Is it possible to mark multiple emails as read or unread all at once?
Yes, it is! To mark multiple emails as read or unread, select the desired emails by following the steps mentioned in question 2. Once the emails are selected, tap on the “Mark” option at the bottom right corner of the screen. A menu will appear, giving you the option to mark the selected emails as read or unread. Select the desired option, and the emails will be marked accordingly.