
Are you overwhelmed by the constant influx of emails on your iPhone? Deleting emails can be a tedious task, especially when you have a crowded inbox. Luckily, there are simple and effective methods to help you declutter your email account and regain control of your iPhone’s storage.
In this article, we’ll guide you through the process of deleting emails on your iPhone, whether you use the default Apple Mail app or a third-party email client. We’ll provide step-by-step instructions and helpful tips to ensure your email management is efficient and stress-free.
By following the methods and techniques outlined in this article, you’ll be able to efficiently delete emails, organize your inbox, and optimize your iPhone’s storage space. So, let’s dive in and discover how you can easily delete emails on your iPhone!
Inside This Article
- Setting Up Email Accounts on iPhone
- Accessing the Mail App on iPhone
- Deleting Individual Emails on iPhone
- Deleting Multiple Emails on iPhone
- Conclusion
- FAQs
Setting Up Email Accounts on iPhone
One of the first things you might want to do with your new iPhone is set up your email accounts. With the iPhone’s built-in Mail app, you can easily access and manage multiple email accounts right from your device. Here’s how you can set up your email accounts on your iPhone:
- Open the Settings app: Locate the Settings app on your iPhone’s home screen and tap on it. The Settings app is represented by a gear icon.
- Scroll down and tap on “Mail”: In the Settings menu, scroll down until you find the “Mail” option. Tap on it to access the Mail settings.
- Select “Accounts”: Under the Mail settings, you will see a list of options. Tap on “Accounts” to view and manage your email accounts.
- Add account: On the Accounts screen, tap on “Add Account” to begin setting up a new email account on your iPhone.
- Choose your email provider: You will be presented with a list of popular email providers such as Google, Microsoft, Yahoo, and more. Select your email provider from the list, or choose “Other” if your provider is not listed.
- Enter your email address and password: In the next screen, enter your email address and password associated with the account you are setting up. If you are setting up a Gmail or Microsoft account, the Mail app may automatically detect the settings for you.
- Configure additional settings: Depending on your email provider, you may be prompted to configure additional settings such as enabling or disabling sync for mail, contacts, calendars, and notes. Make your desired selections and proceed.
- Verify your account: After providing the necessary information, the Mail app will try to verify your account. This may take a few moments. Once verified, you can choose which items you want to sync with your iPhone.
- Repeat for other email accounts: If you have additional email accounts to set up, repeat the above steps for each account. You can add and manage multiple email accounts simultaneously on your iPhone.
Once you have successfully set up your email accounts on your iPhone, you can start using the Mail app to send, receive, and manage your emails on the go. The Mail app provides a user-friendly interface that allows you to organize your inbox, compose new emails, and even access attachments directly from your iPhone.
Setting up email accounts on your iPhone is a simple process that ensures you stay connected and productive while on the move. Whether you use Gmail, Outlook, Yahoo, or any other email provider, the iPhone’s Mail app makes it easy to access all your emails in one place.
Accessing the Mail App on iPhone
Accessing the Mail app on your iPhone is easy and convenient. Whether you want to check your personal or work email, follow these simple steps to access your inbox:
- Locate the Mail app on your iPhone’s home screen. The Mail app icon is represented by a white envelope with a blue background.
- Tap on the Mail app icon to open it. You will be directed to the Mail app’s main screen.
- On the main screen, you will see various folders, including the Inbox, Sent, Drafts, and more. Tap on the Inbox folder to access your incoming email messages.
- Your inbox will display a list of all the emails you have received. Each email will be listed with the sender’s name, subject line, and a brief preview of the message.
- To view the contents of an email, simply tap on the desired email from the list. The email will open, allowing you to read the full message, view any attachments, and see the sender’s information.
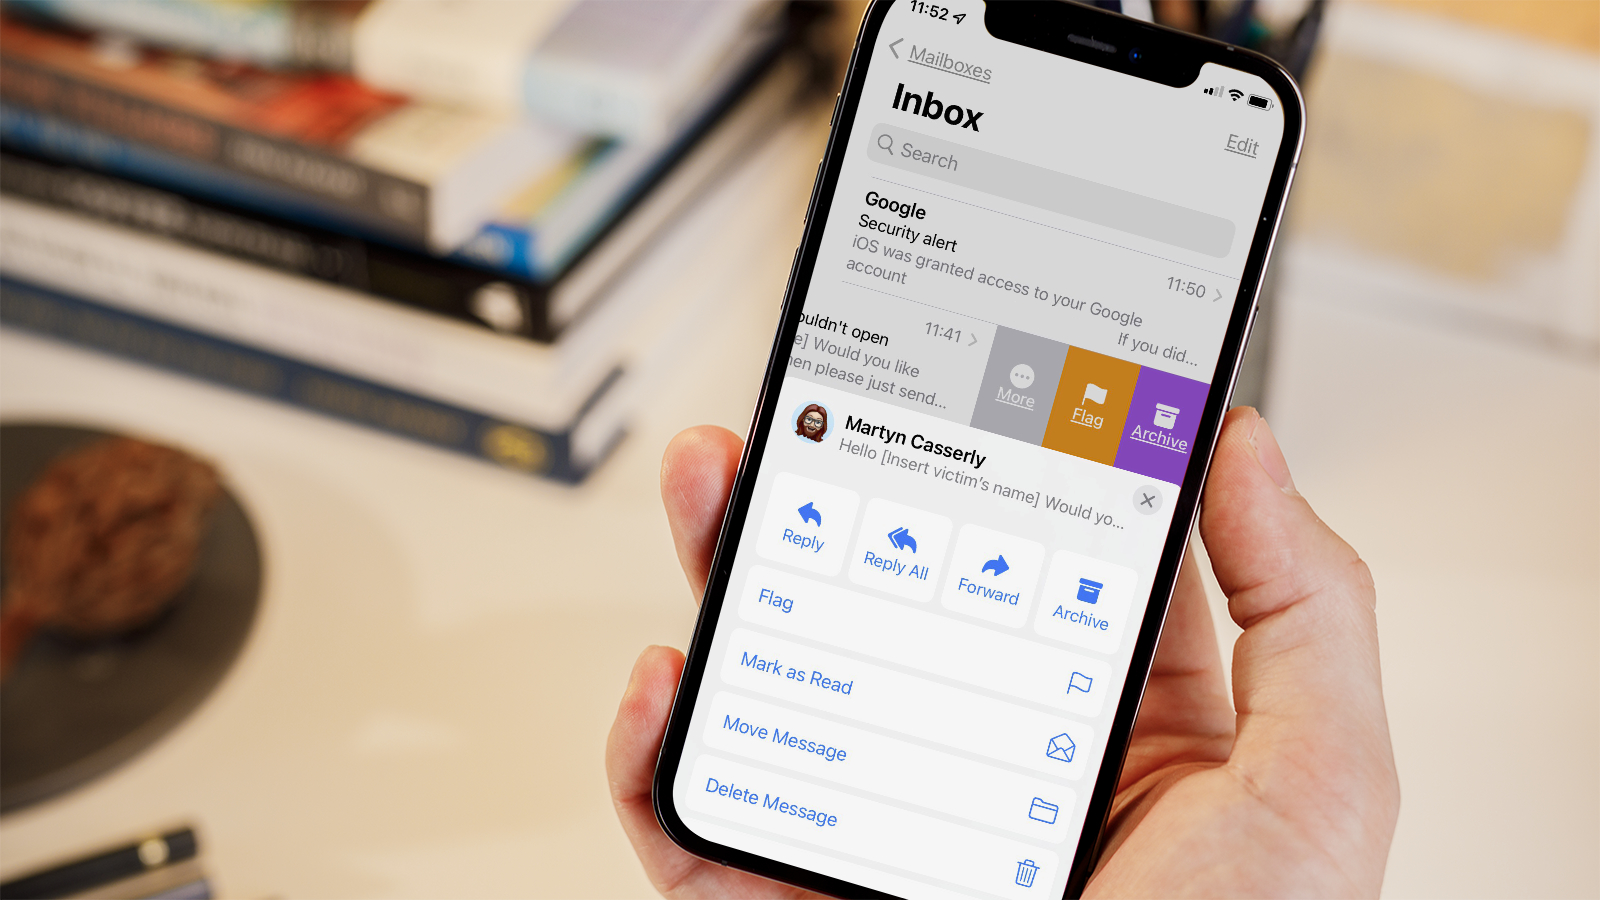
- From the open email, you can perform various actions such as replying, forwarding, or deleting the email. The options for these actions can be found at the bottom of the email screen.
That’s it! Now you know how to access the Mail app on your iPhone and view your emails. It’s a quick and efficient way to manage your inbox and stay connected on the go.
Deleting Individual Emails on iPhone
Deleting individual emails on your iPhone is a simple and straightforward process. Here are the steps to follow:
- Open the Mail app on your iPhone by tapping on the Mail icon from the home screen.
- Navigate to the email you want to delete by selecting the appropriate mailbox or folder.
- Once you locate the email, swipe from right to left across the email in the list or tap on the Edit button in the top right corner.
- A red “Delete” button will appear on the right side of the email. Tap on it to delete the email.
- A confirmation message will pop up asking if you want to move the email to the Trash. Tap on the “Delete” option to confirm the deletion.
Alternatively, you can also use the “Move to Junk” option instead of “Delete” if you want to mark the email as spam and move it to the Junk folder.
Remember that deleting an email on your iPhone will also delete it from the server or other devices connected to the same email account. If you want to keep a copy of the email, make sure to move it to a different folder or archive it before deleting.
Now you know how to easily delete individual emails on your iPhone without any hassle. Keep your inbox clean and organized by getting rid of unnecessary emails with just a few taps.
Deleting Multiple Emails on iPhone
Deleting multiple emails on your iPhone can save you a significant amount of time, especially if your inbox is overflowing with messages. Fortunately, the Mail app on your iPhone offers a simple and efficient method to delete multiple emails at once. Here’s how you can do it:
- Launch the Mail app on your iPhone and navigate to the mailbox or folder containing the emails you wish to delete.
- Tap the “Edit” button located at the top right corner of the screen. This will enable the selection mode, allowing you to choose multiple emails at once.
- A circular checkbox will appear next to each email. Tap the checkbox of the emails you want to delete.
- As you select emails, you will notice a blue bar at the bottom of the screen. This bar displays the number of emails selected and offers various actions you can perform with the selection, including the option to “Trash” the emails.
- Tap the “Trash” icon on the blue bar to delete the selected emails. Alternatively, you can tap “Move” to move the selected emails to a different folder or “Archive” to archive them.
- A confirmation prompt will appear asking if you want to delete the selected emails. Tap “Delete Message” to confirm and permanently remove the emails from your iPhone.
Keep in mind that deleting multiple emails simultaneously is a powerful action, so make sure you double-check your selection before confirming the deletion. Once the emails are deleted, they cannot be recovered unless you have a backup. If you’re unsure about deleting certain emails, you can choose to delete them one by one instead.
By efficiently deleting multiple emails on your iPhone, you can declutter your inbox and maintain better email organization. This can improve the overall performance of your device and make it easier to find important emails when you need them.
Remember, regularly managing your emails and deleting unnecessary ones can help keep your iPhone’s storage space free and prevent it from getting overwhelmed with excessive data. So take a few minutes every now and then to clear out your inbox and enjoy a more streamlined and organized email experience on your iPhone.
Conclusion
In conclusion, deleting emails on iPhone is a simple and straightforward process that can help declutter your inbox and improve overall device performance. Whether you prefer to delete individual emails, multiple emails, or even entire email accounts, the iPhone offers various options to cater to your specific needs.
By following the steps outlined in this guide, you can efficiently manage your emails and keep your iPhone organized. Remember to regularly delete unnecessary emails to free up storage space and enhance your device’s speed.
Deleting emails on iPhone not only improves system performance but also helps you maintain a clear and clutter-free inbox. With a few simple taps, you can bid farewell to unwanted messages and stay on top of your digital communication.
So, take control of your email management today and enjoy a streamlined and efficient iPhone experience. Let go of the unnecessary and focus on what truly matters, all at the tip of your fingertips.
FAQs
1. How do I delete emails on my iPhone?
Deleting emails on your iPhone is a simple process. To delete a single email, swipe left on the email in your mailbox and tap the “Delete” button that appears. If you want to delete multiple emails at once, you can tap the “Edit” button in the top right corner of your mailbox, select the emails you want to delete, and then tap the “Trash” icon.
2. Can I delete all emails at once on my iPhone?
Yes, you can delete all emails at once on your iPhone. To do so, go to the mailbox where you want to delete all emails (e.g., Inbox, Sent, etc.), tap the “Edit” button in the top right corner, then tap “Select All” at the bottom left corner. Finally, tap the “Trash” icon to delete all selected emails.
3. Are deleted emails permanently removed from my iPhone?
When you delete emails on your iPhone, they are moved to the “Trash” folder. By default, the deleted emails will stay in the “Trash” folder for 30 days before being permanently deleted. However, you can manually delete them sooner if needed. To do this, go to the “Trash” folder, tap “Edit” in the top right corner, and then tap “Delete All” to permanently remove all emails in the “Trash” folder.
4. What happens if I delete an email account on my iPhone?
If you delete an email account on your iPhone, all emails, contacts, and settings associated with that account will be removed from your device. However, any emails that were downloaded to your device’s local storage will remain. To delete an email account, go to the Settings app, select “Mail,” then “Accounts,” and choose the account you want to delete. Finally, tap “Delete Account” and confirm the deletion.
5. How can I retrieve a deleted email on my iPhone?
If you accidentally deleted an email and want to retrieve it, you can look for it in the “Trash” folder or the “Archive” folder. To do this, open the Mail app, go to the mailbox where the email was originally located, and look for the “Trash” or “Archive” folder. If you find the email there, simply open it and move it back to your inbox or desired mailbox.