
Are you tired of squinting at your computer screen? Do you find it difficult to read small text? Thankfully, Windows provides a solution – the Magnifier tool. The Magnifier allows you to zoom in on your screen, making it easier to see and read the content. However, if you’re struggling to figure out how to change the zoom level in the Magnifier, you’ve come to the right place. In this comprehensive guide, we will walk you through the steps to adjust the zoom in the Magnifier tool in Windows. Whether you want to increase or decrease the zoom, we’ve got you covered. Say goodbye to eye strain and get ready to enjoy a more comfortable computing experience. Let’s dive in!
Inside This Article
- Overview of the Magnifier in Windows
- Adjusting the Zoom Level in Magnifier
- Changing the Zoom Increment in Magnifier
- Customizing the Magnifier Views in Windows
- Conclusion
- FAQs
Overview of the Magnifier in Windows
Windows offers a built-in assistive technology called the Magnifier, designed to help users with low vision or visual impairments. The Magnifier magnifies the screen content, making it easier to see and read. Whether you need to enlarge text, images, or app windows, the Magnifier has got you covered. With a few simple steps, you can adjust the zoom level, change the zoom increment, and customize the magnifier views according to your preferences.
The Magnifier in Windows provides three main views: Full-screen view, Lens view, and Docked view. The Full-screen view magnifies the entire screen, allowing you to see everything in a larger size. The Lens view acts as a magnifying glass, displaying a small, adjustable portion of the screen in greater detail. The Docked view, on the other hand, magnifies a portion of the screen and locks it into place, giving you the flexibility to interact with other parts of the screen.
One of the key features of the Magnifier is its ability to adjust the zoom level. By default, the Magnifier opens at 100% zoom, but you can easily increase or decrease the magnification as needed. This enables you to find the perfect balance between readability and screen real estate. Whether you want a subtle magnification or a more significant zoom, the Magnifier gives you full control over your viewing experience.
In addition to adjusting the zoom level, you can also change the zoom increment in the Magnifier. The zoom increment determines how much the zoom level changes each time you press the plus or minus buttons. By default, the zoom increment is set to 100%, but you can customize it to meet your specific needs. For users who require precise control over their magnification, this feature proves especially useful.
Windows also allows you to customize the Magnifier views according to your preferences. You can adjust the size of the magnifier window and choose between a circular or rectangular shape for the Lens view. Additionally, you can turn on color inversion for better contrast or enable the Follow Focus option to automatically track the keyboard focus. These customizations enhance the usability of the Magnifier and ensure a personalized viewing experience.
Overall, the Magnifier in Windows is a powerful tool for individuals with visual impairments, offering a range of customization options to meet individual needs. Whether you need to magnify text, images, or entire app windows, the Magnifier provides an easy-to-use solution. With its adjustable zoom level, customizable views, and zoom increment, the Magnifier empowers users with low vision to comfortably navigate the digital world.
Adjusting the Zoom Level in Magnifier
Windows Magnifier is a useful tool that allows users to enlarge the contents displayed on the screen. One of the key features of Magnifier is the ability to adjust the zoom level, which determines the degree of magnification applied to the screen.
To adjust the zoom level in Magnifier, you have a few options. The most straightforward way is to use the keyboard shortcuts. Press the Windows key and the plus (+) or minus (-) key to increase or decrease the zoom level, respectively. Each press of the plus or minus key will increment or decrement the zoom level by a fixed amount.
If you prefer a more precise approach, you can open the Magnifier settings by pressing the Windows key and the plus (+) key together, then selecting “Settings”. In the settings window, you’ll find a slider that allows you to adjust the zoom level using a visually intuitive interface. Simply slide the bar to the desired magnification level, and the screen will instantly reflect the changes.
Another way to adjust the zoom level is by using the Magnifier toolbar. By default, the Magnifier toolbar appears at the top of the screen when Magnifier is active. It contains various controls, including zoom in and zoom out buttons. Clicking on these buttons will increase or decrease the zoom level by a predefined increment.
Moreover, you can also use the scroll wheel on your mouse to adjust the zoom level in Magnifier. If you have a mouse with a scroll wheel, simply hold down the Ctrl key and scroll up or down to increase or decrease the zoom level, respectively. This method provides a quick and convenient way to adjust the zoom level on the fly.
By adjusting the zoom level in Magnifier, you can ensure that the content on your screen is displayed in a way that suits your visual needs. Whether you prefer a subtle magnification or a larger zoom level, Windows Magnifier offers flexible options to enhance your viewing experience.
Changing the Zoom Increment in Magnifier
The Magnifier feature in Windows allows users to zoom in on their screens and easily see the content more clearly. By default, the Magnifier zooms in by increments of 100%, which may be too drastic for some users. Fortunately, Windows provides the flexibility to change the zoom increment and adjust it to individual preferences.
To change the zoom increment in Magnifier, follow these steps:
- Open the Magnifier settings by pressing the Windows key and the plus sign (+) at the same time.
- Alternatively, you can open the Settings app, go to Ease of Access, and select Magnifier from the left-hand menu.
- In the Magnifier settings, you will find a section called “Zoom increments.”
- Click on the drop-down menu under “Zoom increments” to view the available options.
By default, the options include 100%, 200%, and 400%. However, you can also choose to enter a specific percentage value by selecting the “Custom” option.
Select the desired zoom increment from the drop-down menu or enter a specific value for custom zoom increment.
After selecting the desired zoom increment, the changes will be applied immediately. You can test the new zoom increment by using the Magnifier and observing the zoom level adjustments.
Changing the zoom increment in Magnifier allows you to have finer control over how much you zoom in or out when using the feature. This can be particularly helpful for users with visual impairments who require precise adjustments to accommodate their unique needs.
Experiment with different zoom increments to find the optimal setting that suits your preferences and makes it easier for you to view the content on your screen.
Remember that you can always return to the Magnifier settings and change the zoom increment again if you find that the current setting is not ideal.
With the ability to customize the zoom increment in Magnifier, Windows empowers users to personalize their computing experience and ensure that they can interact with their devices in a way that works best for them.
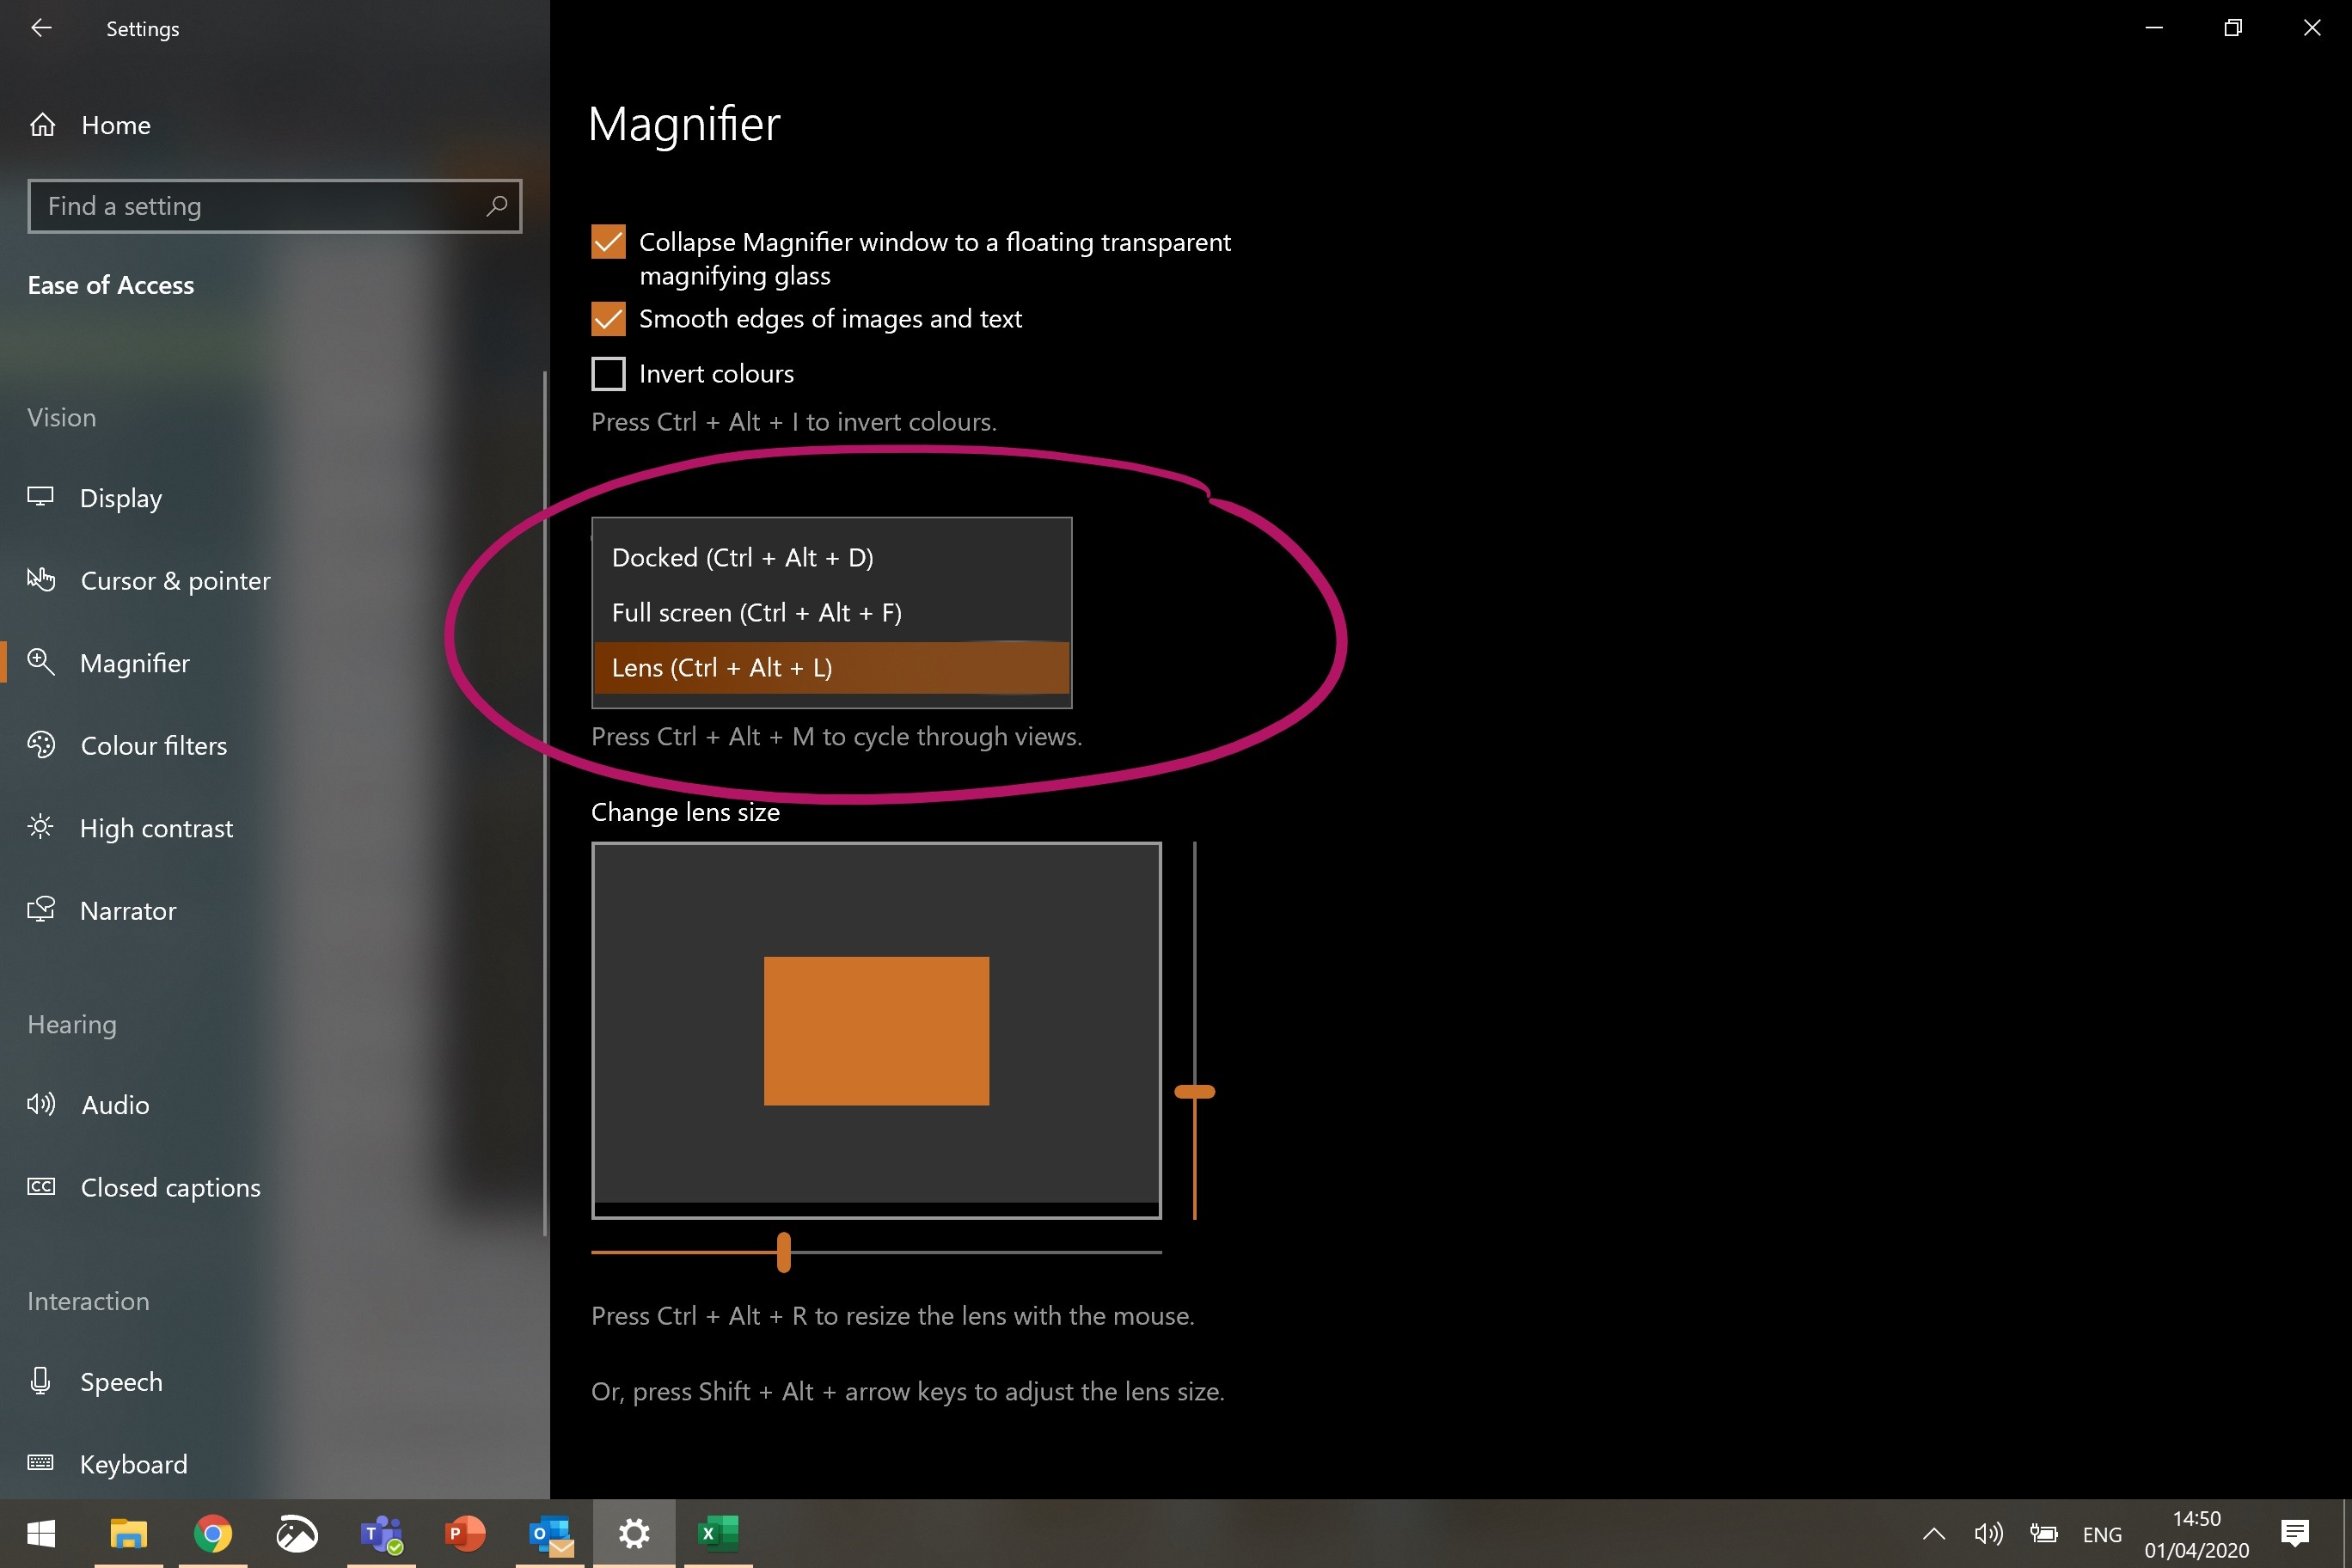
Customizing the Magnifier Views in Windows
Windows Magnifier is a built-in accessibility tool that helps users with visual impairments to magnify their screen and make it easier to read and navigate. While the default magnification options are useful, Windows also offers a range of customization settings for Magnifier, allowing you to personalize your viewing experience. In this section, we will explore how to customize the Magnifier views in Windows to suit your preferences.
1. Launch the Magnifier Settings:
To begin customizing the Magnifier views, you need to access the Magnifier Settings. There are several ways to do this:
- Press the Windows key and type “Magnifier Settings” in the search bar. Click on the corresponding result.
- Press the Windows key + I to open the Settings app. Click on “Ease of Access” and then select “Magnifier” from the left-hand menu.
- In the system tray, locate the Magnifier icon (a magnifying glass) and right-click on it. Choose “Settings” from the context menu.
2. Adjusting the Magnifier Views:
Once you have opened the Magnifier Settings, you will find options to customize the Magnifier views. Here are the key settings you can modify:
- Zoom Level: You can adjust the level of magnification by moving the slider under “Zoom Level.” Drag it to the left to decrease the magnification and to the right to increase it. Alternatively, you can use the + and - buttons to fine-tune the zoom level.
- Views: The Magnifier offers three different views – Full screen, Lens, and Docked. Full screen magnifies the entire screen, Lens magnifies a small portion around the cursor, and Docked magnifies a designated area. Click on the dropdown menu under “Views” to select your preferred view.
- Follow the Mouse or Keyboard Focus: By default, the Magnifier follows the mouse cursor. However, if you prefer it to follow the keyboard focus, toggle the switch labelled “Follow the mouse pointer” to off.
- Turn on Color Inversion: If you find it easier to read text with color inversion, toggle the switch labelled “Turn on color inversion” to on. This will change the color scheme to enhance visibility.
3. Additional Customization Options:
In addition to the basic settings, Windows offers several advanced customization options for the Magnifier views. To access these options, click on the “Additional magnifier settings” link at the bottom of the Magnifier Settings screen. Here, you can customize various aspects such as tracking, transparency, and smoothing.
4. Closing the Magnifier Settings:
Once you have finished customizing the Magnifier views, you can simply close the Magnifier Settings window. Your chosen settings will be saved and applied the next time you open the Magnifier.
By personalizing the Magnifier views in Windows, you can optimize the screen magnification experience to suit your specific needs. Experiment with different zoom levels, views, and additional settings to find the configuration that works best for you.
Conclusion
In conclusion, changing the zoom in magnifier settings in Windows is a simple and useful feature that can greatly enhance your visual experience on your computer. Whether you need to magnify text, images, or other elements on your screen, Windows provides a convenient way to adjust the zoom level to suit your needs.
By following the steps outlined above, you can easily customize the zoom settings to your preference, making it easier to read, view, and navigate your Windows interface. Whether you have a vision impairment or simply prefer a larger display, the zoom in magnifier feature offers a versatile solution.
Remember to experiment with the different options and features available in the magnifier settings to find the configuration that works best for you. With a few simple adjustments, you can make your Windows experience more comfortable and accessible, ensuring that you can effectively use your computer without any visual strain or difficulties.
So go ahead and explore the zoom in magnifier settings in Windows to optimize your visual experience and make the most out of your computer usage.
FAQs
1. Can I change the zoom in magnifier on Windows?
Yes, you can change the zoom level in the magnifier on Windows. There are several methods to do this, including using keyboard shortcuts, the magnifier settings, or the mouse scroll wheel.
2. How do I change the zoom level using keyboard shortcuts?
To change the zoom level using keyboard shortcuts, press the Windows key and the plus (+) or minus (-) key to zoom in or out, respectively. You can also press the Windows key and the Esc key to exit the magnifier.
3. How do I change the zoom level using the magnifier settings?
To change the zoom level using the magnifier settings, open the Settings app on Windows and navigate to the Ease of Access section. From there, select the Magnifier option and adjust the zoom level using the slider.
4. Can I change the zoom level by using the mouse scroll wheel?
Yes, you can change the zoom level by using the mouse scroll wheel. To do this, make sure the magnifier is active, then simply scroll up or down on the mouse scroll wheel to increase or decrease the zoom level, respectively.
5. Are there any other options for customizing the magnifier zoom?
Yes, apart from changing the zoom level, you can also customize other magnifier settings such as the magnification mode, tracking options, and color filters. These options can be found in the magnifier settings within the Ease of Access section of the Windows Settings app.