
Live photos are great for capturing a moment in time without having to record a video or create a GIF. They make great home and lock screens if you want to add a bit more dynamism to your device. However, while capturing a live photo may be easy, creating one from something like a video isn’t as straightforward. That’s precisely why we’re here. Here’s everything you need to know about how to make a video a live photo.
Inside This Article
What Is a Live Photo?
Before proceeding to the method of how to make a video into a live photo, let’s talk about live photos first. What exactly is a live photo? If you’re out of the loop, a live photo is a moving image that’s not quite video, not quite photo. Rather, it lies somewhere in between, limiting the capture to three seconds of movement.
Now, you might ask, what is a live photo good for? We already have GIFs that are pretty handy for sharing memes and reactions across social media. Are live photos truly necessary? That’s a fair point. However, live photos aren’t made specifically to spread memes or graphics you usually find GIF websites. Their main purpose is to simply live in your home or lock screen and make things look more interesting. You can use them as live wallpapers, say you want to set a wallpaper on your iPhone that is something different.
For iPhone users, this might already seem familiar, as you can use a live photo wallpaper on your home screen. In fact, live photos are an iOS-only feature that’s technically unavailable for Android. That is unless you use a proper workaround (more on that later).
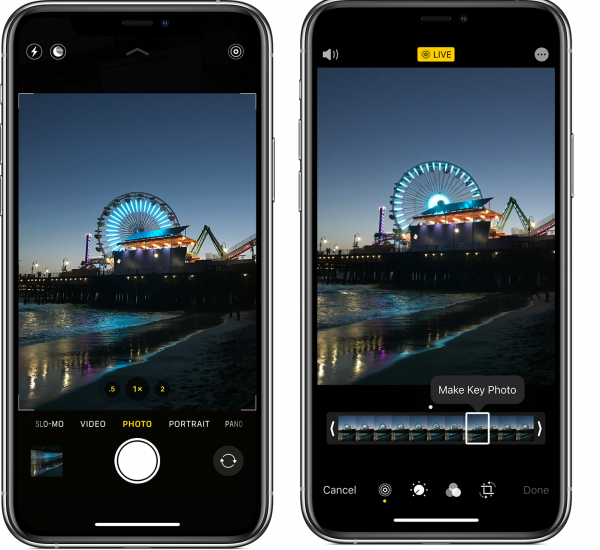
On an iOS device, you can easily create a live photo simply by opening the camera app. Just launch the camera and enable the “Live Photo” feature. You can do so by tapping on the icon that looks like three circles. Afterward, all you need to do is tap the shutter button, and voila, you’ve successfully captured a live photo.
Moreover, much like other media content, you can also find the live photo you took within the iPhone’s gallery. You can simply activate it (i.e., make it move) by long-pressing on the live photo. With this, you can provide yourself a neat little home screen photo without much effort.
How to Make a Video into a Live Photo?
Of course, having a live photo as your wallpaper is great. However, it’s not always fun to have to capture the live photos yourself. What if you have a great video clip that you want to turn into a live photo? Perhaps it’s like your favorite animation or a video of a concert.
While iOS (and especially Android) does not provide a native solution, there are ways to do so. Here’s everything you need to know about how to make a video a live photo on either platform. All you’ll need are a couple of free apps and a little bit of effort.
For iOS
iOS users have the upper hand when it comes to live photos because they’re natively supported on the platform. However, what they don’t natively support is converting a video you captured into a live photo format. For that, you’ll need to learn how to make a video a live photo using a third-party app. Here’s what you need.
Step 1: Getting the App
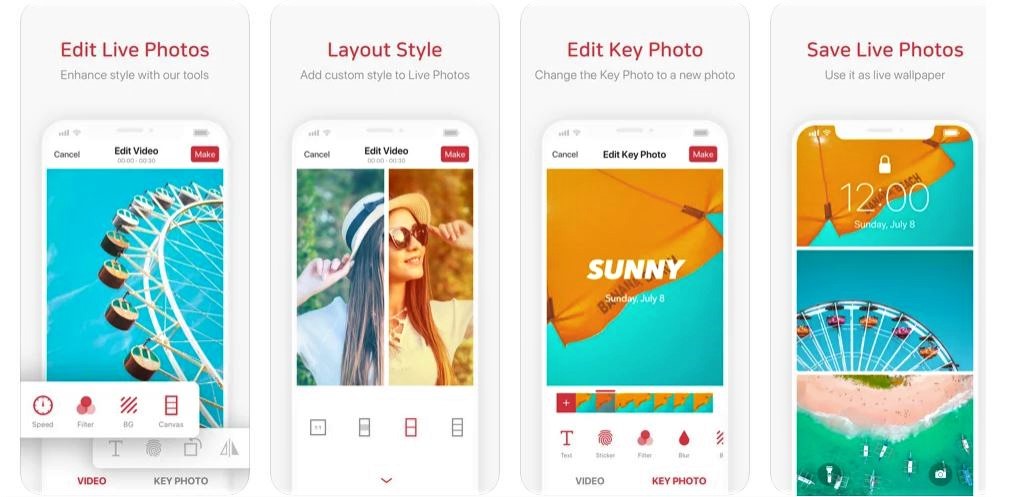
Firstly, you’ll need to download the intoLive app from Apple’s App Store. This is a free app, so it’s easy for anyone to use to convert their videos. However, there’s also a premium version of the app in case you’re interested in advanced editing and more features.
Step 2: Choosing Your Video
Learning how to make a video a live photo means you need to already have a video on hand. Hence, if you don’t have it in your gallery, get the file from your camera, laptop, or other devices. Regardless, make sure to transfer it to your iPhone or iPad’s photo library.
Afterward, launch the intoLive app and allow it to access your photo library. Once you do that, you’ll be able to see all of your gallery’s media files, including videos. The live wallpaper iPhone users want can be created through any one of these videos. Just choose the one you want and then proceed.
The video you choose can have any length with no limit. However, do note that intoLive can only make five-second-long live photos with the free version. You can create something longer using the pro version, but it also has a maximum of 30 seconds.
Step 3: Editing
The reason why most people learn how to make a video a live photo is probably due to length. iOS devices can already natively create live photos without all of these tools. However, if they want to use snippets for longer clips, they’ll need a third-party app.
Thankfully, intoLive doesn’t require you to cut the video into the required length through a separate app. That’s because intoLive already has a built-in video editor to help you create a snippet. Once you tap on the video you want within the app, it should redirect you to the video editing page.
Within this page, you can use the bottom slider to choose the snippet you want. On the other hand, you can also add different effects like filters, alter the speed, and more. Just tap on an icon at the bottom of the slider to choose which video effect you want to use. However, do note that some of these effects are only available for pro users.
Step 4: Creating Your Live Photo
After editing your live photo, it’s time to publish the finished product and save it into your gallery. To do this, just tap on the “Make” button on the top-right and choose a repetition option. This simply gives you the option to repeat the snippet several times. By default, this is set to “No repeat.”
Afterward, intoLive should finish creating your live photo. Just tap “Save Live Photo” and you’re finished. With that, you’ve successfully learned how to make a video a live photo on an iPhone. You can use it as you please for your home and lock screens and enjoy your new dynamic smartphone wallpaper.
For Android
Now, we know that Android doesn’t natively support live photos as a feature. After all, it is an iOS exclusive, so you can’t natively capture a three-second live photo on your smartphone. However, there is an Android equivalent called “TurnLive: Live Wallpapers.”
Unfortunately, they only move when they’re applied as wallpapers to your phone. They don’t move or feel alive when you share them via text. Moreover, you can’t view them in your gallery like you would on an iPhone.
Regardless, at the very least, you can still use live photos as wallpapers on your Android device. All you need to do is capture a video and turn that into a live photo. Without further ado, here’s how to make a video into a live photo on Android.
Step 1: Installing the App
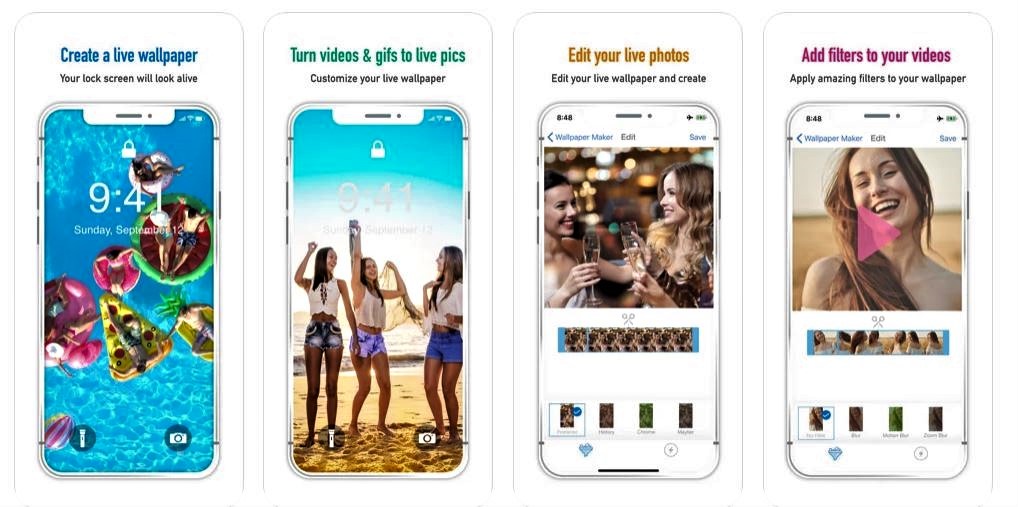
Like on the iPhone, the method for how to make a video a live photo on Android is pretty straightforward. All you need is a third-party app called TurnLive – Live Wallpaper App. Just go to the Google Play Store and download the app on your phone. Like intoLive, TurnLive is free but also has premium features behind a paywall.
Download TurnLive – Live Wallpaper App on Android
Step 2: Choosing Your Video File
Once you’ve downloaded TurnLive, it’s time to learn how to make video a live photo using the app. To do this, all you need is to launch the app and accept its terms of service. Afterward, just tap on the “Live Photo” icon (three circles icon) at the bottom of the app.
This should redirect you to another page where you can create your wallpaper. Within this page, tap the “Video to Live Wallpaper” option and allow access to your camera and photos. Afterward, you should see all the videos you have saved on your smartphone. Pick the one you want and then tap “Done” on the upper-right.
Step 3: Editing
Afterward, TurnLive should load the video and redirect you to the editing page. Like intoLive, TurnLive also has a maximum length of five seconds for live photos. Hence, you’ll need to edit the clip and turn it into a five-second snippet.
However, before we get to that, TurnLive will ask you which frame you’d like to use as the cover. Pick one snapshot within the video and then hit “Next.” Afterward, the video should present a slider at the bottom that you can use to cut the video. Just drag each edge of the slider to create your five-second snippet.
Unfortunately, the video-editing tool for this app is a little unintuitive. For example, sometimes you need to tap on each edge multiple times before it’s selected. Moreover, moving the snippet to a new part of the video requires you to manually drag each edge. Granted, it’s not the best video editor, but it works.
On the other hand, you can also add and use filters the app provides below the slider. You can change the speed, add a blur, or change the video’s effects.
Step 4: Finishing Your Live Photo
Once you’re satisfied with your edit, just hit the “Next” button on the upper-right. Afterward, select the number of times you want the live photo to repeat, depending on your preference. Then, your live photo should finish processing after a little while. You can tap the “My Wallpapers” heading and find it there once it’s done.
Step 5: Downloading the Live Photo
Congratulations, you’ve successfully learned how to make a video a live photo using TurnLive. All that’s left to do is to go to your newly created live photo and tap the download icon. Doing this will prompt the app to ask you if you want to clear your current wallpaper.
If you do, tap “Clear” and provide the app with the necessary permissions to access system settings. Once that’s done, go back to the app and hit “Clear” again to download. Afterward, you should find a black screen that’s labeled “DayTime LWP.” Just tap “Set wallpaper” within this screen and set your live photo as your wallpaper. You can choose to set it as your home screen, lock screen, or both.
How to Make a Live Photo into a Video
Now that you know how to make a video a live photo, you can perfectly create more dynamic wallpapers. However, what if you want to do the reverse? Live photos are fun as is, but they’re not always shareable with other users.
Moreover, you can’t share them in high-quality, making the photo shoddy and unsatisfying to view. On the other hand, live photos also sometimes convert into still photos when shared. Hence, learning how to make a live photo a video is also a crucial skill.
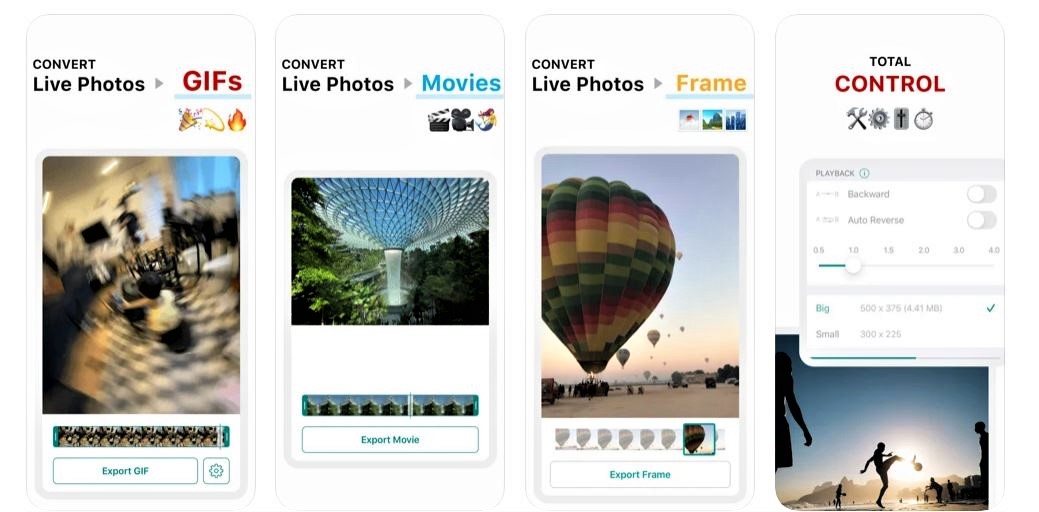
Thankfully, there is an easy way to do this on the iPhone through the Lively app. Within the app, choose the live photo you want and then select the “Movie” tab at the top. Afterward, you can edit the video’s length through the slider or toggle the sound options by tapping the video.
Afterward, just hit the “Export Movie” button on the bottom. This will open a share sheet where you can share the video or save it in your gallery. To save it, tap the “Save” icon at the bottom-left. With that, you’ve successfully learned how to make a live photo to a video.
Download Lively App on App Store
Benefits of Making a Live Photo
Now you know how to make a video a live photo and vice versa. However, it’s not always clear why creating live photos is so important. Why is learning how to make a video a live photo something you need?
Frankly speaking, it’s not exactly a required skill that people should learn. However, if you’re fond of the effect of live photo wallpapers, it’s pretty useful to know. Knowing how to make a video a live photo is a neat way to remind yourself of fond memories.
You can see the moment your child first spoke, walked, or ran all the time through your wallpaper. On the other hand, you can play your favorite animation cycle on loop right on your home screen. There are millions of use cases, but of course, it all boils down to personal preference.