
Are you tired of being constantly interrupted by notifications on your iPhone? Do you wish to have some uninterrupted peace and quiet? Thankfully, there’s a solution! The Do Not Disturb feature on your iPhone allows you to silence notifications and calls, ensuring that you can focus on what’s important without any disruptions. Whether you’re in a meeting, enjoying some quality time with loved ones, or simply need a break from the constant influx of notifications, enabling Do Not Disturb can provide the peace of mind you’re seeking. In this article, we’ll guide you step-by-step on how to enable Do Not Disturb on your iPhone, so you can have a more peaceful and uninterrupted experience with your device. Let’s get started!
Inside This Article
- How To Enable Do Not Disturb On iPhone
- Schedule Do Not Disturb
- Manually Activate Do Not Disturb
- Customize Do Not Disturb Settings
- Exceptions for Do Not Disturb
- Conclusion
- FAQs
How To Enable Do Not Disturb On iPhone
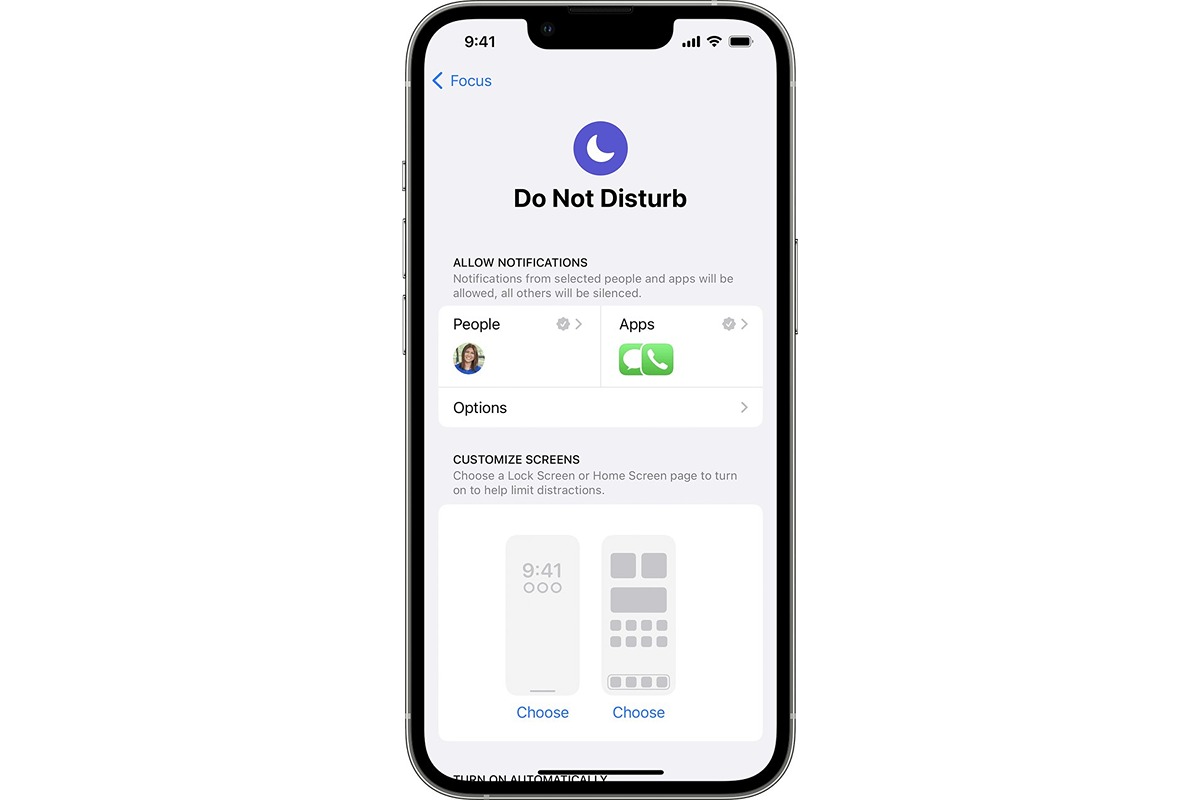
Do Not Disturb is a useful feature on the iPhone that allows you to enjoy uninterrupted time without being bothered by calls or notifications. Whether you’re in a meeting, sleeping, or simply need some quiet time, enabling Do Not Disturb can help you stay focused and undisturbed. Here’s a step-by-step guide on how to enable Do Not Disturb on your iPhone.
Schedule Do Not Disturb
If you want to automate the activation of Do Not Disturb, you can schedule it to turn on and off at specific times. This is especially useful when you have a regular routine, such as during nighttime when you want to ensure that you won’t be disturbed while sleeping. Here’s how to schedule Do Not Disturb:
- Open the Settings app on your iPhone.
- Scroll down and tap on “Do Not Disturb.”
- Toggle on the “Scheduled” option.
- Set the “From” and “To” times to specify when Do Not Disturb should be enabled.
Once you have set the schedule, Do Not Disturb will automatically activate and deactivate based on the specified times.
Manually Activate Do Not Disturb
If you don’t want to schedule Do Not Disturb or need to activate it immediately, you can manually enable it with just a few taps. Here’s how:
- Swipe up from the bottom of your iPhone’s screen to access the Control Center.
- Tap on the crescent moon icon to activate Do Not Disturb.
When Do Not Disturb is enabled, you will see a crescent moon icon in the status bar at the top of your screen. This indicates that notifications and calls will be silenced until you disable Do Not Disturb.
Customize Do Not Disturb Settings
Customizing the Do Not Disturb settings allows you to tailor its behavior to your specific needs. Here are some options you can modify:
- Allow Calls From: You can choose to allow calls from everyone, no one, or specific groups in your Contacts.
- Repeated Calls: When this is turned on, a second call from the same person within three minutes will not be silenced.
- Silence: You can choose whether to have your iPhone only vibrate or completely silence all calls and notifications.
To customize your Do Not Disturb settings, follow these steps:
- Open the Settings app on your iPhone.
- Tap on “Do Not Disturb.”
- Adjust the desired settings according to your preferences.
Exceptions for Do Not Disturb
There may be certain contacts or events that you don’t want to be silenced by Do Not Disturb. Apple provides a way to allow exceptions to this feature. Here’s how:
- Go to the Settings app on your iPhone.
- Tap on “Do Not Disturb.”
- Scroll down to the “Allow Calls From” section and tap on it.
- Choose the desired option, such as “Favorites,” “All Contacts,” or “No One.”
By allowing exceptions, you can ensure that important calls or messages will still come through, even when Do Not Disturb is enabled.
Now that you know how to enable Do Not Disturb on your iPhone, you can take advantage of this feature to enjoy uninterrupted time whenever you need it. Whether you want to focus on work, get a good night’s sleep, or simply have some quiet time, Do Not Disturb has got you covered.
Schedule Do Not Disturb
One of the most useful features on the iPhone is the ability to schedule Do Not Disturb. This feature allows you to automatically silence all notifications and calls during specific times, such as when you’re asleep or in a meeting.
To schedule Do Not Disturb on your iPhone, follow these simple steps:
- Open the “Settings” app on your iPhone.
- Scroll down and tap on “Do Not Disturb.”
- Toggle the switch next to “Scheduled” to enable it.
- Select the “From” and “To” times for when you want Do Not Disturb to be active.
By scheduling Do Not Disturb, you can ensure that your iPhone stays silent and undisturbed during certain hours of the day or night.
This feature is especially useful if you have a regular sleep schedule and want to avoid being woken up by notifications or calls. It’s also helpful for maintaining focus during important meetings or events.
Once you’ve set up the schedule, your iPhone will automatically enter Do Not Disturb mode during the specified times. You’ll still receive notifications, but your device will remain silent and won’t vibrate or light up.
Scheduling Do Not Disturb is a great way to take control of your iPhone’s notifications and create a more peaceful and uninterrupted user experience.
Manually Activate Do Not Disturb
If you’re in a situation where you need uninterrupted time on your iPhone, whether it’s for work, study, or simply to enjoy some peaceful moments, the Do Not Disturb feature comes in handy. With just a few taps, you can activate Do Not Disturb and ensure that your iPhone stays silent and distraction-free. Here’s how to manually activate Do Not Disturb on your iPhone:
1. Open the Control Center by swiping down from the top right corner of the screen on iPhone X or newer models, or by swiping up from the bottom of the screen on older iPhone models.
2. Look for the crescent moon symbol, which represents Do Not Disturb. Tap on it to activate Do Not Disturb.
3. Once Do Not Disturb is activated, you will see a moon icon in the status bar at the top of your screen, indicating that Do Not Disturb is on.
That’s it! You have successfully activated Do Not Disturb on your iPhone. You won’t receive any calls, notifications, or alerts until you turn off Do Not Disturb.
To turn off Do Not Disturb, simply follow the same steps: open the Control Center and tap on the crescent moon symbol to deactivate Do Not Disturb. Alternatively, you can also disable Do Not Disturb by going to Settings > Do Not Disturb and toggling off the switch.
Customize Do Not Disturb Settings
Do Not Disturb is a handy feature on iPhones that allows you to silence calls, notifications, and alerts when you don’t want to be disturbed. However, did you know that you can customize the Do Not Disturb settings to fit your specific needs? Here are some ways you can personalize this feature:
- Silence: Always or Only when iPhone is locked
- Allow Calls From:
- Repeated Calls:
- Schedule:
- Bedtime Mode:
You have the option to choose whether you want your iPhone to be always silent when Do Not Disturb is enabled or only when the iPhone is locked. This can be helpful if you still want to receive notifications when using your iPhone but want it to remain silent while it’s locked.
You can decide if you want to allow calls from everyone, only your contacts, or specific groups in your contacts list. This way, you can ensure that important calls can still come through while others are silenced.
In emergency situations, it’s important to be reachable. With the Repeated Calls option, if someone calls you twice within three minutes, the second call will not be silenced, even if Do Not Disturb is enabled. This can be useful in urgent or pressing situations where you need to be available.
If you have a consistent daily routine, you can schedule Do Not Disturb to automatically activate and deactivate at specific times. This is great for silencing notifications during your sleep or when you’re in important meetings or appointments.
Bedtime Mode is a feature in the Clock app that can be integrated with Do Not Disturb settings. It helps you establish a regular sleep routine by dimming the display and limiting interruptions during the designated bedtime. This way, you can have a more peaceful and restful sleep without any distractions.
By customizing the Do Not Disturb settings, you can effectively manage your iPhone’s notifications and calls, ensuring that you have control over when and how you are alerted. These personalized settings help you create a peaceful and interruption-free environment, allowing you to focus on what matters most to you.
Exceptions for Do Not Disturb
While Do Not Disturb is a useful feature to keep your iPhone quiet and free from distractions, there may be some important calls or notifications that you don’t want to miss. That’s where the Exceptions for Do Not Disturb come in.
Here’s how you can customize the exceptions for Do Not Disturb on your iPhone:
Allow Calls From: With this option, you can choose who can call you even when Do Not Disturb is enabled. You can allow calls from everyone, your favorites, specific groups, or specific contacts.
Repeated Calls: Activate this option to allow a second call from the same person within three minutes to ring through, even when Do Not Disturb is on. This can be useful in case of emergencies or urgent matters.
Allow Calls From: With this option, you can choose who can call you even when Do Not Disturb is enabled. You can allow calls from everyone, your favorites, specific groups, or specific contacts.
Do Not Disturb While Driving: This feature is designed to prevent distractions while driving. When enabled, incoming calls and notifications are silenced, and an automatic reply is sent to the sender. You can set it to activate automatically when your iPhone detects that you’re driving or choose to enable it manually.
Allow Repeated Calls: By toggling on this option, you can allow a call from the same person within three minutes to ring through, even if Do Not Disturb is enabled. This ensures that urgent calls can still reach you.
Silence: With this option, you can specify how incoming calls and notifications are handled when the iPhone is locked. You can choose to silence them completely or allow them to sound an alert. This gives you control over how notifications are received during different situations.
Bedtime: If you use the Bedtime feature in the Clock app, enabling this option will automatically enable Do Not Disturb during your scheduled bedtime. This ensures a peaceful night’s sleep without any interruptions.
Emergency Bypass: This option allows certain contacts to bypass the Do Not Disturb settings and ring through even when it is activated. It can be useful for important contacts or in emergency situations where you don’t want to miss any incoming calls.
Reply With Message: With this option, you can set up an automatic reply to be sent to incoming calls or messages when Do Not Disturb is enabled. It allows you to inform the sender that you are currently unavailable and will respond later.
By customizing these exceptions for Do Not Disturb, you can have more control over the calls and notifications you receive, ensuring that you don’t miss anything important while still enjoying the benefits of a quiet and distraction-free iPhone.
Conclusion
Enabling the “Do Not Disturb” feature on your iPhone is a simple yet powerful way to regain control over your phone notifications. Whether you’re in a meeting, enjoying quality time with loved ones, or simply need some uninterrupted focus, Do Not Disturb allows you to silence incoming calls, messages, and notifications.
By following the step-by-step guide outlined in this article, you will now be able to easily activate Do Not Disturb mode and customize its settings to suit your specific needs. Remember, this feature can be manually turned on or scheduled to automatically activate during specific times and events.
With Do Not Disturb enabled, you can have peace of mind knowing that your iPhone won’t bother you when you need some quiet time. Stay focused, stay connected, and enjoy a distraction-free experience with the Do Not Disturb feature on your iPhone.
FAQs
Q: How do I enable Do Not Disturb on my iPhone?
A: To enable Do Not Disturb on your iPhone, simply go to the Settings app, scroll down and tap on “Do Not Disturb”. From there, you can toggle the feature on or off, or customize its settings to your preference.
Q: What does Do Not Disturb mode do on the iPhone?
A: Do Not Disturb mode on the iPhone allows you to silence calls, notifications, and alerts while your device is locked. This feature ensures uninterrupted focus, preventing unnecessary interruptions and distractions during important tasks or when you need some quiet time.
Q: Can I schedule Do Not Disturb mode on my iPhone?
A: Yes, you can schedule Do Not Disturb mode on your iPhone. In the Do Not Disturb settings, you will find the option to set a specific time frame for the feature to automatically activate and deactivate. This is useful if you want to establish a consistent period of uninterrupted time every day.
Q: Will Do Not Disturb mode still allow important calls to come through?
A: By default, Do Not Disturb mode will silence incoming calls and notifications. However, you can customize the settings to allow calls from your favorites, specific contacts, or repeated calls to bypass the feature. This ensures that important calls can still reach you, even when you’re in Do Not Disturb mode.
Q: Can I set up Do Not Disturb mode to activate automatically when I’m in a meeting?
A: Yes, you can use the iPhone’s “Do Not Disturb While Driving” feature to automatically activate Do Not Disturb mode when your device detects that you’re in a moving vehicle. Additionally, some third-party calendar and reminder apps can integrate with Do Not Disturb mode to enable automatic activation based on meeting and event schedules.