
When it comes to managing our smartphone usage, one feature that has become essential is the “Do Not Disturb” (DND) mode. This convenient option allows us to silence notifications and calls, helping us stay focused or enjoy uninterrupted moments of peace. However, with the constant updates to smartphone operating systems, it’s not uncommon for users to wonder, “Where is Do Not Disturb on iPhone?” Whether you’ve recently switched to an iPhone or you’re simply looking for a refresher on utilizing this feature, you’ve come to the right place. In this article, we’ll explore the various ways to access and enable Do Not Disturb mode on your iPhone, ensuring you have the freedom to customize your notifications and reclaim control over your mobile experience. So, let’s dive in and discover how to find and use Do Not Disturb on your iPhone.
Inside This Article
- Enabling Do Not Disturb on iPhone
- Customizing Do Not Disturb Settings
- Setting Do Not Disturb on a Schedule
- Allowing Important Calls on Do Not Disturb mode
- Conclusion
- FAQs
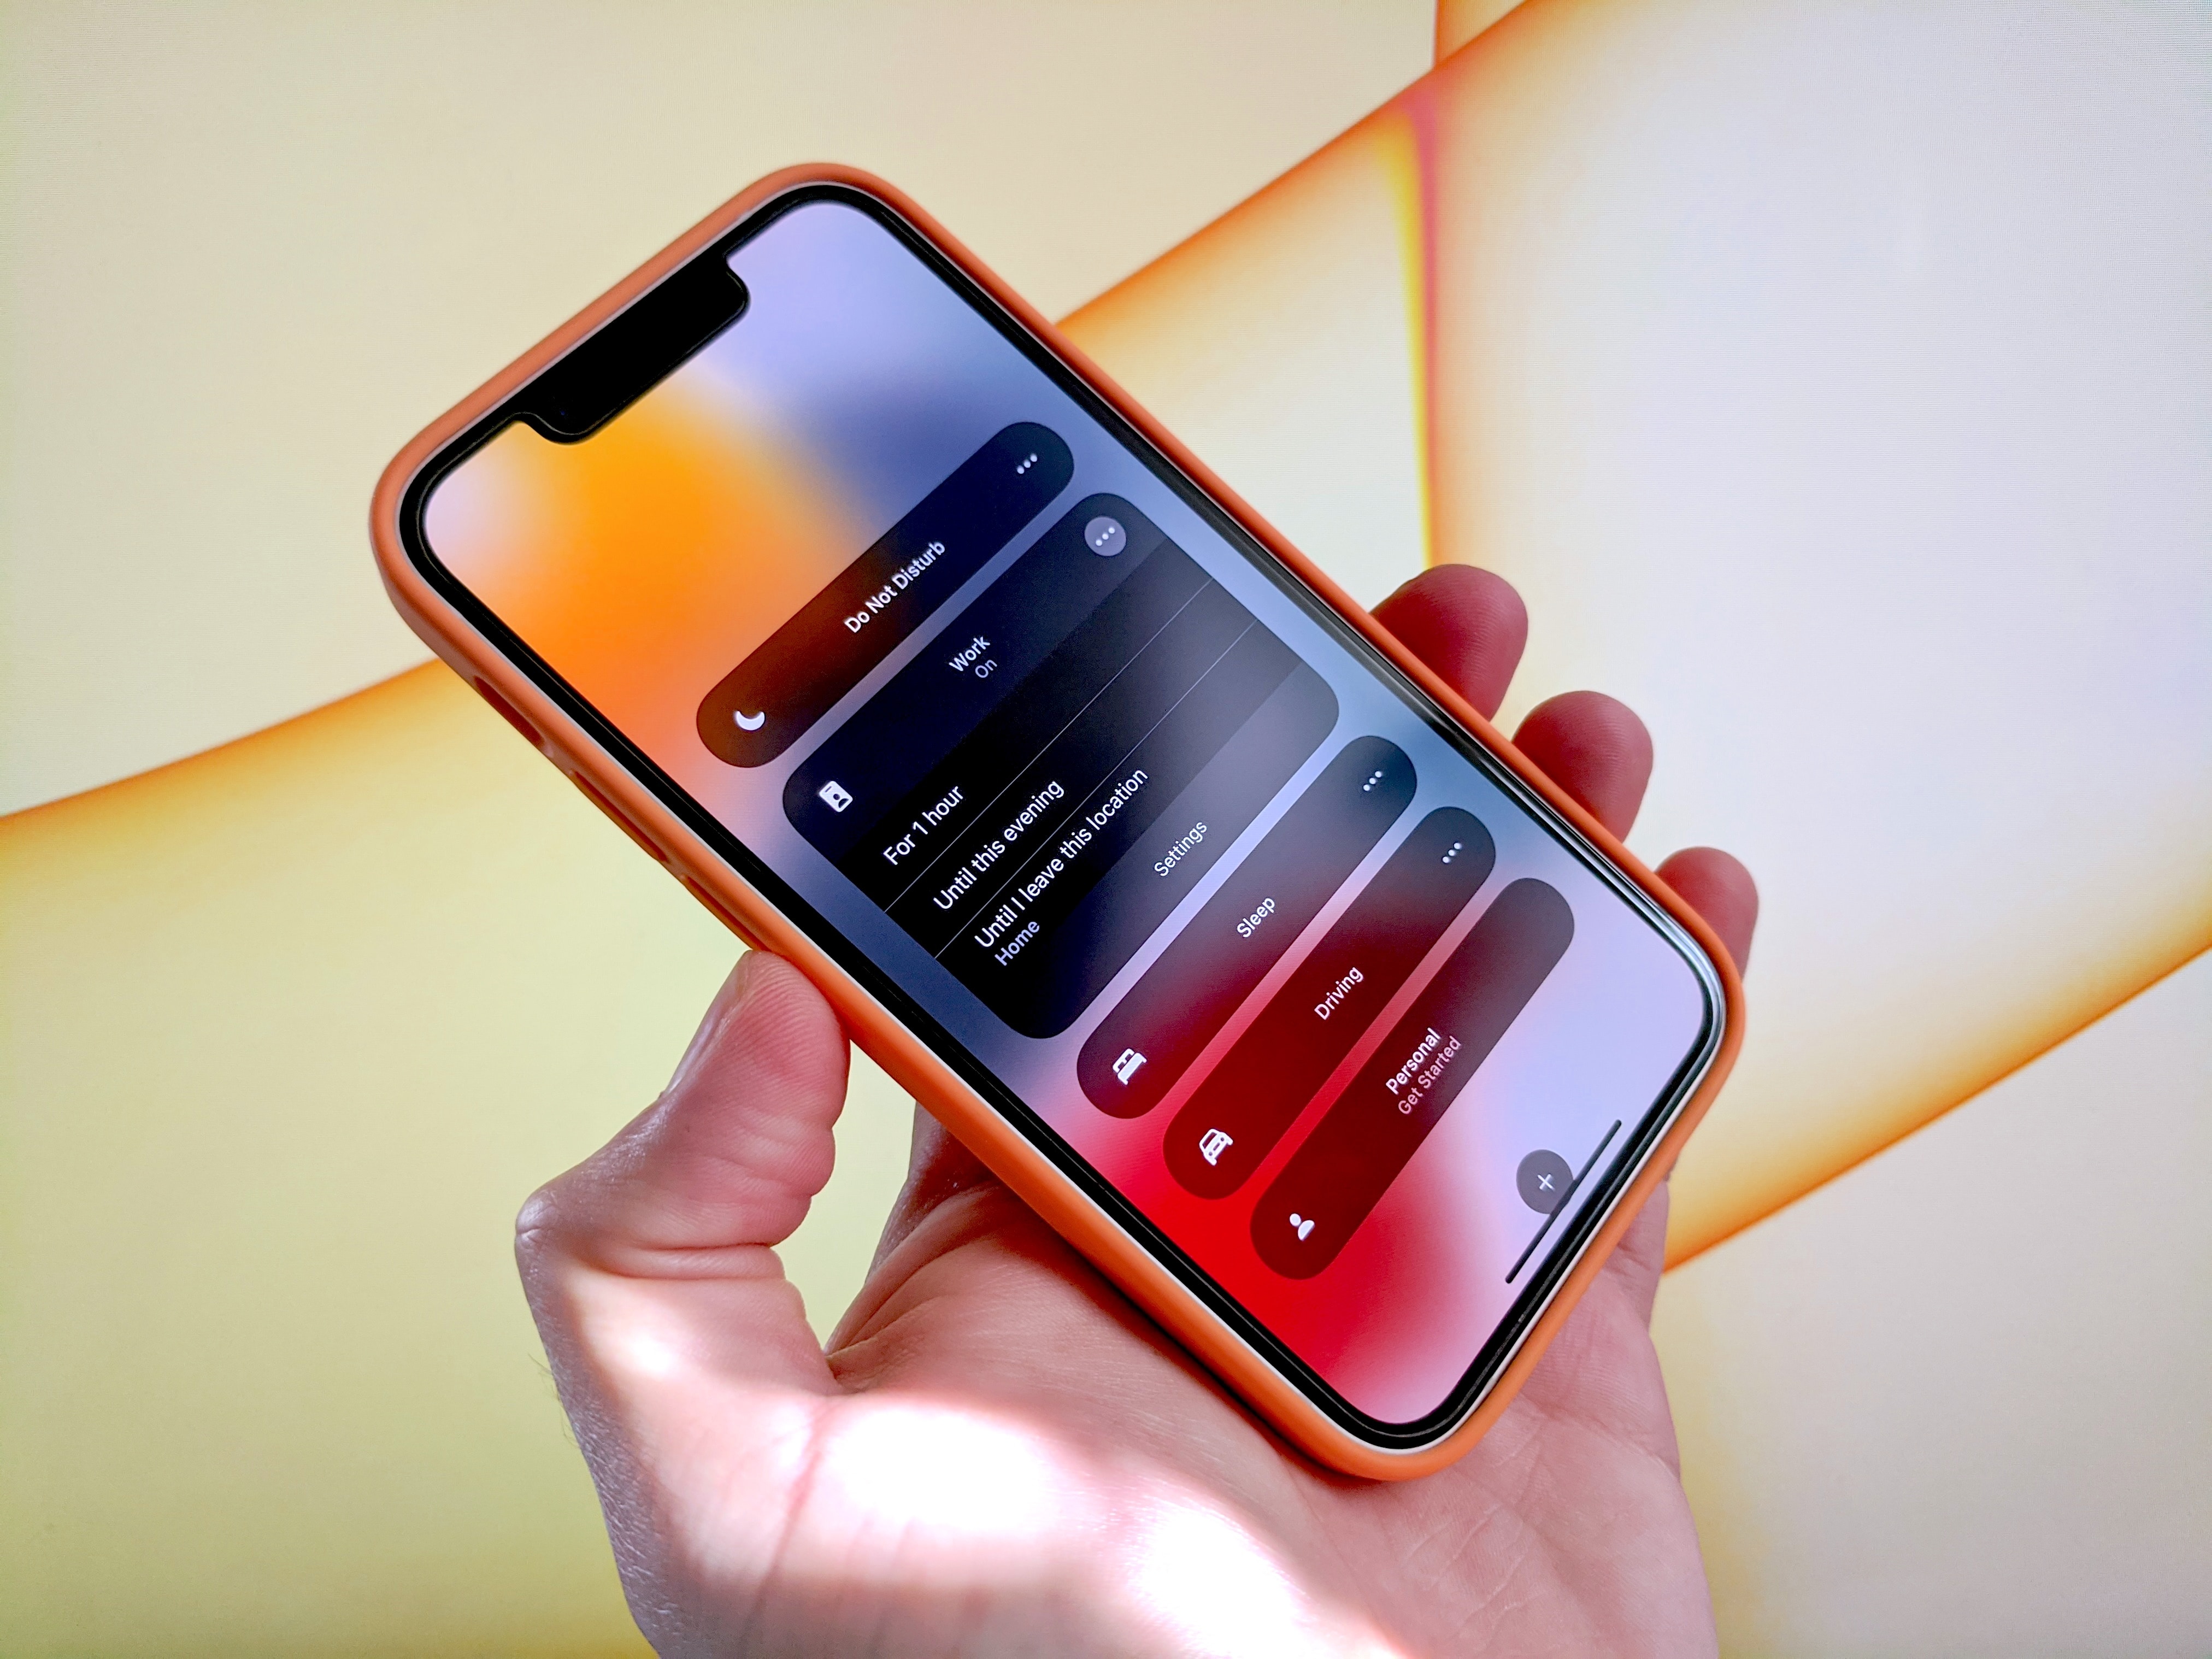
Enabling Do Not Disturb on iPhone
Do Not Disturb is a highly useful feature available on iPhones that allows you to temporarily silence calls, messages, and notifications. It comes in handy when you want to enjoy some uninterrupted time or prevent your phone from distracting you during important meetings or while sleeping. Enabling Do Not Disturb on your iPhone is simple and can be done in just a few steps.
To enable Do Not Disturb on your iPhone, follow these easy steps:
- Open the “Settings” app on your iPhone. You can find the app icon on your home screen.
- Scroll down and tap on “Do Not Disturb”. It should be listed in the settings menu.
- Toggle the switch next to “Do Not Disturb” to turn it on. You will see the moon icon appear in the status bar, indicating that Do Not Disturb is now active.
Once you have enabled Do Not Disturb, your iPhone will automatically silence calls, messages, and notifications by default. However, you can customize the settings to allow certain calls and enable other options.
Customizing your Do Not Disturb settings gives you more flexibility and control over how the feature works. Here’s how you can do it:
- Go back to the “Do Not Disturb” settings screen.
- Scroll down to find options like “Silence”, “Allow Calls From”, and “Repeated Calls”.
- By default, “Silence” is set to “Always.” You can choose to change it to “Only while iPhone is locked” if you want to receive calls when your phone is unlocked.
- Under “Allow Calls From”, you can select “Everyone” if you don’t want to restrict incoming calls or choose “Favorites” if you only want calls from your contacts marked as favorites. Another option is “No One” to silence all calls.
- “Repeated Calls” allows you to receive calls from the same number if they call you twice within three minutes. This can be helpful in emergency situations when someone needs to reach you urgently.
Once you have customized the Do Not Disturb settings to your liking, you can easily activate and deactivate the feature as needed. Simply swipe up from the bottom of your screen to access the Control Center and tap on the moon icon to toggle Do Not Disturb on or off.
Enabling Do Not Disturb on your iPhone is a great way to have some much-needed quiet time or avoid distractions when you need to focus. Take advantage of this feature and customize it to suit your preferences for a more peaceful and uninterrupted smartphone experience.
Customizing Do Not Disturb Settings
While enabling Do Not Disturb on your iPhone is a great way to minimize distractions, you can further customize its settings to suit your preferences. Here are some ways to customize the Do Not Disturb settings:
- Silence: By default, Do Not Disturb mode will silence all calls and notifications. However, you can choose to allow certain calls to come through by customizing the Silence setting. To do this, go to Settings, then tap on Do Not Disturb. From there, you can select either “Always” to completely silence all calls and notifications, “While iPhone is locked” to silence calls only when the device is locked, or “Only while iPhone is locked” to silence calls and notifications only when the device is locked and not in use.
- Repeated Calls: Sometimes, you may want to make sure that important calls are not missed even when Do Not Disturb is enabled. To enable this, you can turn on the “Repeated Calls” option. When this is enabled, if the same person calls you within three minutes, the call will not be silenced, ensuring that urgent or repeated calls are not missed.
- Allow Calls From: In addition to allowing repeated calls, you can also customize Do Not Disturb so that calls from specific contacts come through even when it’s enabled. To do this, go to Settings, then tap on Do Not Disturb, and select “Allow Calls From.” From there, you can choose to allow calls from everyone, only your favorites, or specific groups in your contacts.
- Allow Messages From: Similar to allowing calls from specific contacts, you can also choose to allow messages from certain contacts to come through when Do Not Disturb is enabled. This can be especially useful if you want to receive urgent messages while still minimizing other notifications. To customize this setting, go to Settings, then tap on Do Not Disturb, and select “Allow Messages From.” From there, you can choose to allow messages from everyone, only your contacts, or specific groups.
- Schedule: Do Not Disturb mode can be scheduled to automatically enable and disable at specific times. This is especially handy if you want to ensure that you are not disturbed during certain hours, such as when you’re sleeping or in an important meeting. To schedule Do Not Disturb, go to Settings, then tap on Do Not Disturb, and select “Scheduled.” From there, you can set the start and end time for Do Not Disturb mode to activate and deactivate automatically.
By customizing these Do Not Disturb settings, you can have a more tailored and personalized experience when it comes to managing calls and notifications on your iPhone. Whether you want to allow important calls or messages to come through, or simply want to silence all distractions during certain hours, these customization options give you the flexibility to control your device’s behavior according to your needs.
Setting Do Not Disturb on a Schedule
One convenient feature of Do Not Disturb on iPhone is the ability to set it on a schedule. This means you can automatically enable Do Not Disturb during specific times of the day, ensuring a peaceful and uninterrupted experience during certain periods.
To set Do Not Disturb on a schedule, follow these steps:
- Open the Settings app on your iPhone.
- Scroll down and tap on “Do Not Disturb.”
- Toggle on the “Scheduled” option.
- Tap on “From” to set the start time for Do Not Disturb.
- Use the picker wheel to select the desired hour and minute.
- Tap on “To” to set the end time for Do Not Disturb.
- Again, use the picker wheel to choose the desired hour and minute.
Once you have set the schedule for Do Not Disturb, your iPhone will automatically activate and deactivate this mode during the specified times. This can be useful, for example, if you want to ensure uninterrupted sleep without having to manually enable or disable Do Not Disturb every night.
Additionally, you can customize the behavior of Do Not Disturb during the scheduled time by adjusting the “Allow Calls From” setting. By default, it is set to “Everyone.” However, if you prefer, you can choose to allow calls from specific groups of contacts or only from favorites.
Setting Do Not Disturb on a schedule gives you the flexibility to decide when you want to have uninterrupted time without distractions from incoming calls, notifications, and alerts. Whether it’s during your sleep time, work hours, or any other designated period, you can have full control over your iPhone’s interruptions.
Allowing Important Calls on Do Not Disturb mode
While enabling Do Not Disturb mode on your iPhone can help minimize interruptions, there may be instances when you want to allow important calls to come through even when the feature is activated. Fortunately, Apple has included a feature that allows you to customize the behavior of Do Not Disturb mode.
To allow important calls on Do Not Disturb mode, follow these steps:
- Open the Settings app on your iPhone and scroll down to find the “Do Not Disturb” option.
- Tap on “Do Not Disturb” to access the settings for this feature.
- Scroll down to the “Phone” section and select the “Allow Calls From” option.
- You will see different categories to choose from: “Everyone,” “No One,” “Favorites,” and “All Contacts.” Choose the option that suits your needs.
- If you select “Favorites,” only calls from the people you have added to your Favorites list will be allowed during Do Not Disturb mode.
- If you select “All Contacts,” calls from anyone in your contacts list will be allowed.
- You can also choose the “No One” option if you want to block all calls when Do Not Disturb mode is active.
In addition to these options, you can enable the “Repeated Calls” setting, which allows a second call from the same person within three minutes to bypass Do Not Disturb mode. This can be useful in case of emergency situations or urgent calls.
Furthermore, you can use the “Emergency Bypass” feature to allow specific contacts to reach you even when your iPhone is in Do Not Disturb mode. To enable Emergency Bypass for a specific contact, follow these steps:
- Open the Contacts app on your iPhone and select the desired contact.
- Tap on “Edit” in the top-right corner of the screen.
- Scroll down and tap on “Ringtone” or “Text Tone.”
- Toggle on the “Emergency Bypass” switch next to the option you selected.
- Tap “Done” to save the changes.
By enabling Emergency Bypass for a contact, you ensure that their calls or messages will always ring through, even when Do Not Disturb mode is activated.
With these customization options, you can strike a balance between receiving important calls and minimizing distractions on your iPhone when Do Not Disturb mode is turned on. It’s a useful feature for maintaining focus, especially during important meetings, events, or while you’re trying to get some uninterrupted rest.
Conclusion
In conclusion, the Do Not Disturb feature on iPhone is a valuable tool for managing interruptions and maintaining focus in today’s fast-paced world. With just a few simple steps, users can easily enable or disable the Do Not Disturb feature on their iPhone, allowing them to customize their notification settings according to their preferences.
Whether you’re in a meeting, taking a nap, or simply need some uninterrupted time to focus, activating Do Not Disturb ensures that your iPhone won’t ring, vibrate, or display any notifications. You can also set scheduled periods for Do Not Disturb or allow certain calls to come through in case of emergencies.
Additionally, you can take advantage of various options such as Bedtime Mode, which dimming the display and silencing notifications at night, or turning on Do Not Disturb While Driving to minimize distractions while on the road.
With Do Not Disturb on iPhone, you have the power to take control of your notifications and create a more peaceful and uninterrupted experience. So, next time you need some quiet time, remember where to find the Do Not Disturb feature on your iPhone and enjoy a moment of tranquility in our increasingly connected world.
FAQs
1. How do I enable Do Not Disturb on my iPhone?
To enable Do Not Disturb on your iPhone, simply swipe down from the top right corner of the screen to access the Control Center. Then, tap on the crescent moon icon to activate Do Not Disturb mode. Alternatively, you can go to the Settings app, scroll down to find “Do Not Disturb,” and toggle the switch to enable it.
2. Can I schedule Do Not Disturb on my iPhone?
Yes, you can schedule Do Not Disturb on your iPhone. Go to the Settings app, tap on “Do Not Disturb,” and then enable the “Scheduled” option. From there, you can set the specific start and end times for Do Not Disturb mode to automatically activate and deactivate.
3. What happens when Do Not Disturb is enabled?
When Do Not Disturb is enabled on your iPhone, it silences all incoming calls, notifications, and alerts. However, you can customize the settings to allow certain calls or notifications through, such as from your favorites or repeated calls.
4. Can I still receive calls or messages when Do Not Disturb is on?
While Do Not Disturb is on, calls and messages will be silenced and will not cause your phone to ring or vibrate. However, you can set exceptions to allow calls from specific contacts to come through even when Do Not Disturb is enabled.
5. Is there a way to customize the behavior of Do Not Disturb on my iPhone?
Absolutely! You can customize the behavior of Do Not Disturb on your iPhone by going to the Settings app and tapping on “Do Not Disturb.” From there, you can choose to allow calls from certain groups, enable “Repeated Calls” to ring through if the same number calls twice within three minutes, and even specify which apps can deliver notifications during Do Not Disturb mode.