
Are you struggling to connect to a wireless network on your Windows 10 device? One possible reason for this issue could be that the Windows Wireless Service is turned off. The Windows Wireless Service plays a crucial role in managing wireless connections on your computer, and if it is disabled, you won’t be able to connect to any wireless networks.
In this article, we will guide you through the process of turning on the Windows Wireless Service on your Windows 10 device. Whether you are using a laptop or a desktop computer, our step-by-step instructions will help you enable this service and regain the ability to connect to wireless networks effortlessly.
So, let’s dive into the world of Windows 10 wireless connectivity and learn how to turn on the Windows Wireless Service to stay connected anywhere, anytime!
Inside This Article
- How to Turn On Windows Wireless Service on Windows 10
- Checking Wireless Service Status
- Starting the Windows Wireless Service
- Modifying Wireless Service Startup Type
- Troubleshooting Wireless Service Issues
- Conclusion
- FAQs
How to Turn On Windows Wireless Service on Windows 10
Having a reliable wireless connection is crucial for staying connected and getting things done on your Windows 10 device. If you’re experiencing issues with your Wi-Fi connection or if it’s not working at all, it’s possible that the Windows Wireless Service is turned off. In this guide, we’ll show you step-by-step how to turn on the Windows Wireless Service on your Windows 10 computer.
Before we dive into the steps, it’s important to note that you will need administrative access to your device in order to perform these actions. Make sure you have the necessary permissions and let’s get started!
1. Checking Wireless Service Status
The first step in turning on the Windows Wireless Service is to check its current status. To do this, follow these simple steps:
- Press the Windows key on your keyboard.
- Type Services and click on the Services app from the search results.
- In the Services window, locate and double-click on WLAN AutoConfig.
- A new window will open. Check the Service status under the General tab. If it says Stopped, it means the Windows Wireless Service is currently turned off.
2. Starting the Windows Wireless Service
Now that we’ve confirmed that the Windows Wireless Service is off, let’s proceed to turn it on:
- In the WLAN AutoConfig Properties window, under the General tab, click on the Start button.
- Wait a few seconds for the service to start and then click OK.
The Windows Wireless Service should now be turned on. You can verify its status by following the steps mentioned in the previous section.
3. Modifying Wireless Service Startup Type
In some cases, the Windows Wireless Service may be set to start manually instead of automatically. To ensure that it starts automatically whenever you turn on your computer, here’s what you need to do:
- In the WLAN AutoConfig Properties window, under the General tab, locate the Startup type section.
- Click on the dropdown menu and select Automatic.
- Click Apply and then click OK to save the changes.
This will configure the Windows Wireless Service to start automatically whenever your Windows 10 device boots up.
4. Troubleshooting Wireless Service Issues
If you’re still encountering issues with your Wi-Fi connection after turning on the Windows Wireless Service, here are a few troubleshooting steps you can try:
- Restart your router and modem.
- Update your wireless network adapter drivers.
- Run the built-in Windows troubleshooters.
- Disable any third-party antivirus or firewall software temporarily.
If none of these steps resolve the problem, you may need to reach out to your internet service provider or a professional technician for further assistance.
Now that you know how to turn on the Windows Wireless Service on Windows 10 and troubleshoot any related issues, you can enjoy a stable and reliable Wi-Fi connection for all your computing needs.
Checking Wireless Service Status
Before you can turn on the Windows Wireless Service on your Windows 10 device, it’s important to check the current status of the service. Here’s how you can do it:
- Open the Start menu by clicking on the Windows icon in the bottom-left corner of the screen.
- Type “Services” into the search bar and click on the “Services” app in the search results. This will open the Services window.
- In the Services window, scroll down until you find the “WLAN AutoConfig” service. This service is responsible for managing wireless connections on your Windows 10 device.
- Check the status of the WLAN AutoConfig service. If it is listed as “Running,” then the wireless service is already turned on. If it is listed as “Stopped,” then the wireless service is currently turned off.
- If the WLAN AutoConfig service is stopped, you can right-click on it and select “Start” from the context menu. This will start the service and turn on the wireless functionality on your Windows 10 device.
By following these steps, you can easily check the status of the Windows Wireless Service on your Windows 10 device. If the service is already running, you can proceed to connect to a wireless network. If the service is stopped, you can start it to enable wireless connectivity.
Starting the Windows Wireless Service
When it comes to using the internet on your Windows 10 device, ensuring that the Windows Wireless Service is started is crucial. This service allows your computer to connect to wireless networks and access the internet seamlessly. If you’re experiencing connectivity issues or if the wireless service is not running, here are the steps to start it:
- Press the Windows key + R on your keyboard to open the Run dialog box.
- Type “services.msc” without quotes and press Enter to open the Services window.
- In the Services window, locate the “WLAN AutoConfig” service in the list.
- Right-click on “WLAN AutoConfig” and select “Start” from the context menu.
- Wait for a few moments while the service starts. You can check the status column to ensure that it’s running.
- Once the service is started, close the Services window.
By following these simple steps, you’ll be able to start the Windows Wireless Service on your Windows 10 device. This should help resolve any connectivity issues you may be facing and allow you to connect to wireless networks effortlessly.
Modifying Wireless Service Startup Type
To modify the startup type of the Windows Wireless Service on Windows 10, you will need to follow these steps:
- Open the Services application: Press the Windows key + R on your keyboard to open the Run dialog box. Type services.msc and press Enter.
- Locate the Windows Wireless Service: In the Services window, scroll down to find the “WLAN AutoConfig” service.
- Access the service properties: Double-click on the “WLAN AutoConfig” service to open its Properties window.
- Modify the startup type: In the Properties window, click on the “Startup type” dropdown menu. You will see options such as “Automatic”, “Automatic (Delayed Start)”, “Manual”, and “Disabled”.
- Select the desired startup type: Choose the appropriate startup type for the Windows Wireless Service based on your preference. For most cases, it is recommended to select “Automatic” so that the service starts automatically whenever you boot up your computer. However, if you want more control over when the service starts, you can choose “Manual”.
- Apply the changes: Once you have selected the desired startup type, click on the “Apply” button to save the changes.
- Restart your computer: To make sure the modified startup type takes effect, it is recommended to restart your computer. This will ensure that the Windows Wireless Service starts according to the new configuration.
By following these steps, you can easily modify the startup type of the Windows Wireless Service on Windows 10. Whether you want the service to start automatically or manually, adjusting the startup type allows you to customize your system’s wireless behavior based on your preferences.
Troubleshooting Wireless Service Issues
If you’re experiencing problems with your Windows Wireless Service, there are several troubleshooting steps you can take to resolve the issue. Here are some common issues and their potential solutions:
No Wireless Networks Found: If your Windows 10 device is unable to detect any wireless networks, there are a few things you can try. First, make sure that your Wi-Fi adapter is enabled. You can do this by going to the Network and Internet settings and checking the status of your Wi-Fi connection. If it’s disabled, simply enable it and see if the wireless networks show up. If that doesn’t work, try restarting your router and reconnecting to it. Sometimes, a simple reset can solve the problem.
Slow or Intermittent Connection: If you’re experiencing slow or intermittent connection issues, there are a few potential causes. First, check if there are any physical obstructions, such as walls or large objects, blocking the Wi-Fi signal. Move closer to the router or try repositioning it to improve signal strength. Additionally, you can try updating your Wi-Fi drivers by going to the Device Manager and selecting the appropriate device. Outdated or incompatible drivers can cause connectivity problems.
Authentication or Password Issues: If you’re having trouble connecting to a specific Wi-Fi network due to authentication or password issues, double-check that you’re entering the correct credentials. Passwords are case-sensitive, so make sure you’ve entered them correctly. If you’re still unable to connect, try forgetting the network and then reconnecting to it. This will erase any saved settings and force your device to establish a fresh connection.
Network Adapter Errors: If you’re encountering errors related to your network adapter, try disabling and re-enabling it. Go to the Device Manager, locate your network adapter, right-click on it, and select “Disable.” After a few seconds, right-click again and choose “Enable.” This action can reset the adapter and resolve any temporary issues. If the problem persists, you may need to update or reinstall the network adapter drivers.
Windows Updates: Sometimes, Windows updates can interfere with the wireless service. Make sure that your Windows 10 is up to date by checking for updates in the Windows Update settings. Install any available updates and restart your device. This can often resolve any compatibility issues and ensure that your wireless service is functioning correctly.
If none of these troubleshooting steps resolve the issue, it may be necessary to seek further assistance from a technical support professional or contact your device manufacturer for additional guidance.
Conclusion
In conclusion, turning on the Windows Wireless Service in Windows 10 is a straightforward process that can greatly enhance your browsing experience. By enabling this service, you can connect to wireless networks and enjoy the convenience of wireless internet access. The step-by-step guide provided in this article should help you navigate through the settings and successfully turn on the Windows Wireless Service on your Windows 10 device.
Remember to keep your device updated with the latest Windows updates to ensure smooth functionality. If you encounter any issues or difficulties, don’t hesitate to reach out to Microsoft support for further assistance. Now that you have the knowledge and tools to enable the Windows Wireless Service, you can stay connected and enjoy all the benefits of wireless internet access on your Windows 10 device.
FAQs
1. How do I turn on the wireless service in Windows 10?
To turn on the wireless service in Windows 10, follow these steps:
- Click on the Start menu and select “Settings” (the gear icon).
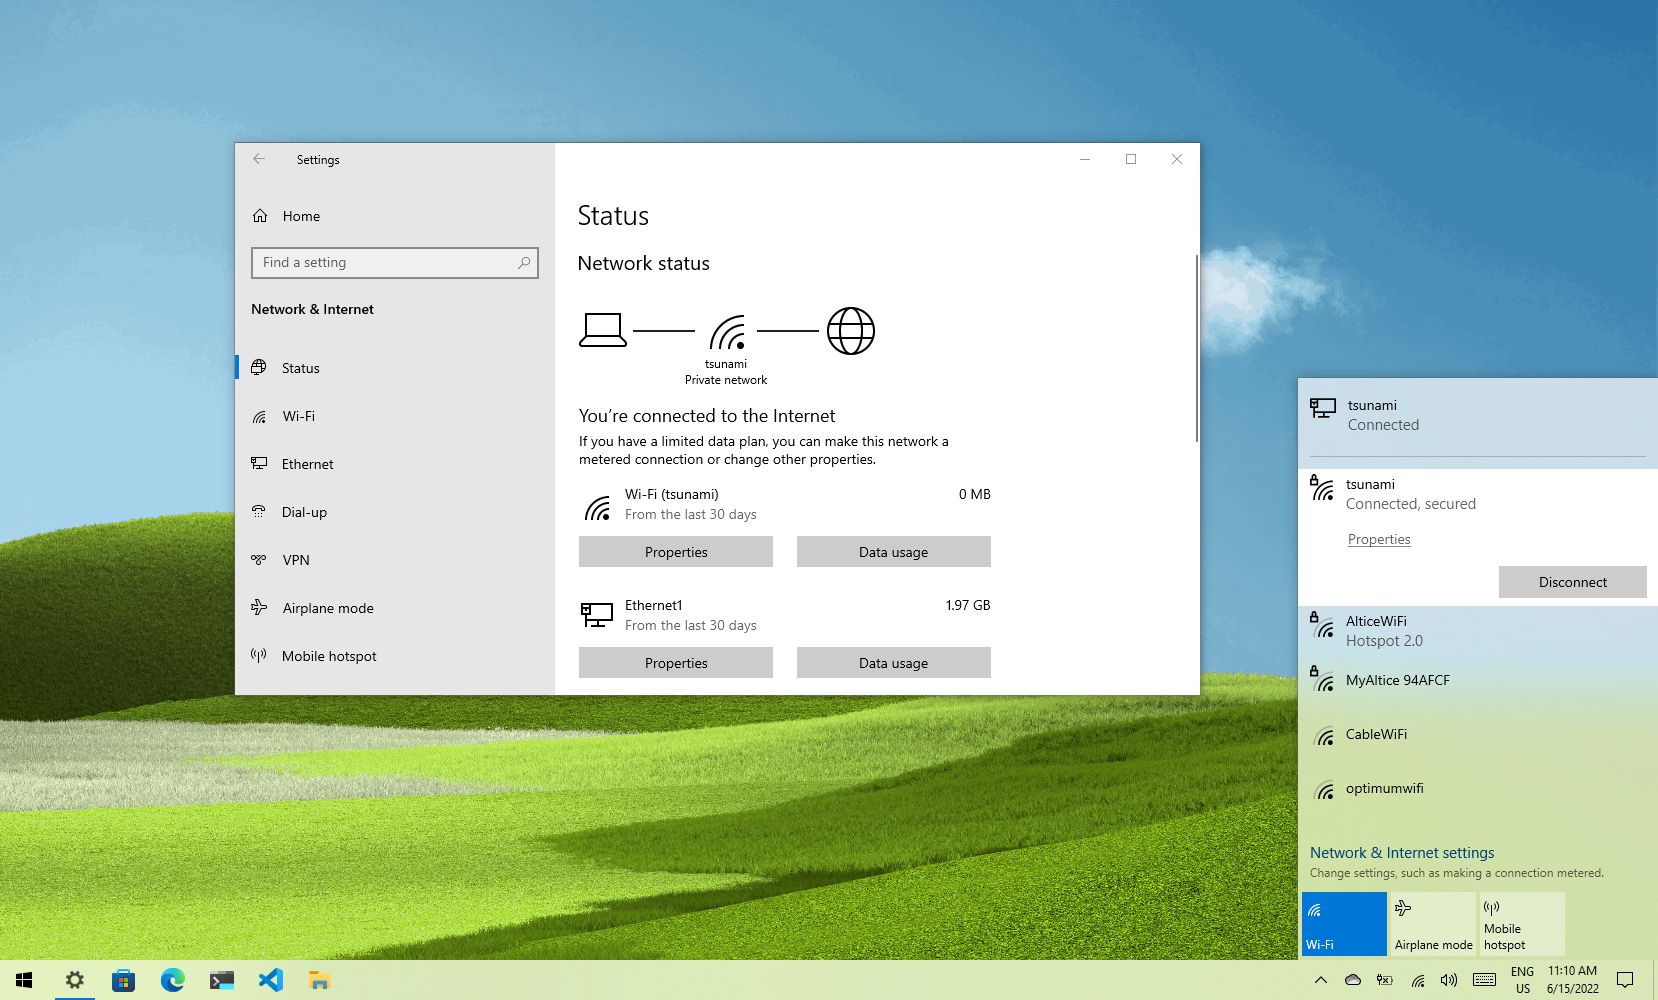
- In the Settings window, click on “Network & Internet.”
- In the left-hand panel, select “Wi-Fi.”
- Toggle the switch under “Wi-Fi” to the “On” position.
This will enable the wireless service and allow you to connect to available Wi-Fi networks on your Windows 10 device.
2. Why is my wireless service not turning on in Windows 10?
There could be several reasons why your wireless service is not turning on in Windows 10. Some common causes include:
- Hardware issues with your Wi-Fi adapter.
- Outdated or incompatible Wi-Fi drivers.
- Software conflicts or corruption.
- Disabled Wi-Fi service in your device’s BIOS settings.
If you’re experiencing this issue, try updating your Wi-Fi drivers, checking your hardware connections, and ensuring that the wireless service is enabled in both the device’s settings and BIOS.
3. Can I turn on the wireless service without using the Start menu?
Yes, you can turn on the wireless service in Windows 10 without using the Start menu. Here’s an alternative method:
- Press the Windows key + X on your keyboard to open the Power User menu.
- From the menu, select “Device Manager.”
- In the Device Manager window, expand the “Network adapters” category.
- Right-click on your Wi-Fi adapter and select “Enable.”
This will enable the wireless service on your Windows 10 device.
4. How do I troubleshoot wireless service issues in Windows 10?
If you’re facing issues with the wireless service in Windows 10, you can troubleshoot the problem using the built-in Network Troubleshooter. Follow these steps:
- Right-click on the network icon in the system tray and select “Troubleshoot problems.”
- Windows will run a diagnostic and attempt to fix any issues with your wireless service.
- If the troubleshooter is unable to resolve the problem, you can try resetting your network settings or contacting your internet service provider for further assistance.
5. Can I turn off the wireless service in Windows 10?
Yes, you can turn off the wireless service in Windows 10 if you want to disable Wi-Fi connectivity on your device. To do this, follow these steps:
- Click on the Start menu and select “Settings” (the gear icon).
- In the Settings window, click on “Network & Internet.”
- In the left-hand panel, select “Wi-Fi.”
- Toggle the switch under “Wi-Fi” to the “Off” position.
This will deactivate the wireless service on your Windows 10 device.