
Are you a digital artist or illustrator looking to create captivating patterns in Procreate? Look no further! In this article, we will dive into the world of Procreate and explore the various techniques you can use to make stunning patterns. Procreate is a powerful software that enables artists to unleash their creativity on their iPads and create intricate designs, illustrations, and now patterns!
Whether you’re a beginner or an experienced Procreate user, this tutorial will provide you with step-by-step instructions and tips to help you master the art of making patterns in Procreate. From selecting the perfect brushes and colors to arranging and blending elements, you’ll learn how to create eye-catching patterns that can be used for a wide range of projects, including digital artwork, product design, and more. So, grab your Apple Pencil, open up Procreate, and get ready to bring your pattern-making skills to the next level!
Inside This Article
- Choosing the Right Brush
- Creating a New Canvas
- Building the Base Pattern
- Adding Details and Enhancements
- Conclusion
- FAQs
Choosing the Right Brush
When it comes to creating patterns in Procreate, selecting the right brush is crucial. The brush you choose will heavily influence the texture, stroke, and overall visual appearance of your pattern. Here are some important factors to consider when choosing a brush:
1. Brush Type: Procreate offers a wide variety of brush types, including pencils, markers, inks, watercolors, and more. Each brush type has its own unique characteristics and effects, so choose one that aligns with the style and look you want to achieve.
2. Brush Settings: Within each brush type, you can further customize the settings to suit your needs. Experiment with brush size, opacity, flow, and pressure sensitivity to achieve the desired level of precision and control.
3. Texture and Grain: Some brushes have built-in textures or grain effects that can add depth and richness to your patterns. Consider exploring brushes with different textures to add visual interest and variety to your designs.
4. Color and Blend Modes: Look for brushes that offer a wide range of color options and blending modes. This will allow you to create seamless transitions and interesting color variations in your pattern.
5. Experiment and Practice: Don’t be afraid to experiment with different brushes and settings. Take the time to practice and familiarize yourself with the capabilities of each brush. This will help you develop your own unique style and achieve the desired effects in your patterns.
Remember, choosing the right brush is a personal preference and may vary depending on the specific pattern you’re creating. Take your time to explore and find the brush that best suits your artistic vision and creative goals.
Creating a New Canvas
When it comes to creating a new canvas in Procreate, you have the freedom to customize the size, orientation, and resolution of your project. This allows you to tailor your canvas to suit your specific pattern-making needs.
To create a new canvas, simply follow these steps:
- Open Procreate and tap on the “+” symbol to create a new artwork.
- In the “Canvas” tab, you will find various options to tweak your canvas settings. You can choose the dimensions, such as width and height, and choose the unit of measurement, such as pixels or inches.
- Additionally, you can determine the orientation of your canvas, whether it’s portrait or landscape.
- Consider the resolution of your canvas as well. A higher resolution will result in a crisper and more detailed pattern, but keep in mind that it may require more processing power and storage space.
- Once you have adjusted the settings according to your preferences, simply tap “Create” to generate your new canvas.
Now you have a blank canvas ready to be transformed into a unique and stunning pattern. Remember to save your work regularly to avoid losing any progress. Let’s move on to the next section to explore how to build the base pattern.
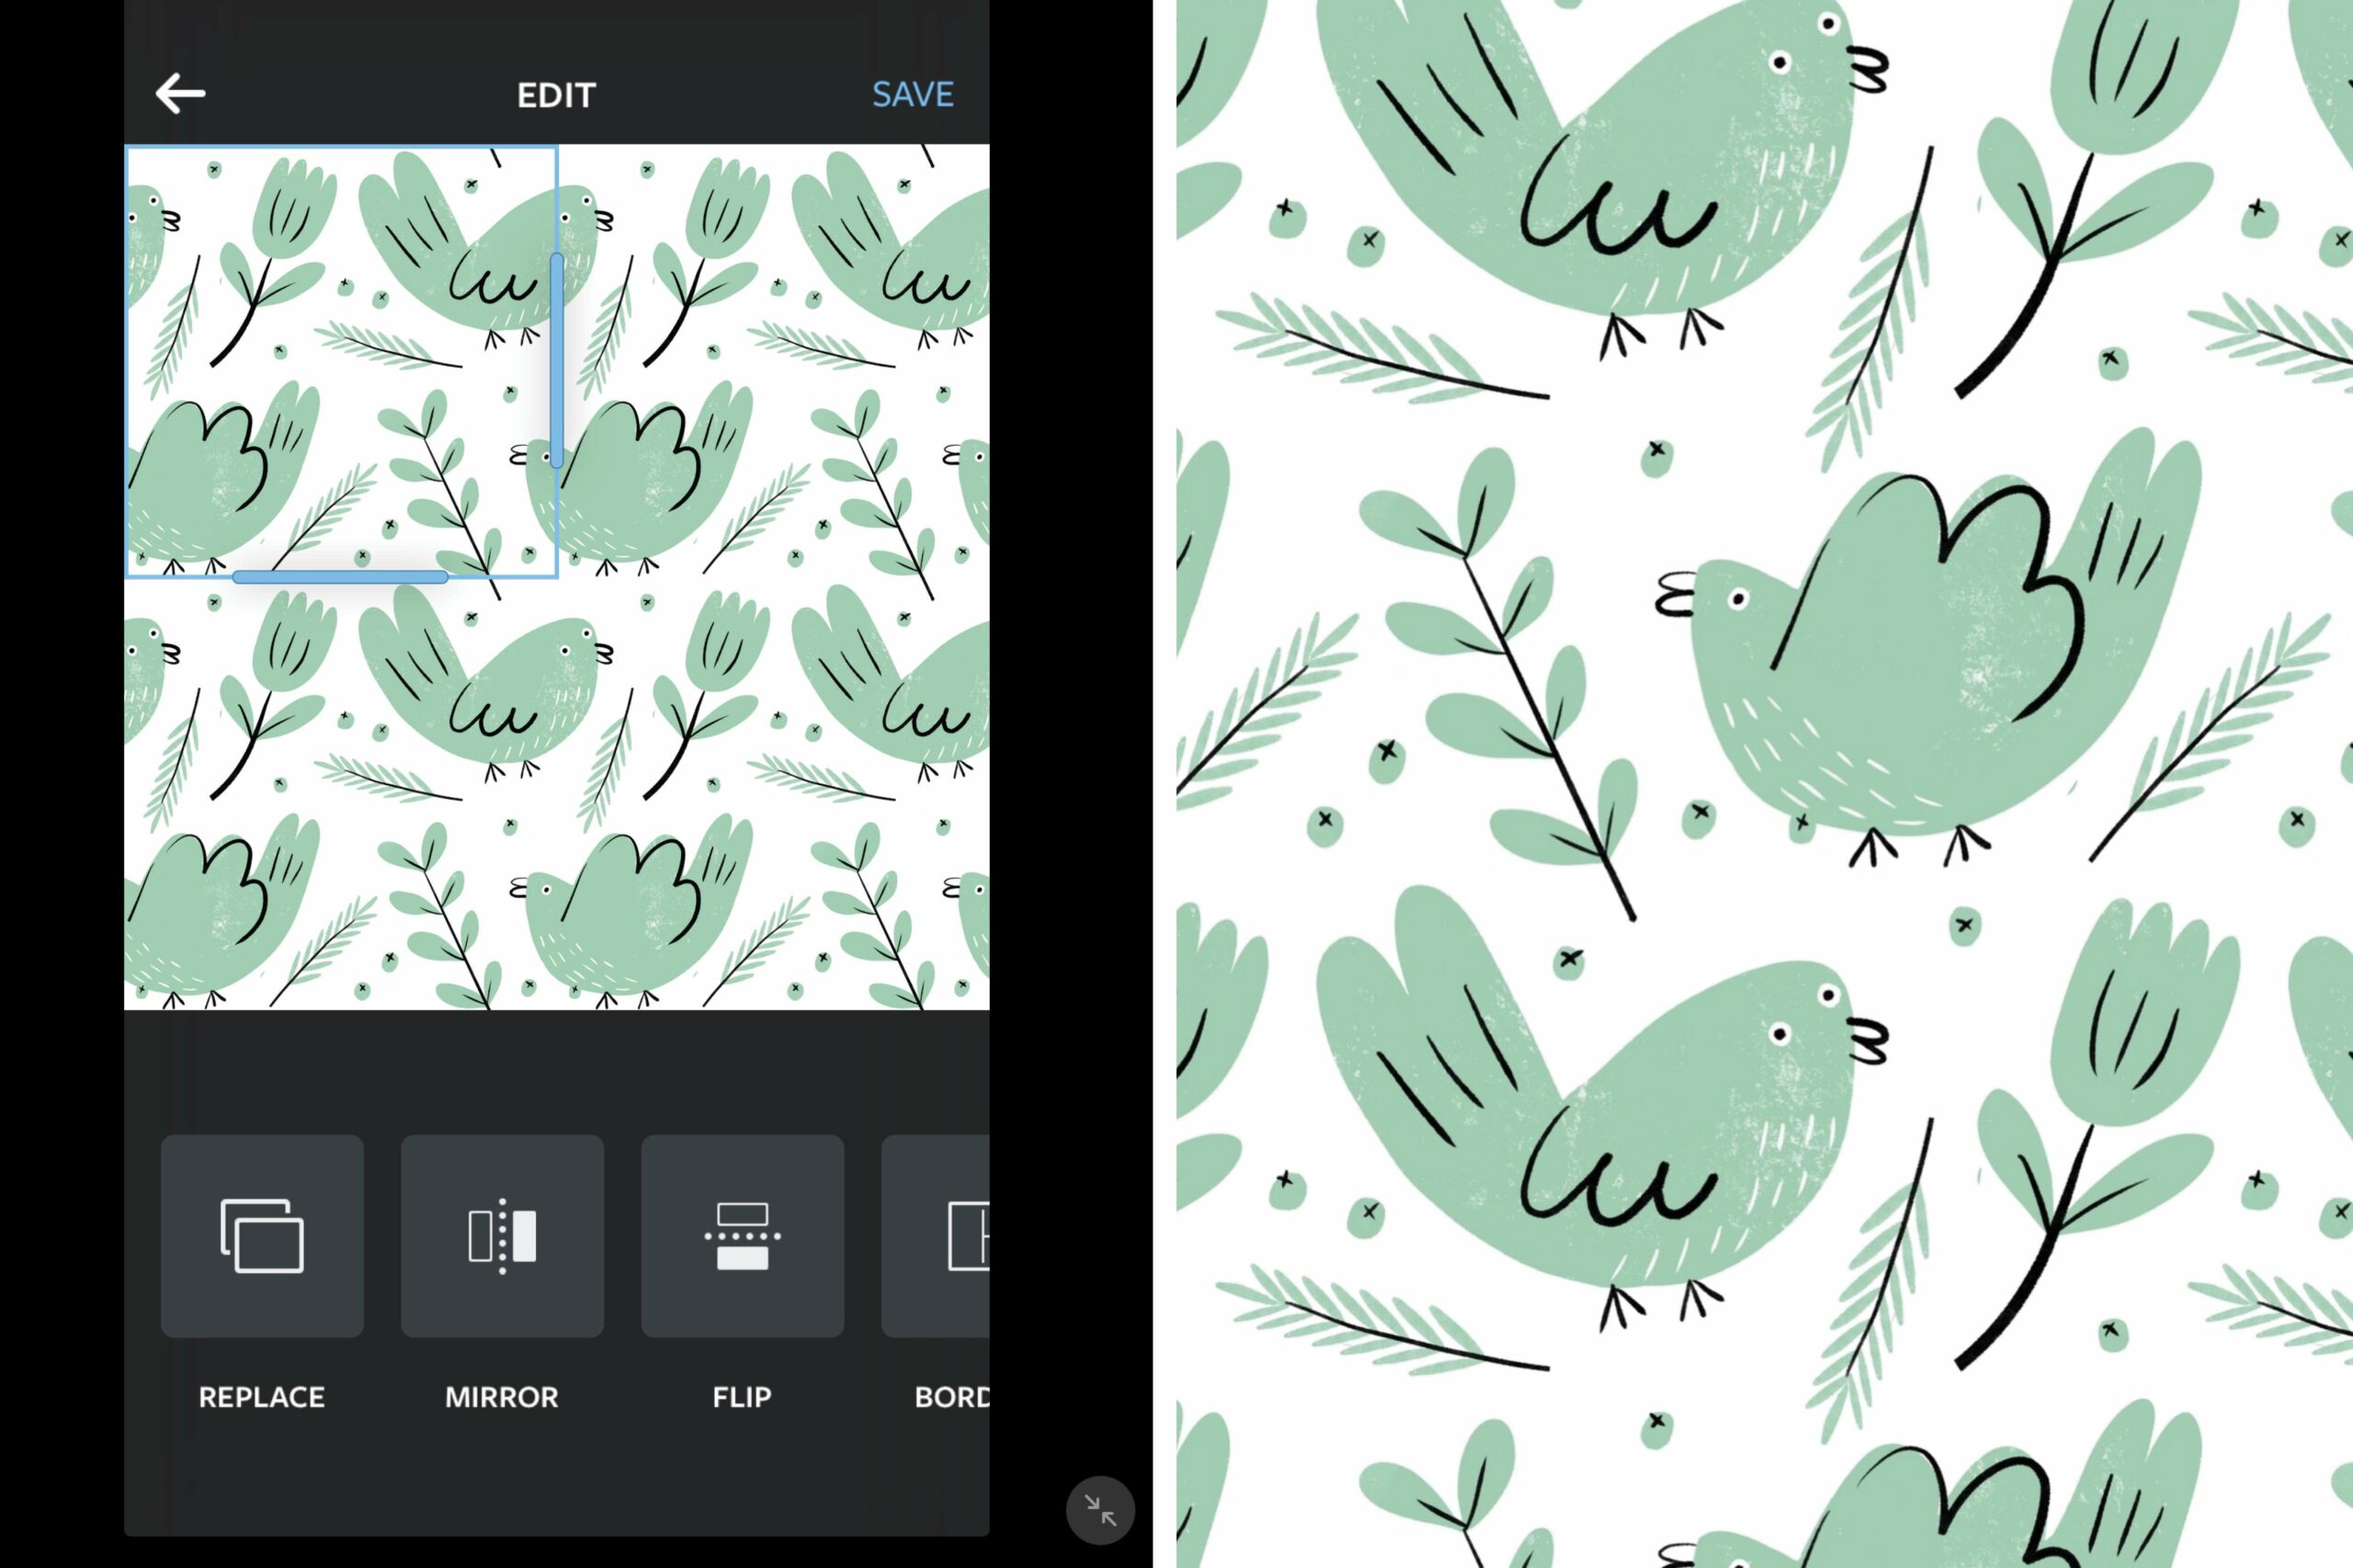
Building the Base Pattern
Building the base pattern is an essential step in creating a unique and visually appealing design in Procreate. This is where you lay down the foundation of your pattern and establish the overall structure and composition.
Here are a few steps to guide you through the process:
- Choose your base shape: Start by selecting a basic shape that will form the core of your pattern. This could be a square, circle, triangle, or any other shape that you find visually appealing.
- Draw the base shape: Use the drawing tools in Procreate to sketch out the base shape on your canvas. You can adjust the size, rotation, and position of the shape to create variations and add interest.
- Duplicate and arrange: Duplicate the base shape layer and arrange the copies in a visually pleasing way. Experiment with different arrangements and orientations to find the layout that works best for your pattern.
- Scale, flip, and rotate: Use the transform tools in Procreate to scale, flip, and rotate the duplicated shapes. This will add more complexity and dynamics to your pattern while maintaining the overall harmony.
- Experiment with opacity and blending modes: Adjust the opacity of the duplicated shapes and explore different blending modes to create interesting layering effects. This can add depth and dimension to your pattern.
- Add color and texture: Choose a color palette that complements your pattern and start filling in the shapes with color. You can also experiment with adding textures or patterns to the individual shapes to enhance visual interest.
- Refine and tweak: Take the time to refine and tweak your base pattern. Make adjustments to the position, size, and arrangement of the shapes until you are satisfied with the overall look and feel.
Remember that building the base pattern is just the beginning. Once you have your foundation, you can further enhance and refine your design by adding details, textures, and other elements in the following steps.
Adding Details and Enhancements
Once you have built the base pattern for your Procreate design, it’s time to take it to the next level by adding details and enhancements. This step will bring depth, interest, and complexity to your pattern, making it truly unique and eye-catching. Here are some techniques to consider:
1. Layering: Utilize the layering feature in Procreate to add depth and dimension to your pattern. Create new layers to add different elements, textures, or colors. Experiment with blending modes and opacity to achieve interesting effects.
2. Textures and Patterns: Incorporate textures and patterns to make your design visually appealing and tactile. Procreate offers a wide range of brush options that mimic various textures like watercolor, oil paint, or even the look of fabric. Experiment with different brushes and layer them to create a truly unique and textured pattern.
3. Highlights and Shadows: Adding highlights and shadows can bring your pattern to life. Use lighter shades for the highlights and darker shades for the shadows to create a sense of depth and realism. This technique will give your pattern a three-dimensional look and make it more visually engaging.
4. Details and Accents: Enhance your pattern by adding small details and accents. These could be intricate lines, small shapes, or delicate dots. These tiny additions can add visual interest and create a sense of intricacy within your pattern.
5. Color Variations: Play around with different color variations to see how they can transform your pattern. Experiment with different palettes, hues, and saturation levels. Don’t be afraid to push the boundaries and create unexpected color combinations that make your pattern stand out.
6. Finishing Touches: Once you are satisfied with all the details and enhancements you have added to your pattern, take some time to fine-tune and polish it. Zoom in closely to check for any imperfections or inconsistencies. Make adjustments and refinements to ensure that every element of your pattern is perfect.
By following these tips and techniques, you can elevate your pattern design in Procreate. Remember to experiment, be creative, and trust your instincts. The more you practice and explore, the better you will become at adding details and enhancements to your patterns, making them truly spectacular.
Conclusion
In conclusion, learning how to make a pattern in Procreate can be an exciting and rewarding experience. With the right tools and techniques, you can unleash your creativity and create stunning designs that can be applied to various projects. Whether you’re a graphic designer, illustrator, or simply someone who enjoys exploring digital art, Procreate provides a powerful platform to bring your ideas to life. From creating seamless patterns to experimenting with different brush effects and color schemes, Procreate offers endless possibilities. So, grab your stylus and start exploring the world of pattern-making in Procreate. Happy creating!
FAQs
1. What is Procreate? Procreate is a powerful digital painting and illustration app designed exclusively for iPad. It offers a wide range of creative tools and features that allow artists to create stunning artwork on their tablets.
2. Can I make patterns in Procreate? Yes, you can definitely create patterns in Procreate. The app provides various tools and techniques that enable you to design unique patterns and textures for your artwork.
3. How do I make a pattern in Procreate? To create a pattern in Procreate, you can either use the repeat tool or the selection tool along with various brushes, shapes, and overlays. Experiment with different elements and arrangements to achieve the desired pattern effect.
4. Can I import my own images into Procreate to use in patterns? Absolutely! Procreate allows you to import your own images and use them as a reference or incorporate them into your patterns. This feature gives you the freedom to personalize your designs by including your own photos or artwork.
5. Can I export the patterns I create in Procreate? Yes, you can export your patterns from Procreate. The app offers various export options, including saving your patterns as high-resolution images or exporting them as layered files that can be further edited in other software or shared with others.