
Are you excited about getting your hands on the latest iPhone 14 but worried about transferring all your data from your old iPhone? Well, worry no more! In this comprehensive guide, we will walk you through the step-by-step process of transferring your old iPhone to the brand new iPhone 14. Whether you have precious photos, important contacts, or crucial documents, we’ve got you covered. With our detailed instructions and expert tips, you’ll be able to seamlessly migrate all your data to your shiny new device without a hitch. So, get ready to make the switch and embark on a smooth transition to the cutting-edge technology and features of the iPhone 14!
Inside This Article
- Point 1: Backing up your old iPhone
- Point 2: Setting up your new iPhone 14
- Point 3: Transferring data using iCloud
- Point 4: Transferring data using iTunes
- Conclusion
- FAQs
Point 1: Backing up your old iPhone
Before you start transferring your data to the new iPhone 14, it is crucial to back up your old iPhone. This step ensures that you don’t lose any important contacts, photos, messages, or other data during the transition.
Backing up your old iPhone is a straightforward process. You have two options: using iCloud or iTunes. Both methods have their advantages, so it’s up to your personal preference to choose which one to use.
If you opt for iCloud, you can easily back up your iPhone wirelessly and automatically. Simply ensure that your old iPhone is connected to Wi-Fi, go to Settings, tap on your name, then select iCloud. From there, scroll down and tap on “iCloud Backup.” Tap on “Back Up Now” and wait for the process to complete.
If you prefer using iTunes, connect your old iPhone to your computer using a USB cable. Open iTunes and select your device. In the “Summary” tab, click on “Back Up Now.” It’s essential to ensure that you have the latest version of iTunes installed on your computer to avoid any compatibility issues.
Regardless of the method you choose, make sure that you have enough storage space on iCloud or your computer to accommodate the backup. Keep in mind that the time taken for the backup process will vary depending on the size of your data and the speed of your internet connection. It’s best to have a stable internet connection during the backup process to avoid any interruptions.
Once the backup process is complete, you can proceed to set up your new iPhone 14 and transfer all the data from your old device.
Point 2: Setting up your new iPhone 14
So, you’ve gotten your hands on the latest and greatest iPhone 14. Congratulations! Now it’s time to set it up and get it ready for use. Follow these steps to ensure a smooth and hassle-free setup experience.
Step 1: Power on your iPhone 14
Press and hold the power button on the side of your iPhone 14 until the Apple logo appears. Once you see the logo, release the button and wait for the device to boot up.
Step 2: Select your language and region
On the welcome screen, choose your preferred language and region. This information will be used to customize your iPhone 14’s settings and display.
Step 3: Connect to a Wi-Fi network
Select a Wi-Fi network from the list and enter the password if required. By connecting to Wi-Fi, you’ll be able to download apps, sync your data, and use various online services.
Step 4: Set up Face ID or Touch ID
Follow the prompts to set up Face ID or Touch ID, depending on the model of your iPhone 14. These biometric authentication features provide an added layer of security and convenience.
Step 5: Sign in with your Apple ID
If you already have an Apple ID, sign in with it. Your Apple ID gives you access to the App Store, iCloud, and other Apple services. If you don’t have an Apple ID, you can create one during the setup process.
Step 6: Enable or disable Siri
You have the option to enable or disable Siri, Apple’s virtual assistant, during setup. Siri can help you perform various tasks using voice commands, so choose according to your preference.
Step 7: Set up Screen Time and Privacy settings
Screen Time allows you to manage and monitor your device usage, while Privacy settings control the access that apps and services have to your personal data. Customize these settings to suit your needs.
Step 8: Restore from a backup or set up as new
If you have a recent backup of your old iPhone, you can choose to restore it to your iPhone 14. This will transfer your apps, settings, and other data to the new device. Alternatively, you can set up your iPhone as new if you prefer a clean start.
Step 9: Set up Apple Pay and other services
During the setup process, you have the option to set up Apple Pay, Apple’s mobile payment service, and other services like iCloud Keychain and Find My iPhone. Take advantage of these features to enhance your iPhone 14 experience.
Step 10: Complete the setup and explore
Once you’ve finished the setup process, you’re ready to start exploring your new iPhone 14. Take some time to familiarize yourself with the features, try out different apps, and make it truly yours.
With these steps, you’ll have your new iPhone 14 up and running in no time. Enjoy the cutting-edge technology and boundless possibilities that come with Apple’s flagship device!
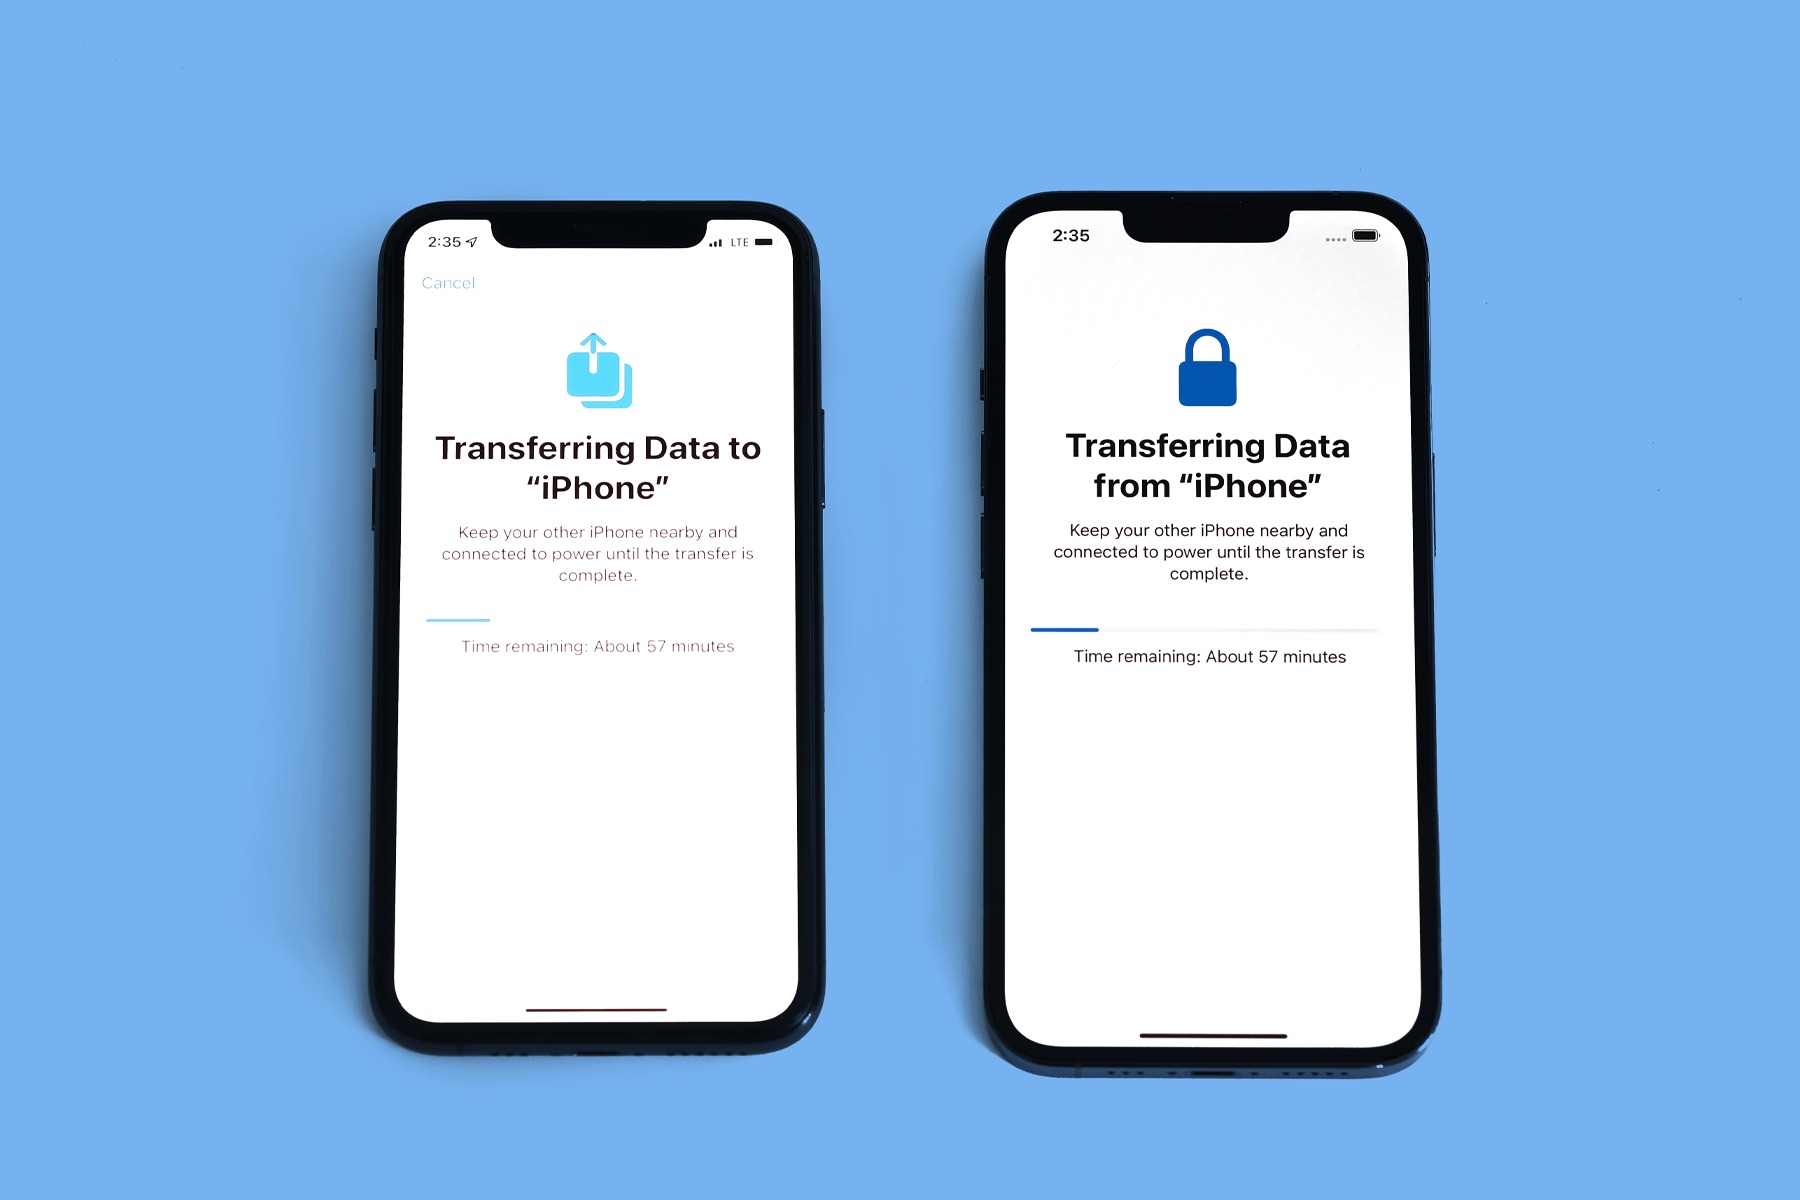
Point 3: Transferring data using iCloud
Transferring data from your old iPhone to the new iPhone 14 is a seamless process when using iCloud. Here’s how you can do it.
1. Start by ensuring that both your old iPhone and the new iPhone 14 are connected to a stable Wi-Fi network.
2. On your old iPhone, go to “Settings” and tap on your name at the top of the screen. Then, select “iCloud” and make sure that all the data you want to transfer is backed up to iCloud. This includes contacts, photos, videos, messages, and more.
3. Once your data is backed up, turn on your new iPhone 14 and follow the on-screen setup instructions. When prompted, select “Restore from iCloud Backup.”
4. Sign in to your iCloud account using your Apple ID and password. Choose the most recent backup that you created on your old iPhone from the list of available backups.
5. Sit back and let your new iPhone 14 do its magic! It will begin restoring your data from iCloud, including apps, settings, and media files. The time it takes to complete the transfer will depend on the size of your backup and the speed of your internet connection.
6. Once the transfer is complete, you can continue setting up your new iPhone 14, including enabling features like Face ID, Touch ID, and Apple Pay. Your apps, photos, contacts, and other data will be exactly where you left them on your old iPhone.
7. Remember to keep your new iPhone 14 connected to Wi-Fi until all your apps and data are fully downloaded and synced. This will ensure a smooth transition and prevent any data loss.
Using iCloud to transfer your data eliminates the need for any physical connection between your old and new iPhone. It’s a convenient and efficient way to get up and running on your new device without missing a beat.
Point 4: Transferring data using iTunes
If you prefer to transfer your data from your old iPhone to your new iPhone 14 using your computer, iTunes is the perfect tool. Follow these steps to make the seamless transition:
- Start by connecting your old iPhone to your computer using a USB cable. Launch iTunes, and if prompted, enter your device passcode or choose to Trust This Computer.
- Click on the iPhone icon that appears in the top-left corner of the iTunes window to open the device summary page.
- From the Summary tab, click on “Back Up Now” under the Backups section. This will create a backup of your old iPhone, including your settings, apps, and app data.
- Wait for the backup process to complete. The time it takes will depend on the amount of data on your old iPhone.
- Once the backup is finished, disconnect your old iPhone from the computer and connect your new iPhone 14.
- In the iTunes window, click on the iPhone icon to open the device summary page for your new iPhone.
- Under the Backups section, click on “Restore Backup.”
- A pop-up window will appear with a list of available backups. Choose the backup you just created of your old iPhone and click on “Restore.”
- Wait for the restore process to complete. This will transfer all your data, apps, and settings from your old iPhone to your new iPhone 14.
- Once the restore is finished, disconnect your iPhone from the computer, and you’re ready to start using your new iPhone 14 with all your data intact!
Transferring data using iTunes gives you more control over the backup and restore process, especially if you have a large amount of data to transfer. However, it is important to note that using iTunes requires a computer and a USB cable, which may not always be convenient for everyone.
Now that you know how to transfer your old iPhone data to your new iPhone 14 using iTunes, you can easily make the switch without losing any of your precious information. So go ahead, get your new iPhone 14 set up and enjoy the seamless transition!
Conclusion
The iPhone has come a long way, evolving with each new iteration to provide users with the latest technology and features. Transferring data from an old iPhone to a new one, such as the iPhone 14, has become a seamless process with advancements in software and improved migration options. Whether it’s contacts, photos, apps, or settings, there are various methods available to ensure a smooth transition.
By following the steps outlined in this article, you can easily transfer your old iPhone data to the new iPhone 14 without losing any important information. From using iCloud and iTunes to utilizing the Quick Start feature and third-party apps, you have a range of options to choose from based on your preferences and requirements.
With the ability to transfer data seamlessly, the process of upgrading to a new iPhone has never been easier. Enjoy the enhanced features and capabilities of the iPhone 14 while keeping your valuable data intact. Say goodbye to the days of manual data transfer and embrace the convenience of modern technology. Upgrade your iPhone and experience the future of mobile communication with the iPhone 14.
FAQs
1. Can I transfer data from an old iPhone to iPhone 14?
Yes, you can transfer data from an old iPhone to the new iPhone 14 using various methods like iCloud, iTunes, or directly transferring from one device to another.
2. Do I need to back up my old iPhone before transferring to iPhone 14?
It is recommended to back up your old iPhone before transferring to iPhone 14 to ensure that your data is safely stored in case anything goes wrong during the transfer process.
3. Can I transfer all types of data from my old iPhone to iPhone 14?
Yes, you can transfer various types of data such as contacts, photos, videos, messages, apps, and more from your old iPhone to iPhone 14, depending on the method you choose for transferring.
4. How long does the transfer process usually take?
The transfer process duration can vary depending on the amount of data you have on your old iPhone and the transfer method you are using. It could take anywhere from a few minutes to several hours.
5. Can I transfer data from an Android phone to iPhone 14?
While it is not directly possible to transfer data from an Android phone to an iPhone, Apple provides a tool called “Move to iOS” that helps you migrate your data, including contacts, messages, photos, and more, from an Android device to iPhone 14.