
Are you looking to add a little extra fun and creativity to your photos on your iPad? Well, look no further than the Photobooth app! Photobooth is a fantastic application that allows you to capture memorable moments and instantly apply a variety of effects and filters to your photos. Whether you want to add a touch of vintage nostalgia, create a stunning black and white image, or even add some funky distortions, Photobooth has got you covered.
In this article, we will guide you through the steps on how to add and change effects in Photobooth on your iPad, so you can unlock your inner artist and unleash your creativity. From selecting the perfect effect to customizing its intensity, we have all the tips and tricks you need to make your photos truly stand out. So grab your iPad, open up Photobooth, and get ready to take your photography skills to the next level!
Inside This Article
How to Add and Change Effects in Photobooth on Your iPad
Photobooth is a popular feature on iPads that allows you to take fun and creative photos with various effects. Whether you’re looking to add some extra flair to your snapshots or change the vibe of your pictures, the Photobooth app on your iPad has got you covered.
There are a couple of ways you can add and change effects in Photobooth. The first method is by using the built-in effects that come preloaded on the app. These effects are ready to use and offer a range of options to jazz up your photos.
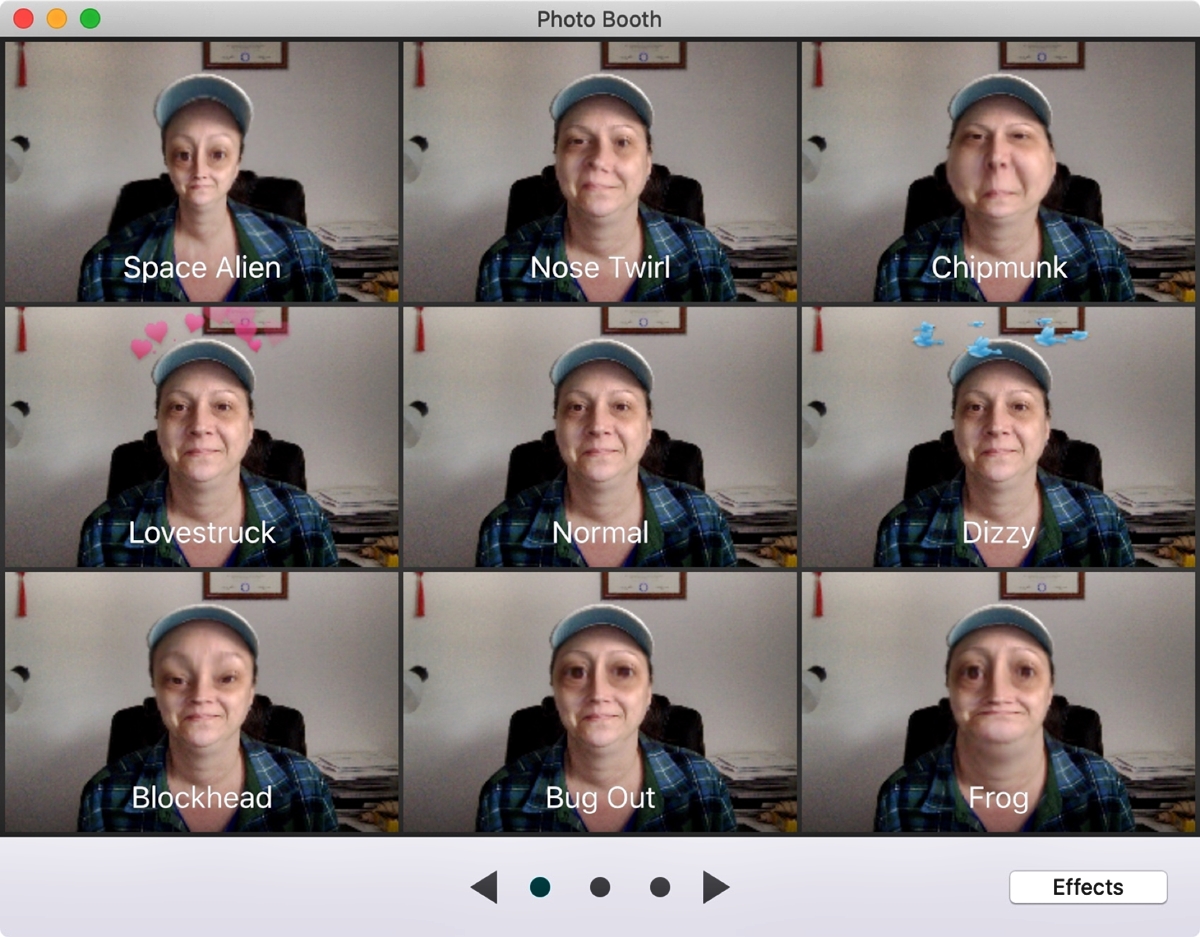
To use the built-in effects, simply open the Photobooth app on your iPad. From the main screen, you’ll see a row of effect icons at the bottom of the screen. Tap on one of these icons to select an effect.
Once you’ve selected an effect, you can start taking photos by tapping the capture button. The effect will be applied in real-time, allowing you to see how the photo will look before you even snap the picture. Have fun experimenting with different effects and capturing unique shots!
If you want to take your creativity a step further, you can also add custom effects to your Photobooth app. This requires a bit of technical know-how, but it’s worth the effort for those looking to personalize their photo-taking experience.
To add custom effects, you’ll need to find and download compatible effects online or create your own using image editing software. Once you have the effect file, you can import it into the Photobooth app on your iPad.
To import a custom effect, connect your iPad to your computer and open iTunes. Select your iPad from the device list, go to the “Apps” tab, and scroll down to the “File Sharing” section. Find the Photobooth app and click on it.
In the file-sharing menu, you’ll see a list of imported files for the Photobooth app. Click on the “Add” button and locate the custom effect file on your computer. Select the file and click “Open” to import it into the app.
Once the custom effect is imported, disconnect your iPad from your computer and open the Photobooth app. You’ll now have the custom effect available to use alongside the built-in effects. Tap on the effect icon to select it and start snapping photos with your personalized touch.
Changing effects in real-time is another exciting feature of Photobooth on your iPad. While capturing photos, you can swipe left or right on the effect icons at the bottom of the screen to switch between different effects instantly.
This allows you to experiment with multiple effects in a single photo session, creating a dynamic and eye-catching collection of pictures. It’s a fantastic way to add variety to your photos and explore different creative possibilities.
Now that you know how to add and change effects in Photobooth on your iPad, it’s time to get creative and start capturing amazing photos. Whether you’re using the built-in effects or adding custom ones, Photobooth offers endless possibilities for transforming your images into artistic masterpieces.
Conclusion
In conclusion, the Photobooth app on your iPad is a fantastic tool that allows you to unleash your creativity and have fun with photos. Whether you want to add a touch of flair with filters, play around with new effects, or simply change the backdrop to set the scene, Photobooth has it all. With just a few taps, you can transform ordinary snapshots into stunning masterpieces.
By following the step-by-step guide we’ve provided, you can easily add and change effects in Photobooth on your iPad. Get ready to take your photos to the next level and impress your friends and followers with your captivating creations!
So, pick up your iPad, open Photobooth, and let your imagination run wild. The possibilities are endless! Happy editing!
FAQs
Below are some frequently asked questions about adding and changing effects in Photobooth on your iPad:
1. Can I add effects to photos in Photobooth on my iPad?
Yes, you can add effects to your photos in Photobooth on your iPad. Photobooth offers a variety of fun and creative effects that you can apply to your photos with just a few taps.
2. How do I add effects in Photobooth on my iPad?
To add effects in Photobooth, open the app on your iPad and select the desired effect from the available options. You can swipe left or right to browse through different effects. Once you find the effect you like, tap on it to apply it to your photo.
3. Can I change the effects after taking a photo in Photobooth?
Yes, you can change the effects after taking a photo in Photobooth. Once you have captured a photo, tap on the “Edit” button, which looks like a slider icon. This will allow you to access the editing options, including the ability to change the effects applied to the photo.
4. Are the effects in Photobooth customizable?
While the effects in Photobooth are pre-designed and not fully customizable, you can still adjust the intensity or strength of the effects. After applying an effect, you can use the slider or other available controls to fine-tune the effect to your liking.
5. Can I remove effects from a photo in Photobooth?
Yes, you can remove effects from a photo in Photobooth. If you have already applied an effect to a photo and wish to revert back to the original, tap on the “Edit” button and locate the “Remove Effect” option. By selecting this option, the photo will return to its original state without any applied effects.