Recording your gameplay is usually done for two things. The first is to record the moment for posterity and bragging rights (if you made a magnificent play in-game, usually on PVP). The second is for posting them in a video-sharing platform for others to see. This includes Youtube and streaming sites like Twitch and Mixer. Most phones also record their playthroughs through third-party apps and Google Play.
These are the many methods for doing such, and they are easy to set up if you have the know-how. But to help you, we’ve made a step-by-step guide that shows how to screen record mobile game playthroughs for both Android and iOS.
How to Screen Record on Android

Back in October 2015, Google updated Google Play. The update allowed players to record gameplay on their games, and to edit and post them as well. This came out when streaming was starting to become popular on the internet. Follow this thorough guide on how to screen record on Android phones.
Note: You need Google Play Games’ latest version plus an Android Lollipop OS to use this feature.
Install and open the Google Play Games
Pretty self-explanatory. The app is available for free on Google Play Store. If you already have the app, make sure that it’s updated to the latest version before doing this.

Click the “Record Gameplay” card and choose the resolution of your video
This is where the fun begins. You can choose which of the two resolutions you wish to have when recording. The choices are 420P (Standard) and 720P (HD).
Play the game you wish to record and start your recording
After doing this, play the game you want on your phone. You’ll then notice that there’s an image of yourself on the corner of your phone’s screen. Press it and you’ll see the red record button. You have to press it to begin recording. Also, you can move the image to any part of your phone’s screen like the Messenger app’s bubbles.
This is one of the easier methods of recording videos since it’s already on Google Play Games, where you won’t need to install anything else. But, there are other apps on the Play Store that you can install if you wish. We’re going to discuss one such app and list other similar apps that you can install.
Record games through AZ Screen Recorder (Android)
AZ Screen Recorder is a cool app that’s easy to use. It’s light, easy, accessible, and cheap. It has an overlay button that doesn’t interfere with the recorded content. There’s also the front-facing camera for game streams or commentary. Plus a small video editor built-in. That way you can shave away the parts that don’t matter. Of course, it doesn’t need root, has no watermarks, no time limits, and more. The pro version costs $2.99 which makes it an accessible recording app to get.
Here’s how to use AZ Screen Recorder:
Run the app after installation
After running the app, the overlay will appear in the corner of your screen. The record hasn’t started yet so don’t worry.
Play the game you wish to record
Same thing as the last method. You can do this with other apps as well.
Open the overlay and press the record button (the video camera button)
The overlay has other features as well. These are live-streaming your playthrough on Facebook and Youtube, a shortcut to the app’s settings, and a way to look at your saved videos. The app is very useful and easy to use, which makes it worth downloading.
Other Apps Like AZ Screen Recorder
There’s also a whole slew of apps that function like the AZ Screen Recorder. Some of them you need to buy, but there are also free ones on Google Play Store. Here are some of the notables for Android smartphones:
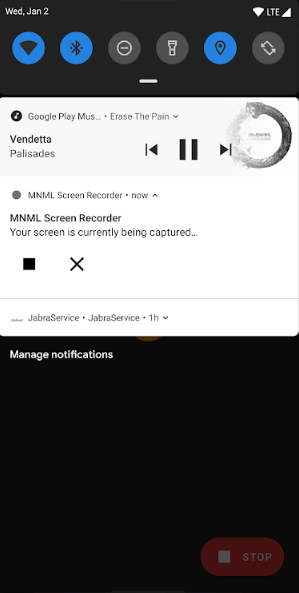
MNML Screen Recorder
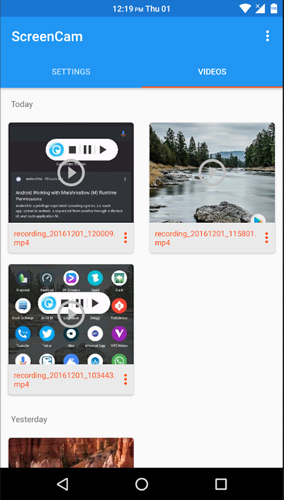
ScreenCam Screen Recorder
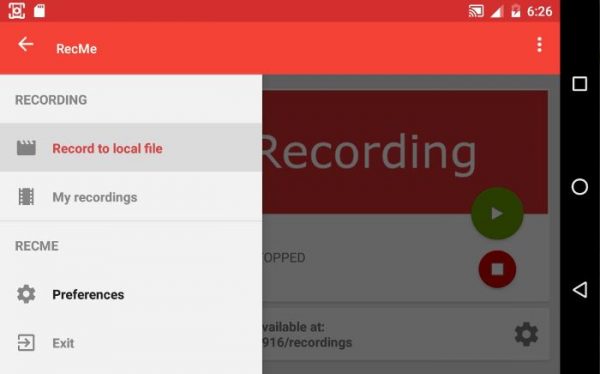
RecMe Free Screen Recorder
How to record playthroughs on iOS Phones
Recording game playthroughs on IOS is as straightforward as on Android. Unlike Android, the recording function is already pre-built on iOS starting from iOS 11. Here’s how you can do it.
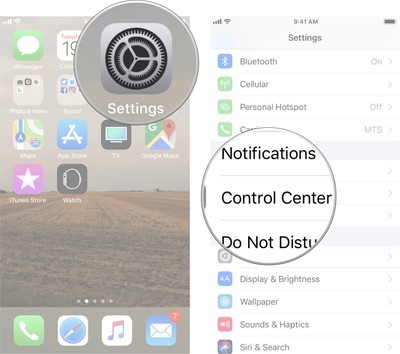
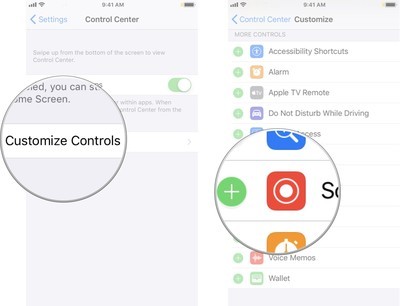
1.) Launch Settings in your iPhone and look for “Control Center”
This is where the customizable controls for your iPhone are located.
2.) Tap “Customize Controls” and Select “Screen Recording”
This allows you to add Screen Recording to the iPhone’s Control Center (the white circle that’s always at your iPhone’s screen). This is pretty convenient as you only need to make one tap to immediately record your gameplay.
3.) Play your game and record
After adding the recording function, play the game you wish to record. Then tap the Control Center and select the “Record” button. You’ll then be able to record your playthrough.
How to record using iPhone/iPad Replaykit

Replaykit is yet another inbuilt function, this time on iPhone/iPad games. This allows players to record their playthroughs on those games. Here’s how you can do this:
Find out if your game is Replaykit-enabled
You can do this by looking for the record button on the game. Usually, it’s on the main menu. Sometimes it’s on one of the corners. Iphonefaq has a list of replaykit compatible games here.
Tap the button and click on which type of recording you wish to get, and play
A prompt will then appear, which will ask if you want to record with a screen and microphone, or mic only. Choose which one you like, then play your game as if you’re playing as usual.
Choose if you wish to edit or save
Unlike most recording apps, this one will prompt every time a level completes. A prompt will then appear asking you if you wish to edit and share the video or save it in your camera roll. What the prompt will look like will vary from game to game.
Other Screen Recording Apps for iOS
Aside from the options above, there are other Screen Recording apps for iOS as well. Most of them are as straightforward as the ones on Android phones and can easily be set up. Here are some of the Screen Recording apps on iOS:
TechSmith Capture
ScreenFlow
AirShou Screen Recorder
Vidyo Screen Recorder

