
Are you wondering how to scan documents from your brand new iPhone 13? Look no further, as we have all the information you need. With the advancement of technology, scanning documents has become easier and more convenient than ever. The iPhone 13, with its powerful camera capabilities, allows you to transform your device into a portable scanner. Gone are the days of bulky scanners and complicated software. Now, you can simply use your iPhone 13 to digitize important documents, receipts, and even photos with just a few taps. In this article, we will guide you through the step-by-step process of scanning from your iPhone 13, ensuring that you can effortlessly digitize your documents on the go. Let’s dive in!
Inside This Article
- Getting Started with Scanning on iPhone 13
- Using the Notes App to Scan Documents
- Scanning Documents Using Third-Party Apps
- Scanning QR Codes and Barcodes on iPhone 13
- Conclusion
- FAQs
Getting Started with Scanning on iPhone 13
Scanning documents on your iPhone 13 has never been easier. With the advanced camera capabilities and intuitive software, you can quickly digitize your important papers and save them directly to your device. Whether you need to scan a receipt, a contract, or a handwritten note, the iPhone 13 offers a convenient and efficient scanning solution right at your fingertips.
To get started with scanning on your iPhone 13, you’ll first need to open the “Notes” app, which comes pre-installed on your device. The Notes app is not only great for jotting down your thoughts but also serves as a powerful scanning tool. With just a few taps, you’ll be able to scan documents and have them seamlessly integrated into your notes.
Once you have the Notes app open, simply create a new note or open an existing one. Now, look for the “+” icon at the bottom of the screen and tap on it. From the menu that appears, select “Scan Documents.” Your iPhone 13 will activate the camera, ready to capture the document you want to scan. Position the document within the camera frame and make sure it fits entirely within the viewfinder. The built-in document detection feature will automatically recognize the document edges and adjust for any skew or distortion.
When you’re ready, tap the capture button to take a photo of the document. You can continue capturing multiple pages if needed by tapping the “+” icon again. Once you’ve captured all the necessary pages, tap “Save” to finalize the scan. The scanned document will now be saved as a PDF file in your note, and you can add additional annotations or text if desired.
The Notes app also allows you to easily share the scanned document. Simply tap the share icon and choose the desired sharing method, such as email, messaging, or saving it to a cloud storage service. You can also export the scanned document to other apps on your iPhone 13, such as Microsoft Word or Google Drive, for further editing or collaboration.
If you prefer to use third-party scanning apps, there are plenty of options available on the App Store. These apps often offer additional features, such as OCR (optical character recognition) to extract text from scanned documents or the ability to organize and categorize your scans. Some popular scanning apps include CamScanner, Scanner Pro, and Adobe Scan.
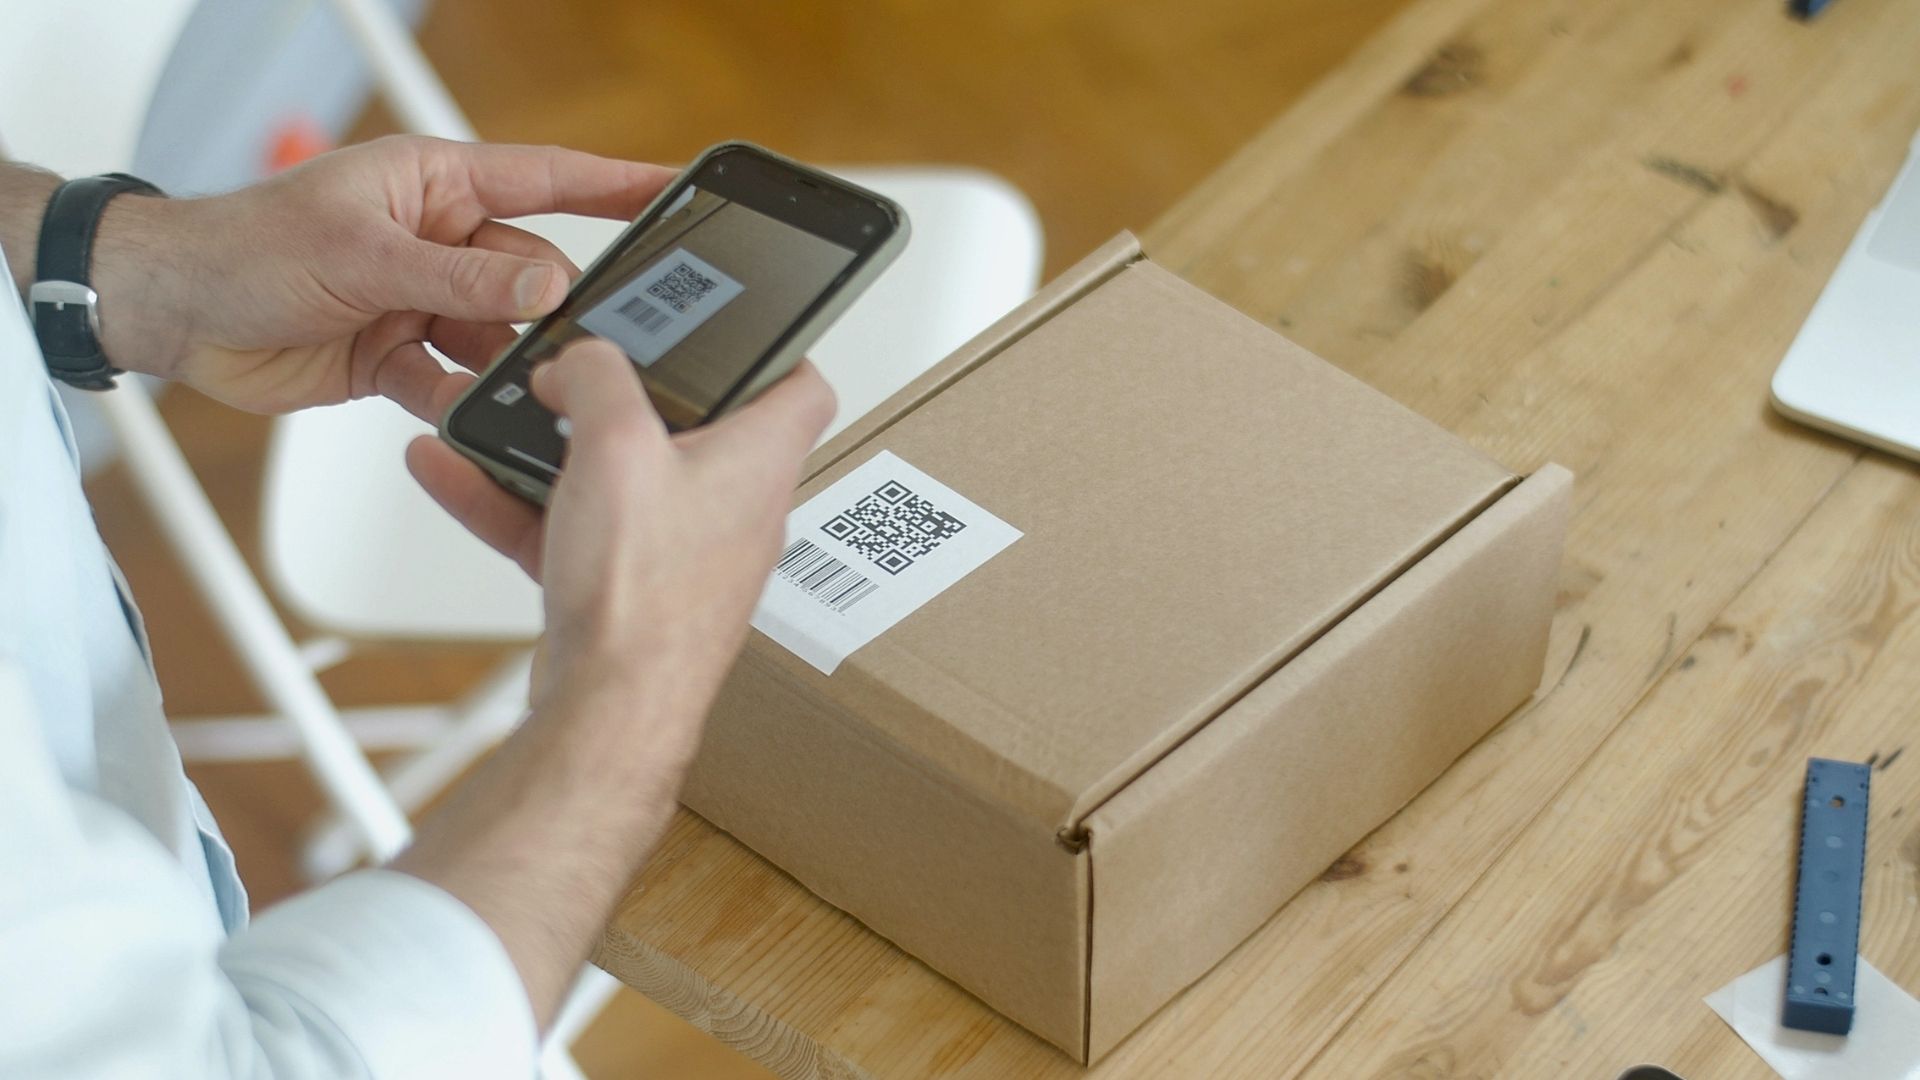
Another handy scanning feature on the iPhone 13 is the ability to scan QR codes and barcodes. This can be useful when you want to quickly access information or track a package. To scan a QR code or barcode, simply open the camera app on your iPhone 13 and point it at the code. The camera will automatically recognize the code and provide you with the relevant information or action.
The iPhone 13 takes scanning to the next level, making it easier than ever to digitize your documents and access information with ease. Whether you choose to use the built-in Notes app or explore third-party scanning apps, you’ll be able to efficiently scan, save, and share your documents right from your iPhone 13.
Using the Notes App to Scan Documents
The iPhone 13 comes equipped with a powerful built-in scanning feature in the Notes app, making it incredibly convenient to scan and save documents on the go. With just a few simple steps, you can turn your iPhone 13 into a portable scanner, eliminating the need for bulky scanners or photocopiers.
To get started, open the Notes app on your iPhone 13. If you can’t find it on your home screen, swipe down and use the search bar to locate the app.
Once you have the Notes app open, create a new note or open an existing one where you want to save the scanned document. Tap on the “+” button at the bottom of the screen to reveal the toolbar, then select the “Scan Documents” option.
Position your iPhone 13 camera above the document you want to scan. The app will automatically detect the document edges and capture the image when it’s in focus. If needed, you can manually adjust the corners of the document to ensure a perfect scan.
After the scanning process completes, you can customize the scan settings by tapping on the preview image. Options such as color filters, cropping, and rotation are available to enhance the quality of the scanned document. Take some time to adjust the settings according to your preferences.
Once you are satisfied with the scan, tap on the “Save” button to store the document within the note. You can continue scanning additional pages if needed or simply close the scan mode by tapping on the “Done” button. Your scanned document will be saved as a high-quality PDF file, easily accessible from the note whenever you need it.
Furthermore, the Notes app allows you to easily share the scanned documents with others. You can send the document via email, message, or even AirDrop, making it convenient to quickly share important information with colleagues, friends, or family members.
The versatility and simplicity of using the Notes app to scan documents on your iPhone 13 make it an invaluable tool for anyone who frequently deals with paperwork. Whether you need to scan receipts, contracts, or handwritten notes, the Notes app has you covered.
So, put away your traditional scanner and take advantage of the powerful scanning capabilities of your iPhone 13. With the Notes app, scanning documents has never been easier or more convenient.
Scanning Documents Using Third-Party Apps
If you’re looking to expand your scanning capabilities on your iPhone 13, there are several third-party apps available that offer advanced scanning features. These apps go beyond the basic document scanning offered by the built-in Notes app, providing additional functionality and customization options.
One popular third-party scanning app is Adobe Scan. With Adobe Scan, you can not only scan and save documents, but also perform OCR (optical character recognition) to convert scanned documents into editable text. This is particularly useful if you need to extract text from receipts, business cards, or other types of paper documents.
Another great option is CamScanner. CamScanner offers a user-friendly interface and allows you to scan documents, crop them, and enhance the scanned images for better clarity. It also provides options for annotation and sharing, making it easier to collaborate on scanned documents with others.
If you prefer a cloud-based solution, Evernote Scannable is worth considering. This app integrates seamlessly with the Evernote note-taking platform, allowing you to save scanned documents directly to your Evernote account. It also automatically detects document boundaries and applies image optimization algorithms to ensure clear and legible scans.
For those who need to scan large volumes of documents, Scanner Pro is an excellent choice. This app supports batch scanning, which means you can scan multiple pages in a single session and save them as a single document. It also includes advanced features like automatic edge detection, smart cropping, and the ability to add annotations and signatures.
While these are just a few examples, there are countless other third-party scanning apps available in the App Store. Before choosing an app, consider your specific scanning needs and read reviews to ensure you select one that meets your requirements.
Once you’ve installed a third-party scanning app, the process of scanning documents is similar to using the Notes app. Simply launch the app, position the document within the camera frame, and tap the shutter button. Most apps offer additional settings to adjust the scan quality, apply filters, and choose output formats.
With the wide array of third-party scanning apps available, you can unlock a whole new level of versatility and convenience when it comes to scanning documents on your iPhone 13. So, go ahead and explore these apps to make the most out of your scanning needs!
Scanning QR Codes and Barcodes on iPhone 13
If you own an iPhone 13, you have a powerful tool at your fingertips for scanning QR codes and barcodes. With the built-in camera capabilities and various apps available on the App Store, you can easily scan and retrieve information from these codes. Whether you want to check the price of a product, access a website, or join a Wi-Fi network, scanning QR codes and barcodes on your iPhone 13 is a breeze.
To get started, simply open the Camera app on your iPhone 13. Make sure you have adequate lighting and a steady hand. Point the camera at the QR code or barcode, ensuring that it is within the frame. The camera will automatically recognize the code and display a notification banner at the top of the screen. Tap on the banner to access the information embedded in the code.
If the QR code or barcode contains a website link, tapping on the notification banner will open your default web browser and take you directly to the website. For barcodes, the information may vary depending on the product. It could include the product name, description, price, and other relevant details. You can save this information for future reference or proceed with any additional actions prompted by the app you’re using.
While the Camera app on iPhone 13 can scan QR codes and barcodes, there are also specialized apps available on the App Store that offer additional features and functionalities. These third-party apps often provide a more advanced scanning experience, allowing you to create custom QR codes, organize scanned codes, and even generate barcodes for your own products.
When choosing a third-party scanning app, it’s important to read reviews and consider the features that matter to you. Some popular options include Scanbot, QR Code Reader, and ScanLife Barcode & QR Reader. These apps offer a user-friendly interface and powerful scanning capabilities, making it easy to scan and interact with QR codes and barcodes.
Scanning QR codes and barcodes on iPhone 13 provides a convenient way to access information quickly and effortlessly. Whether you need to decode a QR code, check the legitimacy of a product, or simply explore the possibilities, your iPhone 13 is up to the task. Embrace the power of scanning technology and unlock a world of exciting possibilities with your iPhone 13.
In conclusion, the iPhone 13 offers users a seamless and convenient way to scan documents with its built-in scanning feature. With just a few simple steps, you can capture high-quality scans directly from your device. Whether it’s for work, school, or personal use, the scanning capabilities of the iPhone 13 make it a versatile tool for on-the-go productivity.
By leveraging the power of the camera and the advanced image processing capabilities, the iPhone 13 ensures that your scanned documents are clear, sharp, and easy to read. Furthermore, with the integration of OCR technology, you can even extract text from your scans for quick and effortless editing and sharing.
With its sleek design, powerful performance, and innovative features, the iPhone 13 continues to set the standard for smartphones. So, if you’re looking for a device that not only excels in communication and entertainment but also offers handy scanning capabilities, the iPhone 13 is definitely worth considering. Experience the convenience and efficiency of scanning documents directly from your iPhone 13 and elevate your productivity to new heights.
FAQs
Here are some frequently asked questions about scanning from your iPhone 13:
1. Can I scan documents using my iPhone 13?
Yes, you can absolutely scan documents using your iPhone 13. The iPhone 13 comes equipped with a built-in document scanning feature that allows you to capture and save digital versions of physical documents.
2. How do I scan a document with my iPhone 13?
To scan a document with your iPhone 13, follow these steps:
- Open the Notes app on your iPhone 13.
- Create a new note or open an existing one.
- Tap the “+” button and select “Scan Documents.”
- Position your iPhone 13 camera over the document you want to scan, ensuring that the document is within the frame.
- Wait for the camera to automatically detect the document and capture it.
- Adjust the corners of the document if necessary.
- Tap “Keep Scan” to save the scanned document.
- You can also tap “Add more” to scan multiple pages.
- Once you’re done scanning, tap “Save.”
3. What formats can I save the scanned documents in?
The scanned documents can be saved in PDF format, which is widely supported and compatible with various devices and software applications. This allows for easy sharing and viewing of the scanned documents across different platforms.
4. Can I edit the scanned documents on my iPhone 13?
Yes, you can edit the scanned documents on your iPhone 13. Once you have scanned a document, you can use the markup tools in the Notes app to annotate, highlight, or add text to the scanned document. This allows you to make any necessary changes or additions to the scanned document directly on your iPhone 13.
5. How can I share the scanned documents from my iPhone 13?
To share the scanned documents from your iPhone 13, follow these steps:
- Open the Notes app on your iPhone 13.
- Open the note containing the scanned document you want to share.
- Tap the share icon (square with an arrow pointing up) located at the top right corner of the screen.
- Choose the desired sharing method, such as Messages, Mail, AirDrop, or any other compatible app or service.
- Follow the prompts to complete the sharing process.
These were just a few of the frequently asked questions about scanning from your iPhone 13. With the built-in document scanning feature, you can conveniently scan and digitize important documents directly from your iPhone 13 without the need for additional equipment or apps.