
Procreate is a popular digital art and design application that offers a wide range of creative possibilities for artists and illustrators. One of the useful features in Procreate is the ability to organize your artwork into stacks, which are essentially folders that help you keep your projects organized and easily accessible.
However, there may come a time when you want to rename a stack in Procreate, either to better reflect its contents or simply to give it a more fitting name. Fortunately, Procreate makes it easy to rename stacks, allowing you to customize your organization and stay organized in a way that suits your artistic workflow.
In this article, we will guide you through the simple steps to rename a stack in Procreate, ensuring that your projects are neatly sorted and easy to find.
Inside This Article
- Renaming a Stack in Procreate
- Frequently Asked Questions
- How to Change the Name of a Stack in Procreate
- Steps to Rename a Stack in Procreate
- Renaming Stacks in Procreate: A Step-by-Step Guide
- Conclusion
- FAQs
Renaming a Stack in Procreate
Procreate is a powerful digital illustration app that offers a wide range of features and tools. One useful feature in Procreate is the ability to organize your artwork into stacks. Stacks act as folders, allowing you to group similar artworks together for easy access and management. If you find yourself needing to rename a stack in Procreate, fret not! In this article, we will guide you through the simple steps to rename a stack in Procreate.
Step 1: Open Procreate
Begin by opening the Procreate app on your device. Once the app is open, you will see the Procreate gallery, where all your artworks are displayed.
Step 2: Select the Stack
Look for the stack that you want to rename. Stacks are represented by a collection of artworks grouped together. Tap on the stack to select it.
Step 3: Access the Rename Option
With the stack selected, you will see a series of options at the bottom of the screen. Look for the “More” icon, usually depicted as three dots or lines. Tap on the “More” icon to access additional options for the selected stack.
Step 4: Rename the Stack
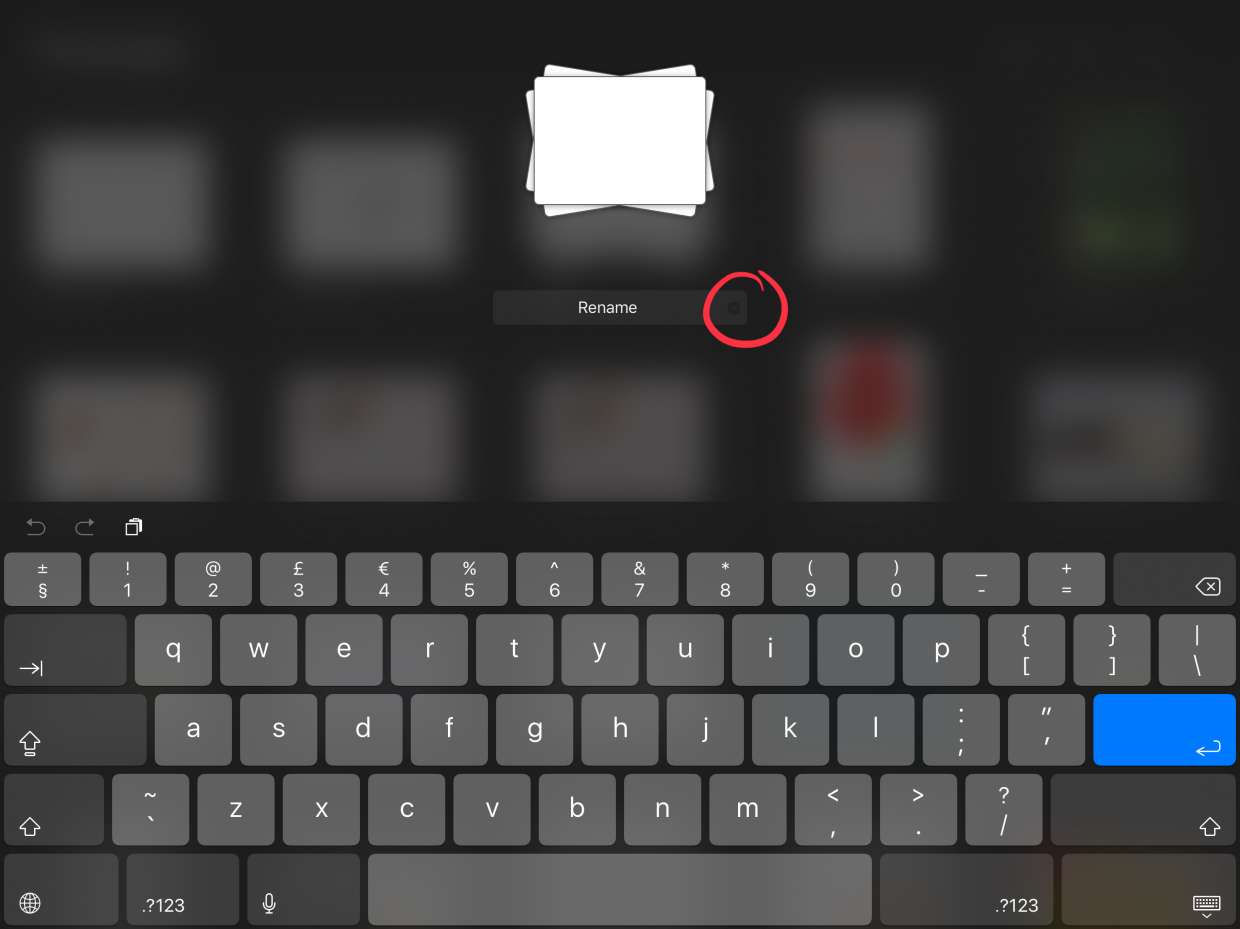
Among the options that appear, you will find the “Rename” option. Tap on “Rename” to proceed.
A dialogue box will appear, allowing you to enter a new name for the stack. Use the on-screen keyboard to type in the desired name for the stack.
Once you have entered the new name, tap on the “Done” button or any other confirmation button available to save the changes.
Congratulations! You have successfully renamed a stack in Procreate.
Renaming stacks in Procreate allows you to better organize your artwork and make it easier to locate specific pieces. Whether you want to create specific categories or simply want to give your stacks more meaningful names, the process is straightforward and hassle-free.
Remember, with Procreate’s intuitive interface, you can easily navigate and manage your artworks, ensuring a seamless workflow for your digital illustration projects.
Frequently Asked Questions
Can I rename a stack multiple times?
Yes, you can rename a stack multiple times in Procreate. Simply follow the steps outlined in this article to access the rename option and change the stack’s name as many times as you need.
Will renaming a stack affect the artworks inside?
No, renaming a stack will not affect the artworks inside. The renaming process only changes the name of the stack itself, preserving the artworks stored within it.
Can I use special characters or emojis in the stack’s name?
Yes, you can use special characters and emojis in the stack’s name. Procreate allows you to use a variety of characters and symbols to personalize your stack names and make them more distinctive.
Feel free to get creative and let your stack names reflect your artistic style!
Ready to take advantage of Procreate’s organizational features? Start renaming your stacks, and enjoy a more streamlined and efficient digital illustration workflow!
How to Change the Name of a Stack in Procreate
If you’re a digital artist using Procreate on your iPad, you may find it useful to organize your work into stacks. Stacks help to keep your artwork organized and easily accessible. But what if you want to change the name of a stack in Procreate? Thankfully, Procreate makes it simple to rename your stacks with just a few steps. In this article, we’ll guide you through the process of changing the name of a stack in Procreate.
Step 1: Open Procreate
The first step is to open the Procreate app on your iPad. Locate the Procreate icon on your device’s home screen and tap on it to launch the app. Once the app is open, you’ll see the Procreate interface, ready for you to create or manage your artwork.
Step 2: Select the Stack
Next, you need to select the stack that you want to rename. Stacks can be found on the main Procreate interface, typically represented by a group of artworks arranged together. Tap on the stack to open it and display the artworks contained within.
Step 3: Access the Rename Option
Once you’ve opened the stack, you’ll need to access the options for the stack itself. Look for the stack’s settings or menu icon, usually represented by three dots or lines. Tap on this icon to open the stack’s options menu.
Step 4: Rename the Stack
Within the stack’s options menu, you’ll find the “Rename” option. Tap on it to enter the rename mode. You’ll notice that the current name of the stack is now editable. Simply use your device’s keyboard to type in the new name for the stack.
After entering the new name, tap “Done” or “Save” to confirm the changes. The stack will now be renamed with the new name you have chosen. You can repeat this process for any other stacks you wish to rename.
And that’s it! You have successfully changed the name of a stack in Procreate. It’s important to note that renaming a stack does not affect the artworks contained within it. They will remain untouched and can still be accessed under the new stack name.
So the next time you want to organize your Procreate work and give your stacks more descriptive or meaningful names, you now have the knowledge to easily rename them. Happy creating!
Steps to Rename a Stack in Procreate
If you’re a Procreate user, you know how important it is to stay organized. Creating stacks is a great way to group similar artwork, but what happens when you need to rename a stack? Don’t worry, it’s a simple process. In this article, we’ll guide you through the steps to rename a stack in Procreate. Let’s get started!
Step 1: Open Procreate
First, open the Procreate app on your device. Ensure that you have the latest version installed to access all the features and updates.
Step 2: Select the Stack
Once you’re inside the Procreate app, you’ll see the gallery view, displaying all your artwork. Navigate to the stack you wish to rename. Tap on it to enter the stack.
Step 3: Access the Rename Option
At the top-right corner of the Procreate interface, you’ll find a gear icon. Tap on it to access the stack settings.
Step 4: Rename the Stack
Within the stack settings, you’ll find an option to rename the stack. Tap on it and enter the new name for the stack using the on-screen keyboard. Once you’re done, tap “Done” or “Save” to save the changes.
Congratulations! You’ve successfully renamed the stack in Procreate. Now you can easily identify and organize your artwork with the updated name.
FAQs
Q: Can I rename a stack on Procreate Pocket?
A: Absolutely! The process of renaming a stack in Procreate Pocket is similar to the steps mentioned above. Open Procreate Pocket, select the stack, access the stack settings, and rename it as desired.
Q: Will renaming a stack affect the artwork inside it?
A: No, renaming a stack will not affect the artwork inside it. It’s purely a way to customize and organize your artwork according to your preferences.
Q: Can I undo the renaming of a stack?
A: Unfortunately, once you’ve renamed a stack in Procreate, there is no undo option. However, you can always go back and manually change the name again if needed.
Now that you know how to rename a stack in Procreate, go ahead and streamline your workflow by giving your stacks more meaningful and personalized names!
Renaming Stacks in Procreate: A Step-by-Step Guide
Procreate is an incredibly popular digital art app known for its powerful features and user-friendly interface. One of the handy features it offers is the ability to organize your artwork into stacks. Stacks allow you to group similar projects together, keeping your Procreate gallery neat and organized. However, there may come a time when you want to rename a stack to better reflect its contents or for better organization. In this step-by-step guide, we’ll walk you through the process of renaming stacks in Procreate.
Step 1: Open Procreate
To begin, launch the Procreate app on your device. If you already have stacks created, you’ll see them displayed in the gallery view. If not, you can create a new stack by tapping the plus icon in the top right corner and selecting “New Stack.”
Step 2: Select the Stack
Once you’re in the Procreate gallery, locate the stack you wish to rename. Stacks are represented by a single thumbnail image that displays the contents of the stack. Tap on the stack to enter it.
Step 3: Access the Rename Option
With the stack open, you’ll see the individual artworks contained within it displayed as thumbnails. In the top right corner of the screen, you’ll find an ellipsis icon (three horizontal dots) – tap on it to access the stack options.
Step 4: Rename the Stack
In the stack options menu, you’ll find various actions you can perform on the stack. Look for the option that says “Rename” or “Edit Stack Name” and select it. This will allow you to enter a new name for the stack.
Once you’ve selected the rename option, a text field will appear where you can enter the new name of the stack. Tap on the field and type in the desired name using the on-screen keyboard. Take your time to choose a name that accurately represents the contents of the stack.
After you’ve entered the new name, tap “Done” or “Save” to save the changes. The stack will now be renamed with the new name you’ve chosen, and it will be updated in your Procreate gallery.
And there you have it – a step-by-step guide on how to rename stacks in Procreate. By renaming your stacks, you can keep your artwork organized and easily locate specific projects. So, go ahead and give it a try, and enjoy the improved organization in your Procreate gallery!
Renaming a stack in Procreate is a simple yet essential task that allows users to organize their artwork effectively. By following the steps outlined in this article, users can rename their stacks effortlessly, making it easier to locate specific projects and maintain a well-structured workflow.
With Procreate’s intuitive interface and powerful features, artists can focus on their creativity without getting bogged down by organizational challenges. So whether you’re a digital artist, graphic designer, or hobbyist, mastering the skill of renaming stacks in Procreate will undoubtedly streamline your artistic process.
Don’t wait any longer – dive into Procreate and start organizing your stacks today. Your digital art journey will be smoother and more enjoyable with a neatly named collection of stacks to showcase your talent.
FAQs
1. Can I rename a stack in Procreate?
Yes, you can rename a stack in Procreate. Procreate is a powerful digital art app that allows you to organize your artwork into different stacks. To rename a stack, simply follow these steps:
- Tap on the stack you want to rename to open it.
- Tap on the stack’s name at the top of the screen.
- Clear the existing name and enter the new name for the stack.
- Tap anywhere outside the text field to save the changes.
Renaming a stack can help you keep your artwork organized and make it easier to find specific projects or themes.
2. Will renaming a stack affect the artwork inside?
No, renaming a stack in Procreate will not affect the artwork inside. The renaming process only changes the name of the stack, while the artwork remains unaffected. You can freely rename stacks without worrying about losing or altering any of your artwork.
3. Can I rename a stack multiple times?
Yes, you can rename a stack multiple times in Procreate. There are no limitations on how many times you can rename a stack. If you decide to change the name of a stack, simply follow the steps mentioned earlier to rename it again. This flexibility allows you to refine your organization and adapt to any changes or preferences you may have.
4. Is there a limit to the number of characters I can use when renaming a stack?
Yes, there is a limit to the number of characters you can use when renaming a stack in Procreate. The exact character limit may vary depending on the device you are using and the version of Procreate installed. However, it is generally recommended to keep the stack names concise and meaningful. Using too many characters in a stack name may make it harder to read and navigate through your artwork library.
5. Can I use special characters or emojis when renaming a stack?
Yes, you can use special characters and emojis when renaming a stack in Procreate. Procreate supports a wide range of special characters and emojis, allowing you to add visual elements or unique symbols to your stack names. However, it is important to note that some special characters or emojis may not be compatible with certain devices or platforms. It is always a good idea to test the compatibility of the characters or emojis you intend to use before finalizing the stack name.