
Having the capability to record your iPhone’s screen can be incredibly useful in a variety of situations. Whether you want to capture a memorable gaming moment, demonstrate a process for a tutorial, or save a FaceTime conversation, knowing how to add screen record on your iPhone can save the day. Screen recording allows you to easily create videos that you can share with friends, family, or colleagues.
In this article, we will guide you through the process of adding screen recording functionality to your iPhone. We will explore the built-in screen recording feature available in iOS, as well as third-party apps that can enhance your recording capabilities. With our comprehensive instructions and tips, you’ll be able to capture high-quality videos of your iPhone’s screen and unlock a whole new world of possibilities.
Inside This Article
- How To Add Screen Record iPhone:
- Enabling Screen Recording Feature
- Accessing Control Center
- Recording iPhone screen
- Saving and Sharing Screen Recordings
- Conclusion
- FAQs
How To Add Screen Record iPhone:
If you’ve ever wanted to capture a video of your iPhone screen to show someone how to use an app or to showcase an achievement, the screen recording feature on the iPhone is the perfect tool for you. With screen recording, you can easily capture everything happening on your device’s screen, including app interactions, gameplay, and more. In this guide, we’ll walk you through the process of adding screen recording to your iPhone and how to use it effectively.
To get started with screen recording on your iPhone, you need to ensure that your device is compatible with the feature. Screen recording is available on iPhones running iOS 11 or later. To check if your device supports screen recording, go to your iPhone’s Settings, tap on Control Center, and then select Customize Controls. Look for the Screen Recording option under the “More Controls” section. If it’s not listed, you might need to update your iOS version or upgrade to a compatible iPhone model.
Once you’ve confirmed that screen recording is available on your device, the next step is to enable it in the Control Center. The Control Center is a convenient panel that provides quick access to various settings and features. To add screen recording to the Control Center, go to Settings, tap on Control Center, and choose Customize Controls. You’ll see a list of available controls. Look for the “Screen Recording” option and tap on the green plus button next to it to add it to the Control Center.
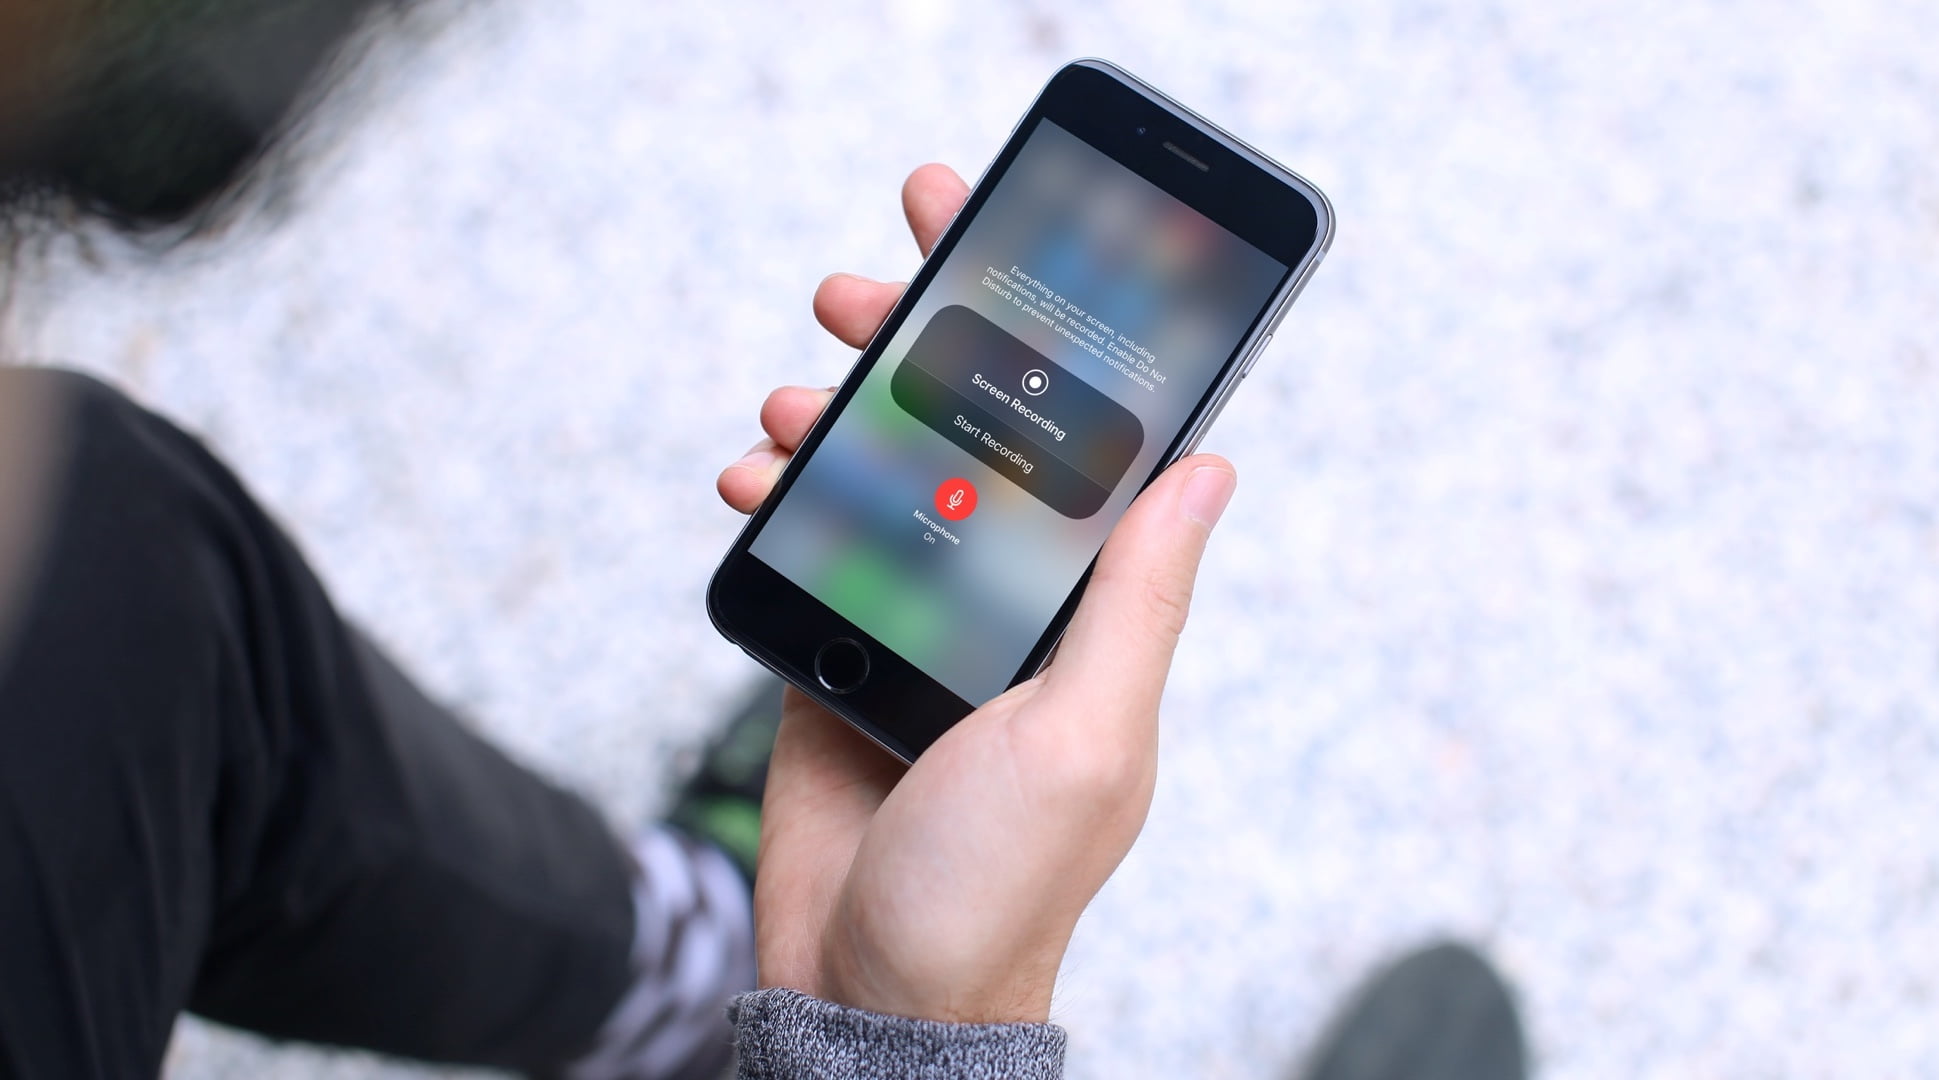
With screen recording added to the Control Center, you now have the ability to record your iPhone screen with just a few taps. To initiate screen recording, swipe down from the upper-right corner of your iPhone’s screen to access the Control Center. Look for the newly added “Screen Recording” button, which looks like a solid white circle surrounded by a white outline. Tap on the button to start recording. You’ll see a three-second countdown before the recording begins.
While your screen recording is in progress, you can interact with your iPhone as usual. Any activities on the screen, such as opening apps, browsing websites, or playing games, will be captured in the recording. To pause or stop the recording, you can either tap on the red recording indicator located at the top left corner of the screen or access the Control Center again and tap on the “Screen Recording” button to toggle it off.
Once you’ve finished recording your iPhone screen, you might want to make some edits before sharing it with others. To access the screen recording, go to the Photos app on your iPhone and look for the “Screenshots” album. Your screen recording will be saved there. Tap on the video thumbnail to view it.
If you want to trim the length of your recording, tap on the “Edit” button at the bottom of the screen. Drag the start and end markers to select the desired portion of the recording. Once you’re satisfied with the selection, tap on “Done” to save the trimmed version.
To save the screen recording to your device or share it with others, tap on the “Done” button again and then tap on the sharing icon, which looks like a square with an upward arrow. From there, you can choose to save the recording to your iPhone’s camera roll, send it to someone via a messaging app, or upload it to a cloud storage service or social media platform.
If you encounter any issues with screen recording, there are a few common troubleshooting steps you can try. One possible problem is insufficient storage space on your iPhone. Make sure you have enough free space to save the screen recording. If you’re recording a video with audio, but the sound is not being captured, check if the microphone is enabled in the Control Center. Look for the microphone icon while in screen recording mode and ensure that it’s not muted.
Enabling Screen Recording Feature
Screen recording is a fantastic feature that allows you to capture and share what’s happening on your iPhone screen. Whether you want to create a tutorial, showcase a gameplay, or simply save a video for future reference, enabling screen recording on your iPhone is a straightforward process.
Here’s how you can enable the screen recording feature on your iPhone:
- Open the Settings app on your iPhone.
- Scroll down and tap on “Control Center”.
- Tap on “Customize Controls”.
- Under “More Controls”, you’ll find the “Screen Recording” option. Tap the green “+” button next to it to add it to your Control Center.
- Once added, you can rearrange the order of the controls by tapping and dragging the three horizontal lines next to each control.
- Exit the Settings app and swipe up from the bottom of your iPhone screen to access the Control Center.
- If you have an iPhone X or later, swipe down from the top-right corner of the screen to access the Control Center.
- Look for the “Screen Recording” button, which looks like a solid white circle within a larger circle. Tap on it.
- A countdown will appear, giving you a few seconds to prepare. After the countdown, the screen recording will start, and a red status bar will appear at the top of your screen indicating that the recording is in progress.
- To stop the recording, simply tap on the red status bar or swipe up/down from the top-right corner of the screen and tap on the “Stop Recording” button.
That’s it! You have successfully enabled the screen recording feature on your iPhone. Now you can capture and share exciting moments, create informative videos, or troubleshoot technical issues with ease.
Accessing Control Center
In order to start screen recording on your iPhone, you need to access the Control Center. The Control Center is a convenient feature that allows you to access various settings and controls with just a swipe.
To access the Control Center, simply swipe down from the top-right corner of your iPhone screen on models with Face ID. If your iPhone has a Home button, swipe up from the bottom of the screen to access the Control Center.
Once you invoke the Control Center, you’ll see a variety of icons and controls. Look for the “Screen Recording” button, which looks like a solid white circle inside a larger circle. You may need to scroll through the Control Center to locate it.
It’s important to note that if you don’t see the Screen Recording button in your Control Center, you may need to enable it in your iPhone’s settings. This can be done in the Control Center settings menu.
Now that you know how to access the Control Center, you’re one step closer to recording your iPhone screen. The next section will guide you through the process of initiating the screen recording.
Recording iPhone screen
Have you ever wanted to capture and share your iPhone screen activity? Whether it’s to create a tutorial, showcase an app, or document a bug, screen recording can be incredibly useful. In this article, we’ll explore how to add screen recording to your iPhone, step by step.
Step 1: Checking Screen Recording Compatibility
Before you begin, it’s essential to ensure that your iPhone supports screen recording. Screen recording is available on iPhones running iOS 11 or later. To check if your device is compatible, go to the “Settings” app, navigate to “Control Center,” and look for the “Customize Controls” option. If you see “Screen Recording” in the list, you’re good to go.
Step 2: Enabling Screen Recording in Control Center
Once you’ve confirmed your iPhone’s compatibility, the next step is to enable screen recording in Control Center. To do this, open the “Settings” app and go to “Control Center.” Then, tap on “Customize Controls” and look for the “Screen Recording” option. Tap the green plus (+) button next to it to add it to your Control Center.
Step 3: Accessing Control Center
To start screen recording, you’ll need to access Control Center. Depending on your iPhone model, swipe down from the top-right corner (iPhone X and later) or swipe up from the bottom of the screen (older iPhone models) to open Control Center.
Step 4: Initiating Screen Recording
With Control Center open, you’ll see a variety of icons and shortcuts. Look for the circular record button that has a solid white background and a red circle in the center. Tap on this button to begin recording your iPhone screen.
Step 5: Accessing the Screen Recording
After you initiate the screen recording, a small red bar will appear at the top of your screen, indicating that the recording is in progress. To stop the recording, tap on the red bar and confirm your action by tapping “Stop.” The screen recording will be saved to your Photos app for further editing and sharing.
Step 6: Trimming the Recording
Once you’ve recorded your screen, you may want to trim unnecessary parts before sharing it. To do this, open the Photos app, find your screen recording, and tap on it to open. Tap on the “Edit” button and drag the sliders to adjust the start and end points of the recording. Once you’re satisfied, tap “Done” to save the trimmed version.
Step 7: Saving and Sharing the Recording
After you’ve finished editing, tap “Done” to save the changes. From there, you can choose to share the recording via various methods, such as AirDrop, messaging apps, or social media platforms. You can also save it to your device or cloud storage for future use.
Troubleshooting Screen Recording Issues
If you encounter any issues while recording your iPhone screen, here are a couple of common problems and their solutions:
– Insufficient Storage Space: If you receive a notification stating insufficient storage space, make sure to free up some space on your iPhone by deleting unnecessary files or apps.
– Microphone Not Recording Audio: If your screen recording doesn’t capture any sound, ensure that the microphone is enabled. To check, access Control Center by swiping down from the top-right corner, then tap on the microphone icon to toggle it on.
With these steps and troubleshooting tips, you’re well-equipped to add screen recording to your iPhone. Have fun exploring this feature and discovering new ways to share and document your iPhone screen activity.
Saving and Sharing Screen Recordings
Once you have finished recording your iPhone screen, you might want to save and share it with others. Luckily, saving and sharing screen recordings on your iPhone is a breeze. Follow the steps below to effectively manage and distribute your screen recordings:
1. Accessing the Screen Recording: After you finish a screen recording, a preview thumbnail will appear in the bottom left corner of your screen. Tap on it to open the recording in a new window.
2. Trimming the Recording: Sometimes, you may want to trim unwanted parts of your screen recording before saving and sharing it. To do this, tap the “Edit” button at the top right corner of the screen. Drag the yellow handles on either side of the timeline to adjust the start and end points of your video. Tap “Done” when you are satisfied with the trimmed recording.
3. Saving and Sharing Options: Once you have finished editing your screen recording, tap the “Save Video” option to save it to your Photos app. From there, you can access the recording anytime you want. If you wish to share the screen recording immediately, tap the “Share” button to choose from a variety of sharing options, such as messaging apps, social media platforms, or email.
4. Saving to Files: If you prefer to save your screen recording to a specific folder or cloud storage service, you can choose the “Save to Files” option. This allows you to select a location on your device or in a third-party cloud storage app, such as Google Drive or Dropbox.
5. Deleting Unwanted Recordings: To free up storage space on your iPhone, it’s a good idea to delete any screen recordings that are no longer needed. Simply open the Photos app, locate the screen recording, swipe left on it, and tap the “Delete” button.
By following these steps, you can easily save and share your screen recordings with others, whether it’s for educational purposes, troubleshooting assistance, or simply to showcase something cool happening on your device. Enjoy capturing and sharing your iPhone screen!
Conclusion
Screen recording on an iPhone is an incredibly useful feature that allows you to capture and share important moments or demonstrate how to use a specific app or feature. Whether you want to create tutorials, showcase gameplay, or share your mobile screen with others, the ability to record your screen can make all the difference.
Thanks to the built-in screen recording functionality on iPhones, you no longer need to rely on external apps or complicated workarounds to capture your screen. With just a few simple steps, you can easily enable screen recording and start capturing your device’s display in high quality.
Remember to explore the various options and settings available for screen recording, such as capturing audio from the microphone or choosing the video resolution, to customize your recording experience. Whether you’re a tech enthusiast, a content creator, or just someone who wants to share their mobile experiences, screen recording on an iPhone is a valuable tool in your digital arsenal.
So, give it a try and start recording your iPhone screen today!
FAQs
1. Why would I want to screen record on my iPhone?
There are many reasons why you might want to screen record on your iPhone. It can be incredibly useful for creating tutorials, capturing gameplay footage, demonstrating app functionality, troubleshooting issues, or simply recording memorable moments to share with friends and family.
2. How do I enable screen recording on my iPhone?
To enable screen recording on your iPhone, you need to add the Screen Recording feature to your Control Center. Go to your device’s Settings, select Control Center, then tap Customize Controls. Under More Controls, you’ll find Screen Recording. Tap the green plus (+) icon next to it to add it to your Control Center. You can then access it by swiping down from the top-right (on newer devices) or swiping up from the bottom (on older devices) to open Control Center, then tapping the Screen Recording button.
3. How do I start and stop a screen recording on my iPhone?
Once you have added the Screen Recording feature to your Control Center, starting and stopping a recording is simple. Open Control Center by swiping down from the top-right (on newer devices) or swiping up from the bottom (on older devices). Locate the Screen Recording button, which looks like a circle within a circle. Tap it once to start recording. A three-second countdown will appear, and then your iPhone will begin recording the screen. To stop the recording, tap the red recording indicator in the top-left corner of the screen or go to Control Center and tap the Screen Recording button again.
4. Can I record audio along with my screen recording on my iPhone?
Yes, you can record audio along with your screen recording on your iPhone. By default, the screen recording captures system audio, but you can also enable microphone audio, which will record any sounds picked up by your iPhone’s microphone. To enable microphone audio, press and hold the Screen Recording button in Control Center, and then toggle on the microphone audio option. You can also adjust the volume level of your microphone by tapping the screen recording indicator in the top-left corner of the screen while recording.
5. Where can I find my screen recordings on my iPhone?
After you stop a screen recording on your iPhone, the video file is automatically saved to your Photos app. Open the Photos app, go to the Albums tab, and you’ll find a folder called “Screen Recordings.” Tap on it to access and manage all your recorded videos. From there, you can edit, trim, share, or delete your screen recordings, just like any other video in your Photos library.