Starting out: switching to a basic flip phone
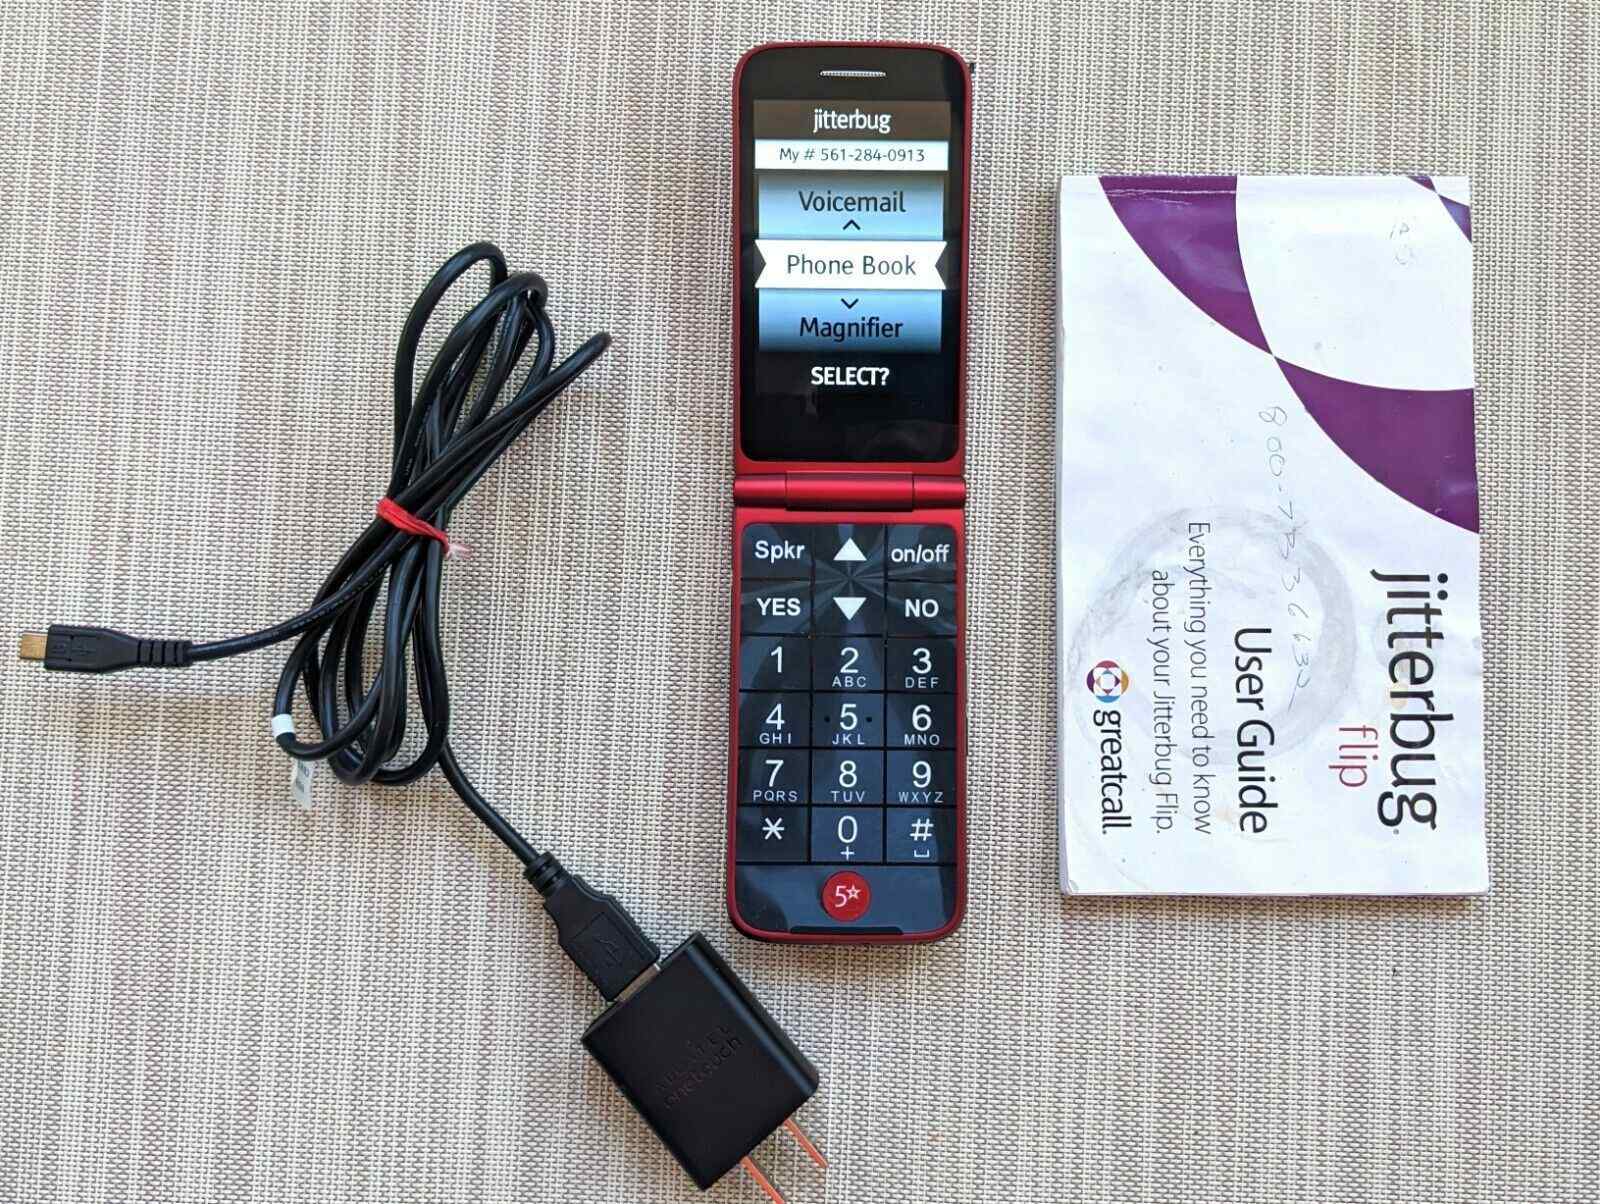
Learning how to use basic flip phones often means choosing a simplified device deeply tied to a specific carrier, and a power button on one model does not function the same way on another even if the hardware looks identical. Before you purchase a device from a senior-focused brand, there is everything you need to know before signing up for a service plan, because where you buy the phone determines whether it arrives pre-activated or requires you to complete setup yourself. If you are making the switch to a flip phone with a Jitterbug, the process to activate a Jitterbug phone depends on the retailer, as units from big-box stores are not ready to use until you visit the carrier’s online portal and enter the serial number from the Activation Card or the side of the retail box. Once that step is done, you can set up Jitterbug flip phone hardware by pressing the On/Off Button, and the phone will automatically complete configuration without navigating complex menus. For families opting for a youth-focused device, you will need to set up Gabb phone hardware by first connecting to WiFi, then using the parent’s MyGabb app with Bluetooth enabled and following the prompts after a QR code appears on the handset’s screen.
Powering on your device
Because carrier-branded models handle startup differently even when they share a manufacturer, the first step is always identifying whose logo appears on the box. For a TCL Flip phone purchased through AT&T, press and hold the Power button. Shutting it down requires holding that same button and then pressing the OK button to confirm. The same hardware sold as a Verizon TCL Flip Pro uses a slightly different label. You press and hold the End/Power Key until the screen lights up. The device will start even without a SIM card installed. If you are holding a Consumer Cellular model such as the IRIS Easy Flip, press and hold the Power Key. Expect a setup tutorial to appear the first time you do this. A completely drained battery can prevent any response. If the phone shows no sign of life, TCL recommends charging with an official charger for at least 30 minutes. Then press and hold the power key for 10 to 15 seconds until the device vibrates. The exact button label and hold duration shift from one carrier variant to the next. The steps that follow group together how to turn on a TCL flip phone, how to turn on flip phone models sold under different service brands, how to turn on a Consumer Cellular flip phone, how to turn on a Verizon Kyocera flip phone, and several other near-identical device-specific instructions. If you need to turn off airplane mode on Consumer Cellular flip phone to restore cellular service. To silence government alerts, you can turn off CMAS alert on Consumer Cellular flip phone through the notification settings. For hands-free calls, learn how to turn on speaker on TCL flip phone during an active call. If your AT&T model is silent, you can turn on ringer on AT&T flip phone from the sound menu. To power up a Lively-branded device, follow the steps to turn on Jitterbug flip phone by pressing the red button. If you own an eTalk handset, the instructions to turn on eTalk flip phone are listed separately. For any AT&T-branded flip phone, the method to turn on AT&T flip phone uses the same power key. Finally, to amplify call audio, you can turn on speaker phone during a conversation. Choose the entry that matches the model name printed on the sticker beneath your phone’s battery or on the retail packaging.
Powering on more models
There is no hidden menu to hunt for. On many Alcatel flip phones, the documented “open” action is not a separate power-on step. Instead, the clamshell itself answers a call, provided the right option is enabled.
Before you can open Alcatel flip phone hardware to pick up a ring, you may need to visit the phone’s own configuration panel. On the GO FLIP V, for instance, you may need to locate the answer options in the call settings and choose the flip open option. On the MyFlip 2, you may need to locate the answer mode in the personalization settings and enable the flip open to answer option. Because AT&T’s compatibility list includes several Alcatel flip models but also states that listed devices are not guaranteed to work, the exact menu path can shift from one variant to the next. Always match your steps to the model name printed under the battery.
Managing contacts and calling
Once your phone is powered on, storing numbers is the next logical step. The exact button you press depends entirely on which carrier’s logo appears on the box. On a TCL Flip 3, you open the contacts screen and use the Options or Left Soft Key to create a New Contact; if you want to add contacts to a TCL flip phone, that method ensures you can store family and friends quickly. A Consumer Cellular Iris Easy Flip hides the same function under a menu, and if you need to add contacts to Consumer Cellular flip phone, that menu path gives you access to save extra details like a nickname or website address. If your phone came from Tracfone, an Alcatel Go Flip asks you to navigate from the Home Screen, and if you need to add minutes to TracFone Alcatel flip phone, you will find that process explained separately to keep your service active. Then you begin entering a name and choosing whether the number is mobile, work, or home. For quick access to the people you call most, you can use speed dial on TCL flip phone models by navigating to the Speed dial settings and assigning a contact to keys 2 through 9. After setup, pressing and holding the assigned key on the home screen dials the number immediately. Because these paths shift between carrier versions even when the hardware looks identical, the steps that follow group together the specific processes for adding contacts across several common models; if you simply want to add contacts to a flip phone. Choose the entry that matches the sticker beneath your battery or the name on your retail packaging.
Handling sound and speaker
Sound controls on a flip phone are rarely universal, so the first thing to do is match the steps to the name on the box. While the side buttons on many clamshells adjust call volume, changing the ringer usually means opening the configuration menu and looking for a "Sound" or "Profiles" option, though the exact label depends on whether your carrier customized the software.
When you need to go hands-free, you can often put a flip phone on speaker by pressing the center OK key during a call, which is useful if you want to multitask or share the conversation with others in the room. On some models, you may need to select the Speaker option from on-screen controls instead. Some carrier-branded models assign this function to the right soft key instead. If the speaker icon does not appear immediately, check whether a silent or vibrate-only profile is active, as that profile can hide the audio routing choices.
Because a Jitterbug-branded device often streamlines these menus differently than a TCL model sold by a prepaid carrier, simply finding the speaker toggle may require one or two extra key presses on some versions. A Lively handset might place the option under a dedicated audio menu, while other senior-focused phones label the control directly on the main call screen. Always look for an icon that resembles a speaker with sound waves radiating outward.
Texting and typing
When you are ready to send a message, the flow depends entirely on the software your carrier loaded onto the device. If you need to text on TCL flip phone hardware sold by AT&T, you typically start from the Messages screen, select the option to create a new message, choose a contact or enter a number, type your message, and then send it.
To text on Jitterbug flip phone models from Lively, you navigate to the messaging function from the main menu, choose a contact, type your note with the keypad, and send it. Replying follows a different path: open your message history, pick the conversation, and choose the reply option.
The actual mechanics of how you type on flip phone keypads also shift between brands. On a Jitterbug Flip2, pressing a number key repeatedly cycles through letters, a long press enters digits, and the star key opens a menu of punctuation and emoji. If predictive text feels slow, you can switch the entry mode through the settings menu, where different text input options are available.
Troubleshooting and settings
When the screen freezes and no button responds, the first thing to try is a simple restart. To unfreeze a Jitterbug flip phone, power the device off completely and then turn it back on; the Flip2 user guide does not list a separate recovery menu beyond that basic step. If your phone is from a different carrier, the same approach usually works, though you may need to remove and reinsert the battery on models that still allow it.
A frozen device can sometimes look like it is stuck in Airplane Mode. Once the phone is back on, check that function directly. On a Jitterbug Flip2, go to Settings, then Wireless & Networks, and finally Airplane Mode, where you can switch it on or off.
Apple handles the same task differently: on an iPhone, you turn Airplane Mode off by opening Control Center and tapping the airplane icon, or by toggling the switch in the device configuration. Android phones vary by manufacturer, but the common path is to open the system preferences and turn the Airplane mode switch off.
While that mode is active, your phone will not receive important alerts. Apple notes that tracking notifications are blocked during Airplane Mode, and emergency alerts may not come through either. Support for these alerts may vary by device and operating system version.
Account and call history tasks
Checking your prepaid balance or minutes remaining almost always lives inside a menu named by your carrier, not by the phone’s manufacturer. On many models you open the main menu and look for a branded account tile or a "Prepaid" option, though the same hardware places that information under "My Account" on one network and "Service Tools" on another. The path is so tightly tied to the SIM card that the only reliable way to locate it is to scan the main menu for your carrier’s name or logo.
Clearing your call logs introduces the same kind of variation, and the sharpest example appears when you try to delete call history on Jitterbug flip phone models. On a Jitterbug Flip2, one documented sequence is Recent Calls, then Delete All Calls, followed by confirming with OK, but one support answer for the original Flip states that the device stores only the last 10 calls and may offer no clearing function at all. Because the available instructions conflict between generations, you should look inside the call list first for a Delete All choice; if neither exists, the phone is likely operating on the older rolling-log system and simply drops the oldest entry when an eleventh call arrives.
Frequently Asked Questions
How do I turn on a Jitterbug Flip phone?
Press the On/Off Button. If the phone was purchased from Amazon, Best Buy, or a similar retailer, you must activate it first at lively.com/activate or by calling 1.888.900.1367 before it will complete setup.
Where is the Airplane Mode setting on a Jitterbug Flip2?
Go to Settings, then Wireless & Networks, and select Airplane Mode to toggle it on or off. This path is specific to the Flip2 model and may differ on the original Jitterbug Flip.
How do I set up a Gabb Phone 4 Pro for my child?
Download the MyGabb app on your smartphone, log in with your Gabb credentials, and enable Bluetooth. Tap Assign next to the device, then choose Assign to Phone or Re-Assign to Phone under the child's Gabb ID and follow the prompts.
How do I make my Alcatel GO FLIP V answer calls when I open it?
Open Settings, then Call settings, then Answer options, and choose Flip open. The phone will then accept incoming calls simply by opening the clamshell, without pressing any key.
How do I delete all call history on a Jitterbug Flip2?
Open Recent Calls, select Delete All Calls, and confirm with OK. The original Jitterbug Flip may only store the last 10 calls and might not offer a clearing function at all, so the option depends on your specific model generation.